Help Toolbar (select a button to browse other online help sections) Home Tutorials Resources Search Tabs & Menus Button Bar Table & Data Display |
Creating Year End Forms
eNETEmployer allows you to print a series of year end forms for each of your employees. Use the following tutorial to learn how to create printed copies of your employee T4, T4A and RL-1 forms.
Printed Forms vs. Electronic Copies - This screen is used for producing printed copies of the various year end forms. While Revenu Quebec still accepts paper copies of RL-1s produced on pre-printed forms, the CRA no longer accepts printed T4 or T4A forms. Therefore, if you produce T4 or T4A forms on this screen, they should be used for review purposes only. |
There are three parts to this tutorial:
- Part A - Printing T4s, T4As, and RL-1s- The first part will show you how to generate printed copies of these three common year end forms.
- Part B - Printing Amended Year End Forms - This step will show you how to print amended copies of the various year end forms.
- Part C - Printing T4 and T4A Reviews- The section will show you how to create a summary of all T4s and T4As that have been generated for the specified year. This report is useful for reconcile the yearly totals with the source deduction payments that were remitted to CRA.
Note: If you wish to produce an XML file for online submission to the CRA or to Revenu Quebec, please see Creating an XML File for Year End tutorial.
Before you begin: In order to print the year end forms described in this tutorial, you must have already created the T4s, T4As and RL-1s for your employees. If you have not yet created these items, please do so before proceeding (refer to the tutorials at the bottom of this page for detailed information on creating employee T4, T4A and RL-1 data). |
NOTE: Click on an image below to view it at full size.
Part A) To Print a T4:
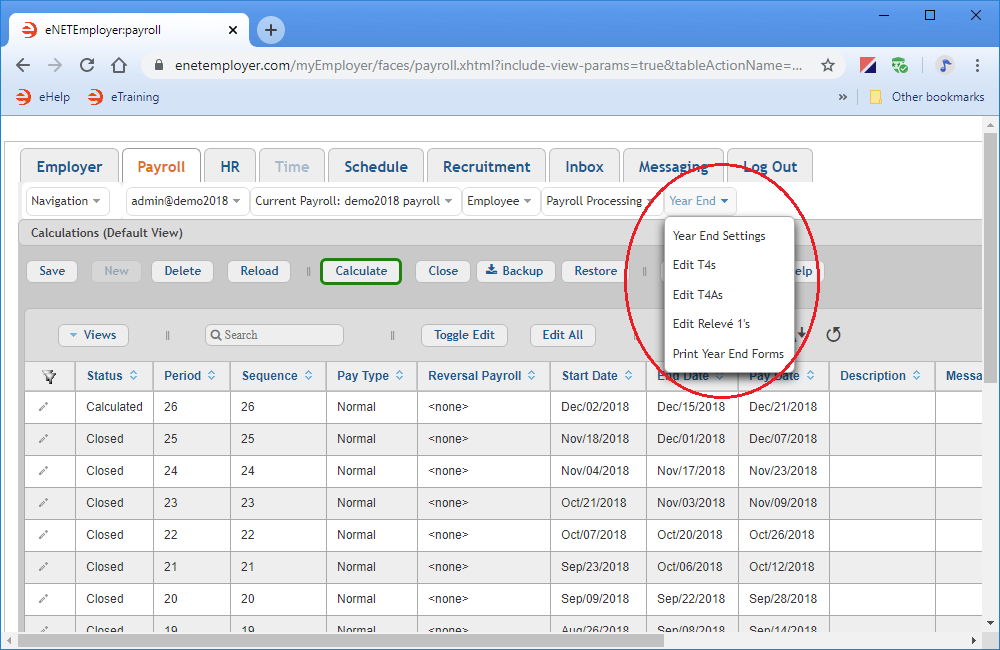
- From the Payroll module, select the Year End menu to view the available options.
- Choose the Print Year End Forms menu option to open the Print Year End Forms screen where you produce printed copies of your employee's year end forms.
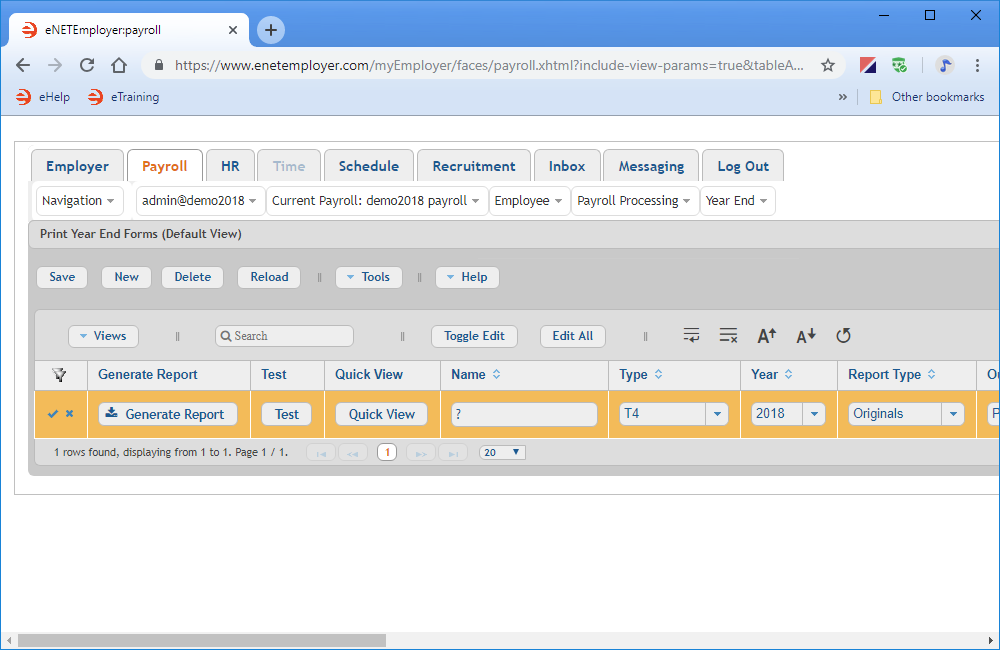
- Select the New button to insert a blank report row into the table. The report row appears in Edit Mode so that you can review or change the default settings as needed.
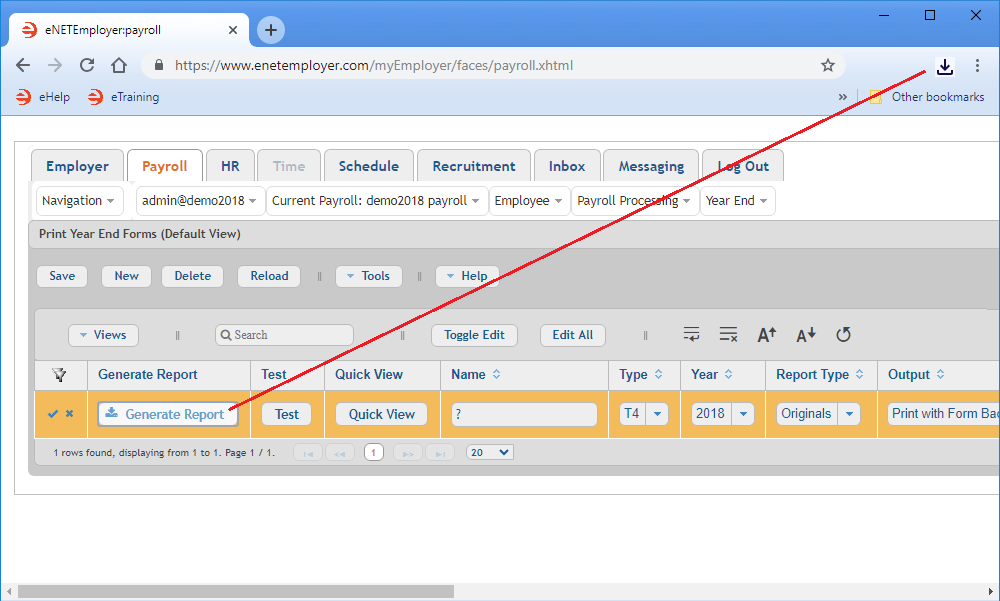
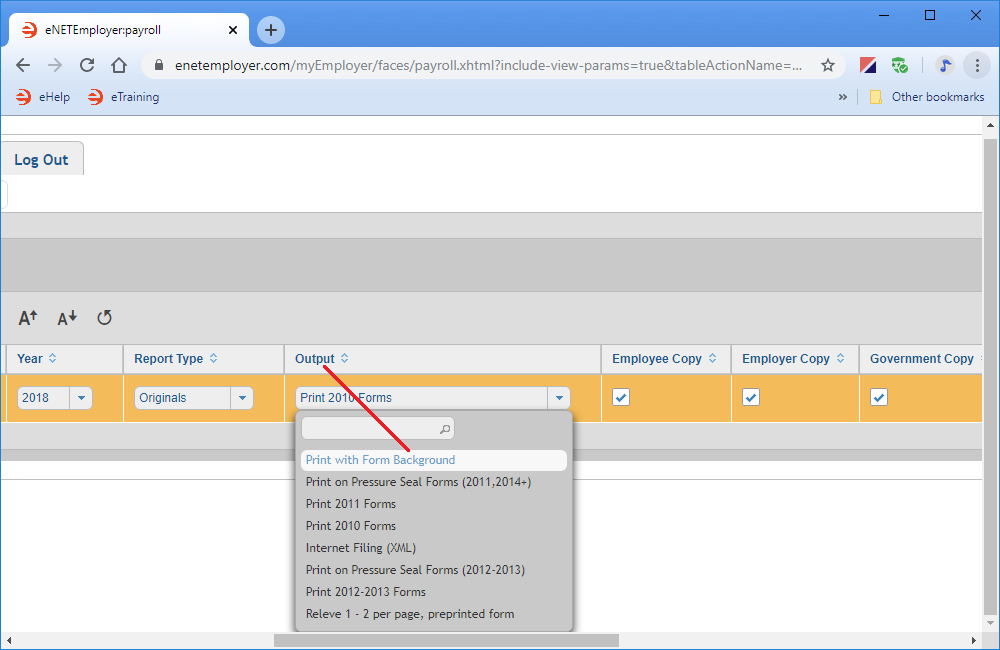
- Scroll over to the Output cell, click the drop-down arrow to open the list, and then choose the Print with Form Background option. This will include an image of the form in the background when the PDF is created.
- With the print settings in place, choose the Generate Report button at the left side of the row to create the Pay Register report as a .PDF document. Depending on your browser settings, the resulting document will either be stored in your Downloads folder or you may be presented with a window that will prompt you where to save the file. In most browsers, the document can be viewed via a link that appears at the top-right of your browser.
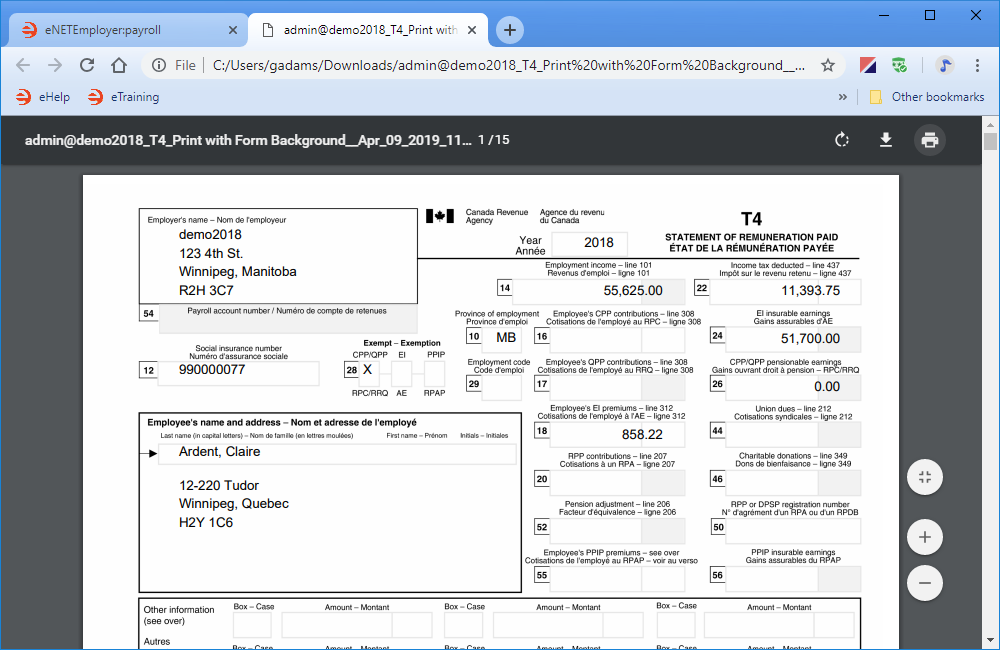
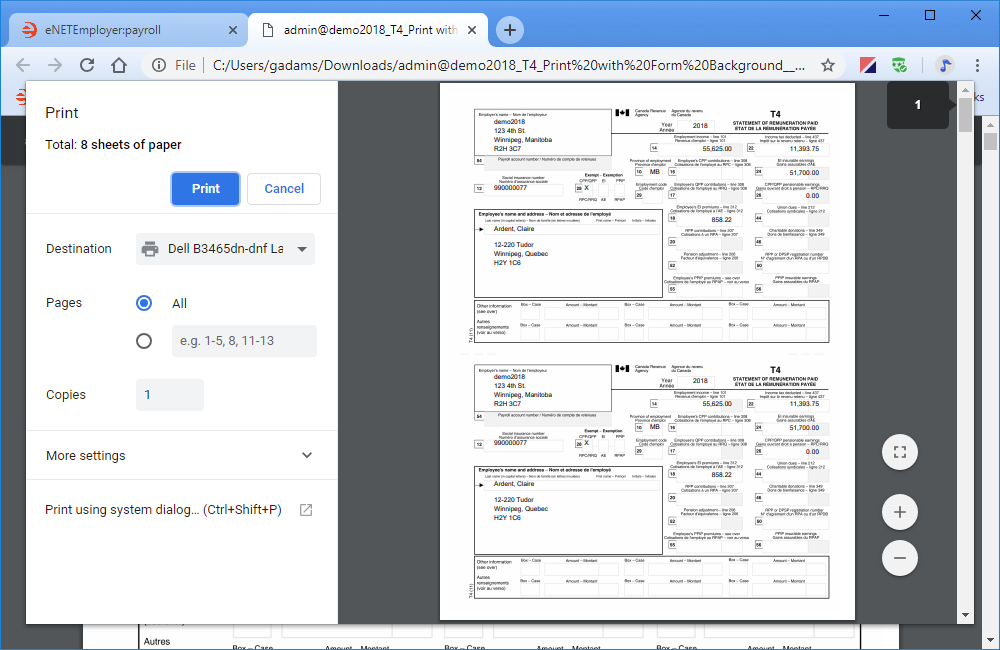
- Click the Download link to access the file, or navigate to your Downloads folder and open the document using your preferred PDF viewer. You can now scroll through the document to review each employee's T4 information.
- Once you are satisfied with the T4 data, choose the Print icon from the top right of the PDF window, and then print any or all of the pages as needed.
- When you have finished printing your T4s, close the PDF and return to eNETEmployer. The PDF that contains your T4 information remains in your Downloads folder - you can choose store it in a different location if you prefer.
Now that you know how to print employee T4s, let's learn how to modify the report settings to create other year end forms.
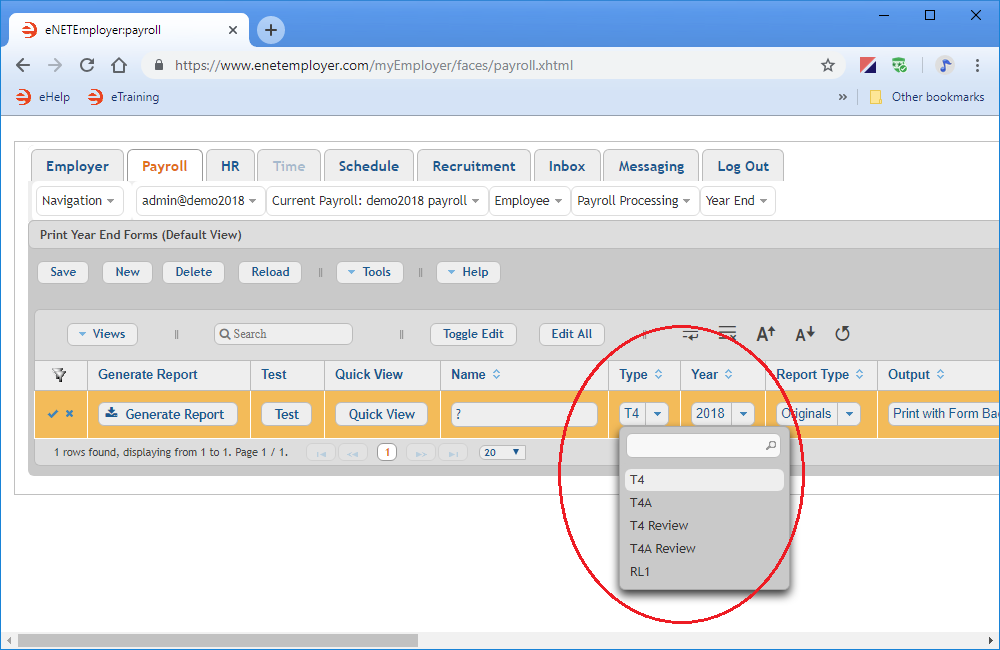
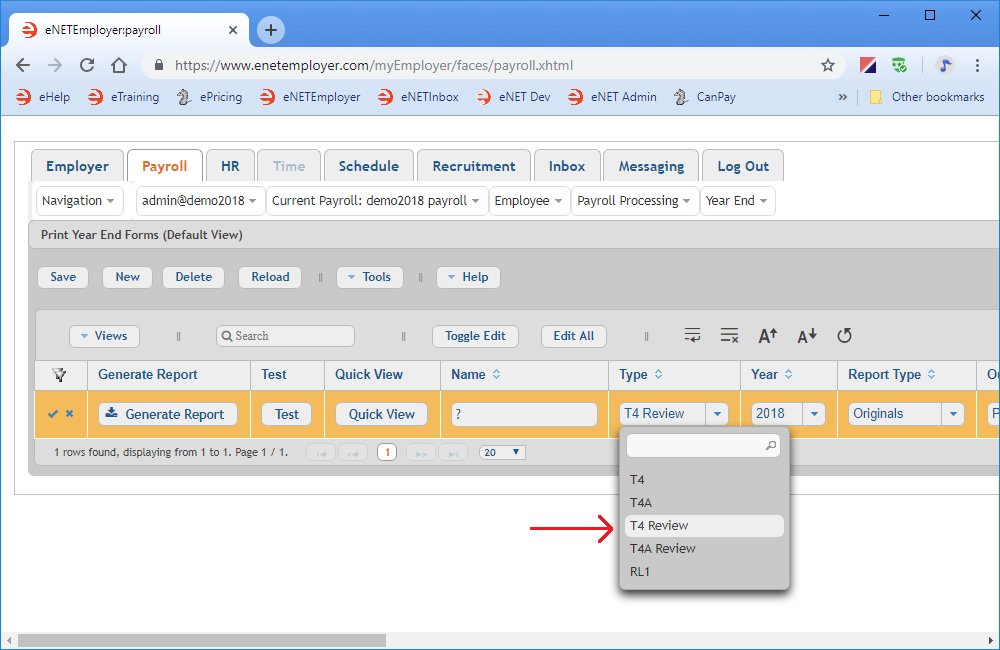
- To print your T4As, select the Type cell to open the list of options (double-click on the report row to access the cells if they are not ready for editing).
- Choose the T4A option from the list. This action will produce a PDF with T4A data the next time that you generate the report.
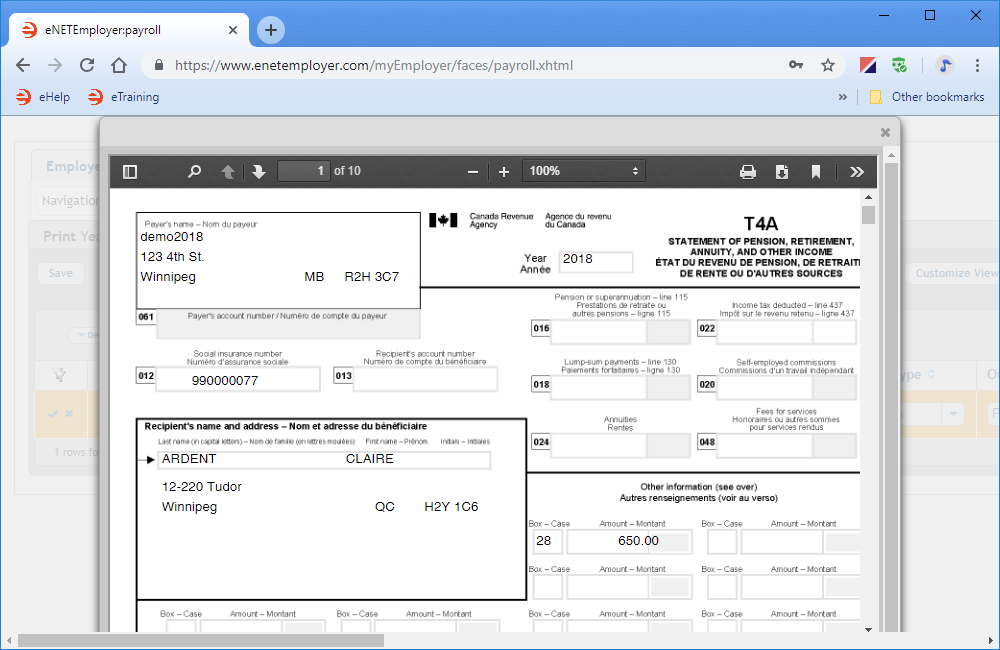
- Instead of using the Generate Report button (as we did earlier for the T4), this time choose the Quick View button instead. This displays the T4A data in a pop-up window.
- Use the Automatic Zoom option if you wish to make the details larger. You can also use the double arrow at the top right of the pop-up window to access a series of useful viewing tools.
- Once you are satisfied with the T4A data, choose the Print icon from the top right of the preview window, and then print any or all of the pages as needed.
- When you are finished printing the T4As, choose the close button (the "X") from the top right of the window.
- To print your RL-1s, repeat the preceding 5 steps, but choosing RL-1 in step 10 above.
The next section of the tutorial step will show you how to print amended year end forms.
Print Year End Forms Help Screen...
If you have never created a report, the screen will not contain any report rows (as shown in Fig. 02 below).
The default settings will create a T4 report that is set to the previous payroll year (as defined in the settings for the Type and Year columns). These settings can be changed as needed to produce the other year end report types that will be discussed in this tutorial. We will now apply additional setting to include background on the printed T4.
Part B) To Print Amended Year End Forms:
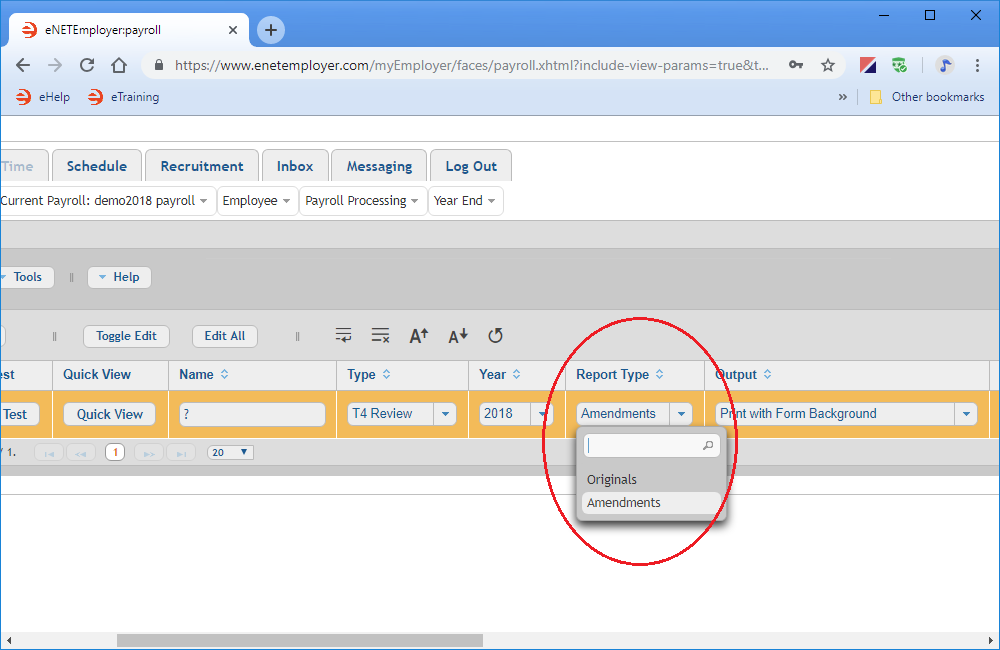
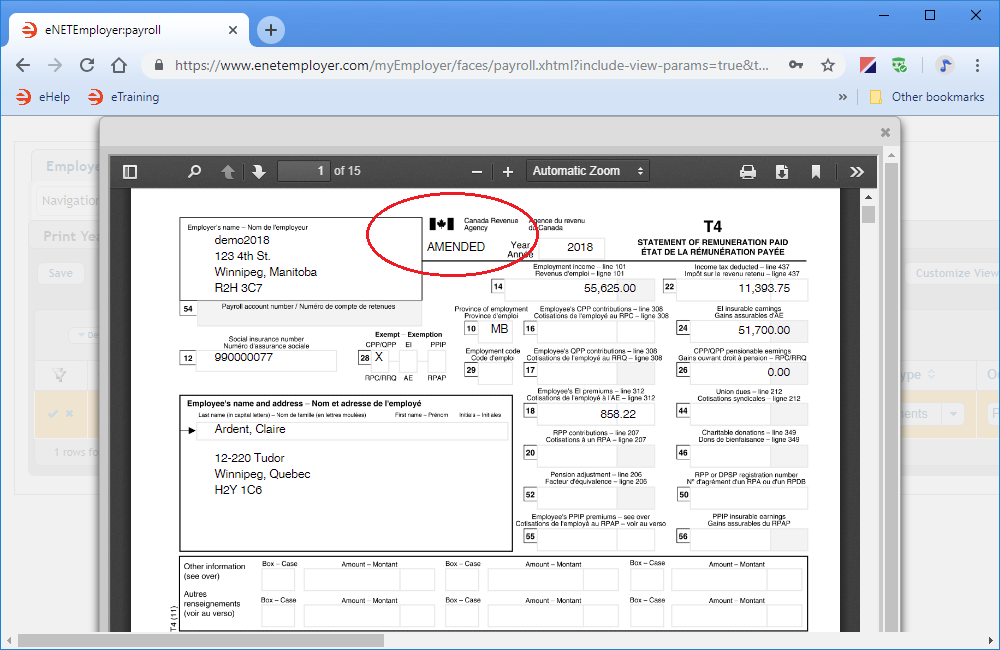
- Select the drop-down arrow in the Report Type cell to open the list of options, and then choose the Amendments option from the list. This action will mark future forms as Amended and include any changes that you have made to the data subsequent to your initial creation of the report.
- Choose the Quick View button and the resulting report will include the word Amended at the top of each form. Note: Your XML file will also include the Amended designation when you create this document for submission to the CRA.
The next section of the tutorial step will show you how to print T4 and T4A reviews.
Part C) To Print T4 and T4A Review:
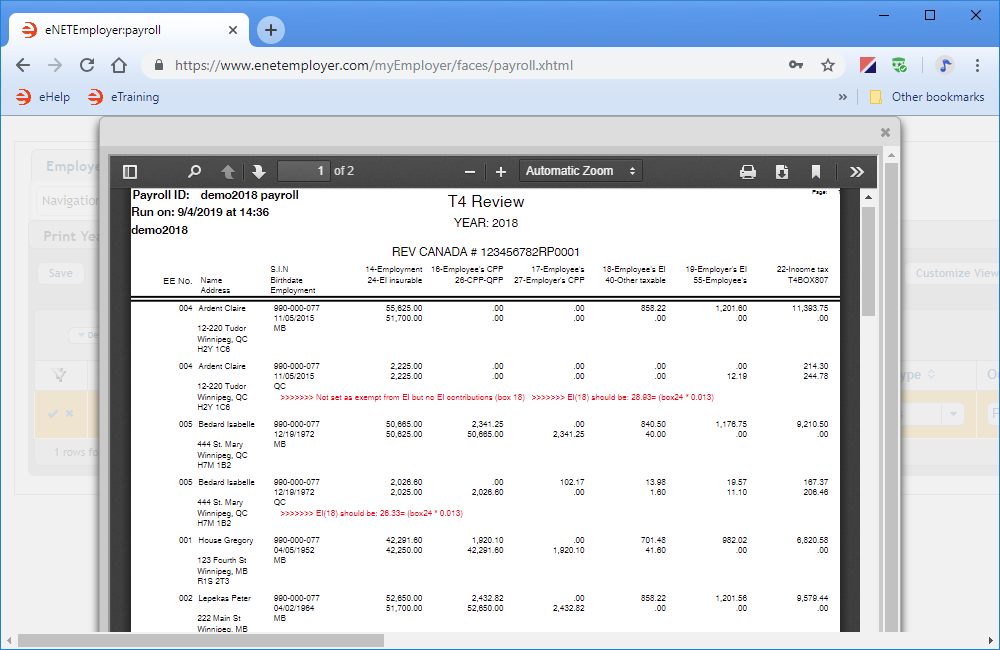
- Edit the Type cell and then choose the T4 Review option from the list. This report contains a summary of all T4s that have been generated for the specified year.
- Choose the Quick View button and the resulting report will list each employee and their corresponding amounts for each T4 box. If one or more T4s encounter an issue while processing, a warning message will appear above the table in Red. This report also includes the final totals and the T4 box numbers that can be used to fill out a T4 Summary.
- Choose the Print icon to produce a paper copy of the report and then choose the close button (the "X") from the top right of the window when you are complete.
- To print your T4A Review, repeat the preceding 3 steps, but choosing T4A Review in step 1 above.
- Once you have completed your report settings, choose the Save icon (the Check Mark icon at the left side of the row) to accept your changes. This action saves the changes for the row and takes you out of Edit Mode. These custom report changes will now be in place the next time that you create the report.
This completes the tutorial on how to print year end forms. We also discussed how to print a copy of amended forms and how to create T4 and T4A review reports.
See Also
- Year-End Overview
- Employee T4s
- Edit T4s help page
- Generate your employee T4s
- Review your employee T4s
- Edit your employee T4s
- Add a T4 manually
- Employee T4As
- Edit T4As help page
- Generate your employee T4As
- Review your employee T4As
- Edit your employee T4As
- Add a T4A manually
- T4/T4A Reports
- Magnetic Media Filing
