Help Toolbar (select a button to browse other online help sections) Home Tutorials Resources Search Tabs & Menus Button Bar Table & Data Display |
Adding Employees to the Employee Database
For this tutorial, we will "onbaord" several employees by adding them to eNETEmployer's Employee Database. Once added, each employee will not be a part of any active payroll until you specifically import from the Employee Database at a later time (using the Payroll tab's Employee - Import Employees screen). Refer to the Importing Employees from the Employee Database tutorial for more information.
NOTE: Click on the images below to view them at full size
To add employees to the Employee Database:
- From the Employer tab, choose the Employee - Setup Employee menu command. This opens the Setup Employee screen that is used to add new employees that are "outside" of any payroll.
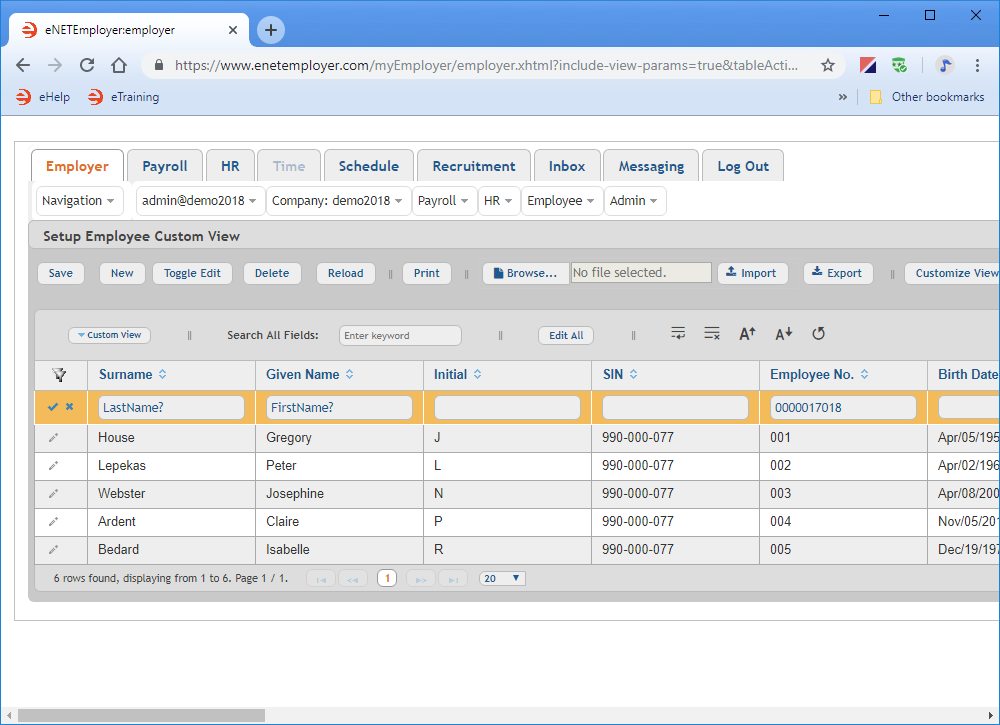
- To add an employee to the Employee Database, choose the New button that appears near the left side of the Button Bar. This inserts a new row into the table and activates Edit Mode for the cells.
- Complete the data for each cell as it relates to your new employee (press <F1> to use the Online Help system if you need to look up a definition for the various cells).
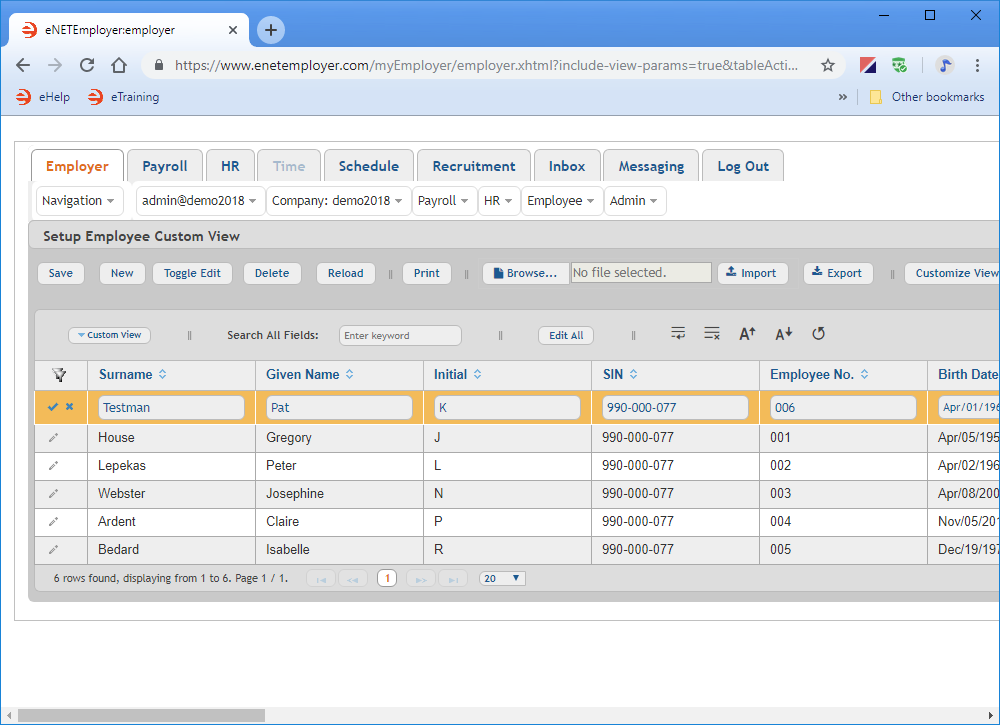
Example: In Fig. 03 below, we added a new employee named Pat Testman. We shortened her Employee Number (006) for easier reporting and set her Language to Default to ensure that the program use the current default language option for this employee. There are many employee settings that can be added at this time, and several items that can only be added once she is officially added to a payroll (Start Date, End Date, etc.).
Surname Given Name Initial SIN Employee No. Birth Date Gender Address City Language Testman Pat K 990-000-077 006 Apr/01/1962 Female 77 Sunset Ave. Winnipeg Default - Once your data is complete, select the Save icon (the check mark icon at the left side of the row). This accepts the changes and the Edit Mode icons are removed to indicate that the entire row has been saved. You can also choose the Save button from the Button Bar above the table.
- If you wish to add additional employees, choose the New button as needed to insert each one (remembering to save each row's information once complete).
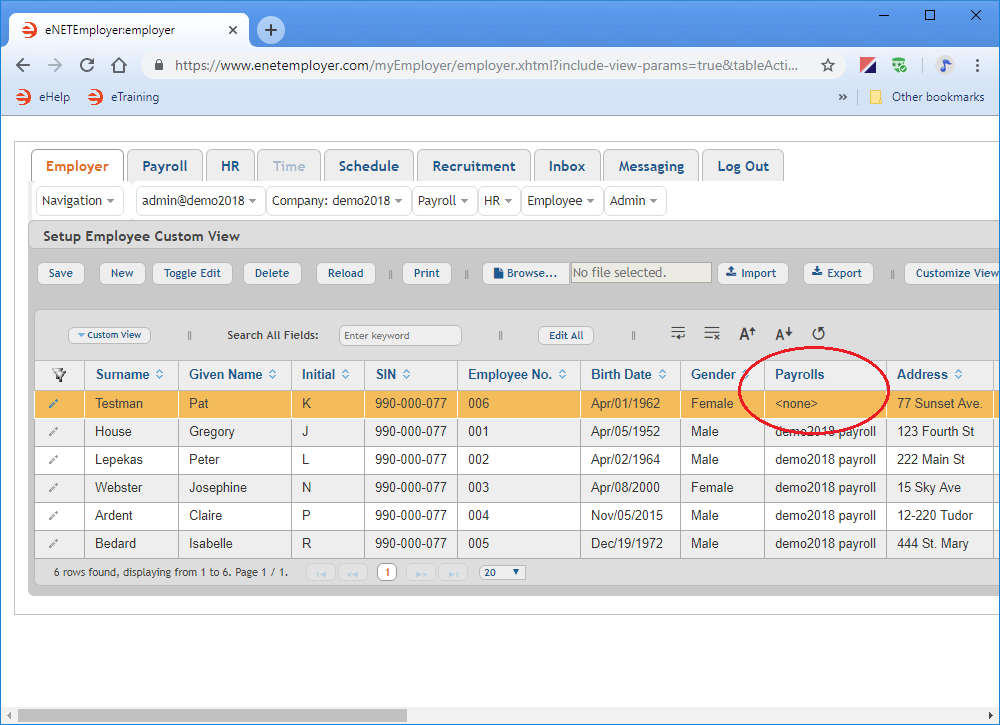
Example: In Fig. 04 below, we have saved our changes and see that the employee is not associated with any payroll (as indicated in the Payrolls cell). This employee can be imported into an active payroll at a later time.
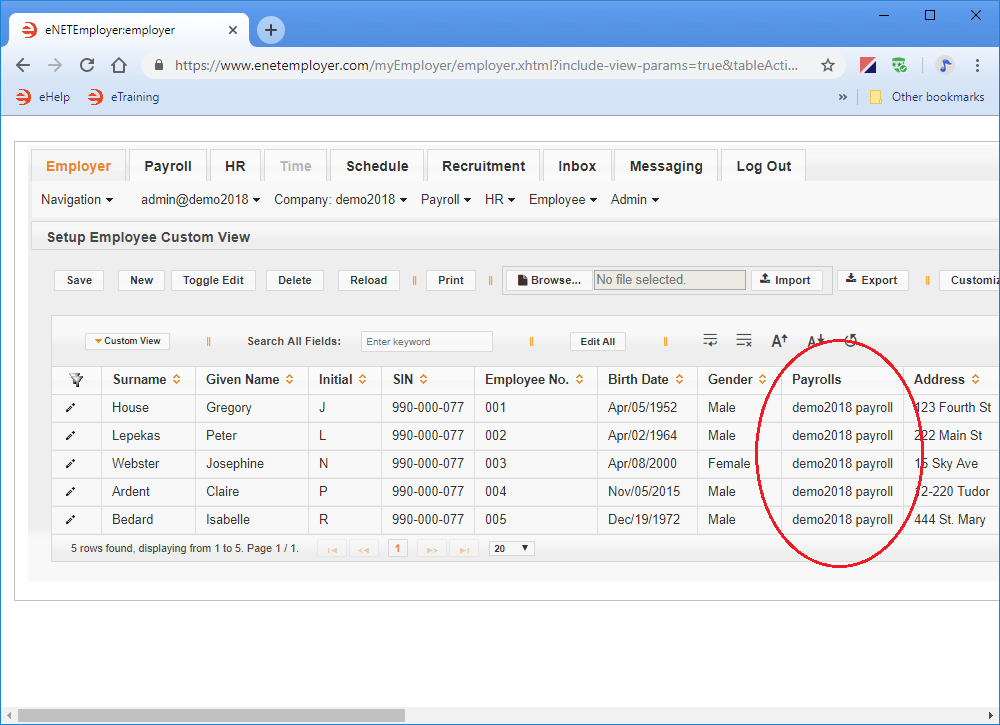
Example: In Fig. 01 below, we see 5 existing employees who already belong to the "demo2018 payroll", as indicated in the Payrolls column for each person).
This completes the tutorial on adding an employee to the Employee Database.
Note: If you are working through the payroll setup process in order, you can now proceed to the Payroll tab to begin entering your company and payroll information.
See Also:


