Help Toolbar (select a button to browse other online help sections) Home Tutorials Resources Search Tabs & Menus Button Bar Table & Data Display |
Adding HR Equipment Types
This tutorial will show you how to create HR equipment types - records that track all types of company equipment such as tools, phones, electronic devices, consumables, and much more
NOTE: Click on the images below to view them at full size
To Add an Equipment Type:
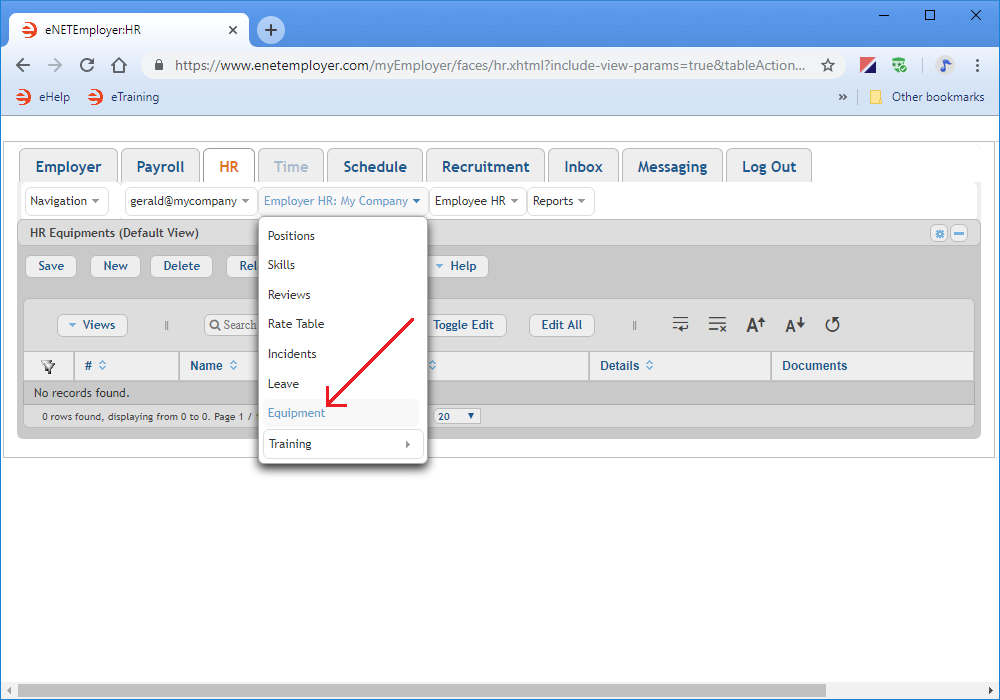
- Click on the HR tab and then choose the Employer HR menu to display the various options.
- Choose the Equipment menu option. This opens the Equipment screen that is used to define employee equipment types.
- Choose the New button to insert a blank equipment row in the table.
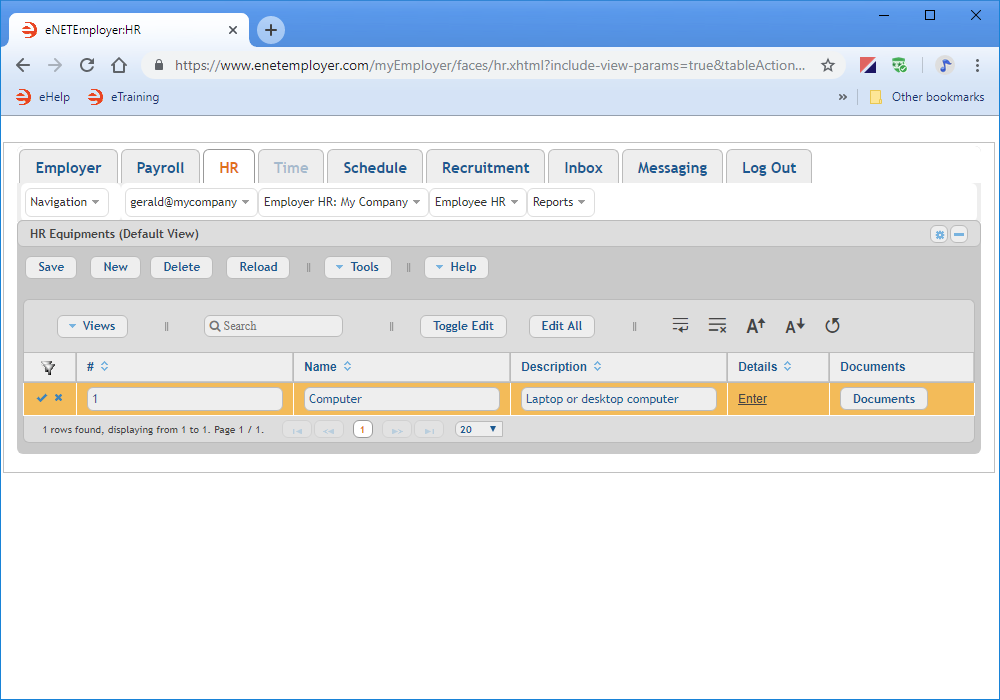
- Use the Name cell to enter a descriptive name for the equipment type and then move to the Description cell and enter a brief description for the equipment.
Example: In Fig. 02 below, we have created an equipment type entitled "Computer". This equipment type can be applied to all employees who are provided with a laptop or desktop PC for work purposes. - Move to the Details cell and click on the Enter hyperlink. This opens a window that allows you to enter detailed information about the equipment type.
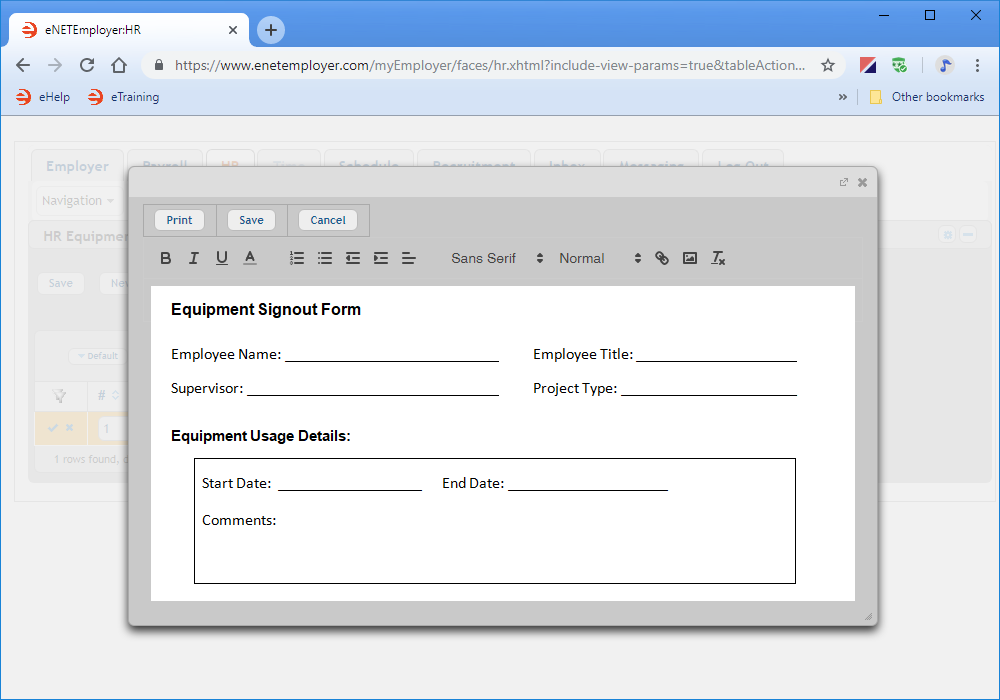
- Enter the equipment type's details as needed. You can use the formatting bar to change the font size, color, etc. You can also paste content into the window from another program or document (e.g. word processor, spreadsheet, web page).
Example: In Fig. 03 below, we have entered a basic "template" form that can be filled in each time an employee makes an equipment request, or has equipment assigned to them. - When the equipment details are complete, choose the Save button to close the pop-up window. This returns you to the main screen where the cell's original hyperlink has been replaced with the word "Edit" to indicate that you can perform further changes to the details when needed.
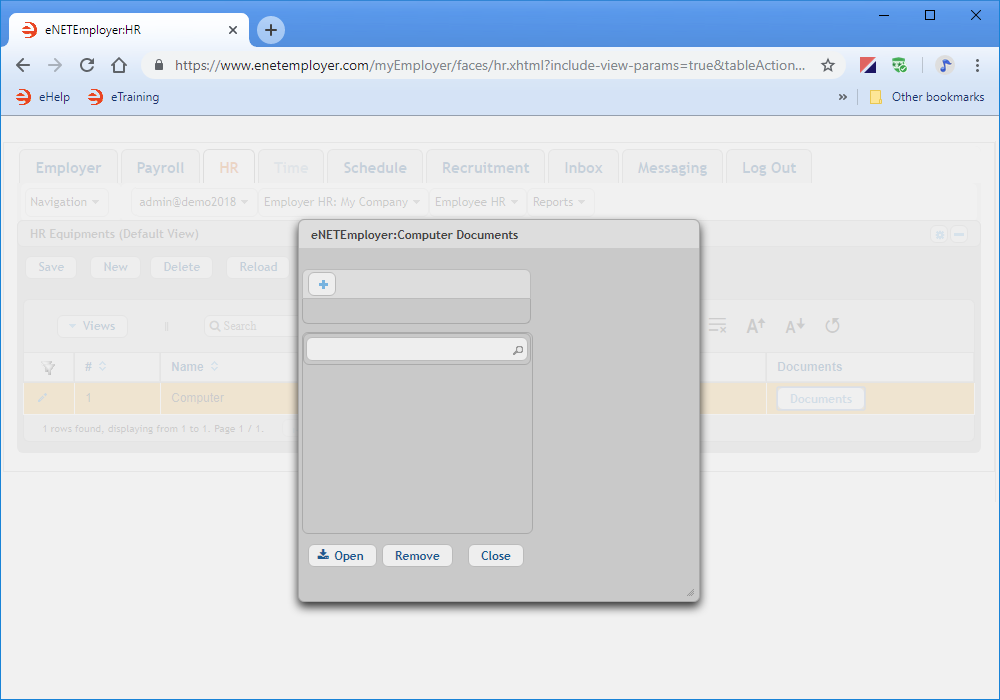
- Select the Documents button to open a window where you can attach documents and files that pertain to the current equipment type. This can include PDFs, word processing documents, spreadsheets and images.
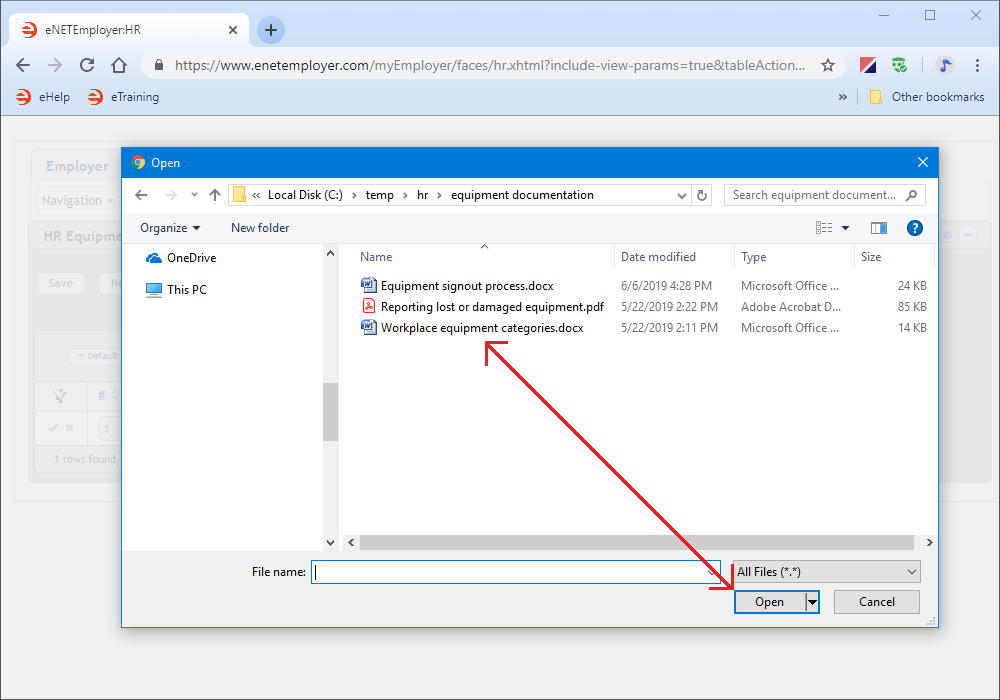
- When the Documents window appears, select the "+" (plus sign) icon to display the Open dialog box, and then use this window to navigate to the location of the document(s) that you wish to add.
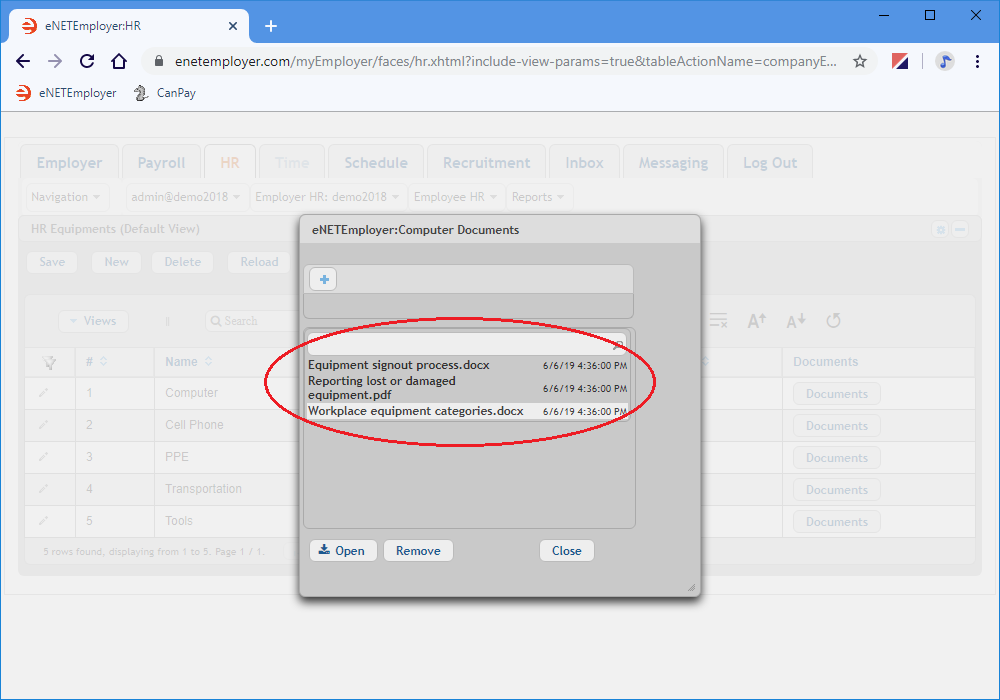
Example: In our example below, we see several documents that relate to our equipment type. - Select one or more documents as needed, and then choose the Open button. This adds the selected document(s) to the eNETEmployer Documents window.
- Select the Close button to exit the Documents window.
- Choose the Save icon (the Check Mark icon at the left side of the row) to accept your changes. This action saves the changes for the row and takes you out of Edit Mode.
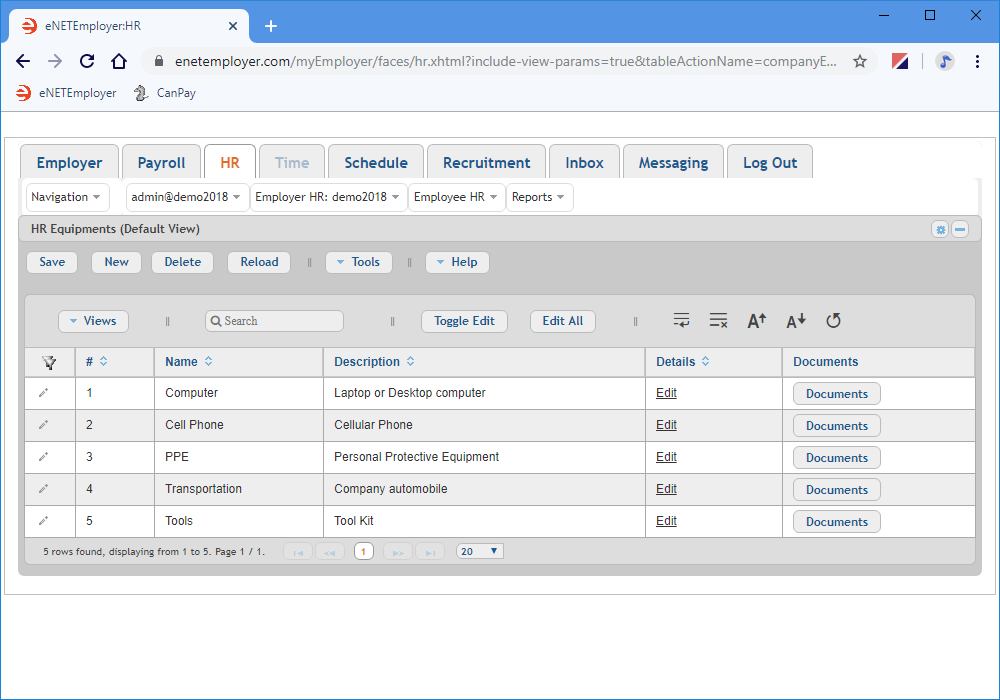
- Repeat the preceding steps to enter additional equipment types to support your company's HR needs.
Example: In Fig. 07 below, we have created a total of five equipment types that can be assigned to our employees as needed.
This completes the tutorial on adding HR equipment types.
To learn how to assign these equipment types to your individual employees, refer to the Assigning Employee Equipment tutorial.
See Also:
