Help Toolbar (select a button to browse other online help sections) Home Tutorials Resources Search Tabs & Menus Button Bar Table & Data Display |
Working with HR Reports
eNETEmployer provides a series of pre-defined reports that are common to most HR scenarios. Use the following tutorial to learn how to access the Reports screen, to create a basic report, and to apply custom report settings.
This tutorial has two parts:
NOTE: Click on the images below to view them at full size
To Create a Basic Report:
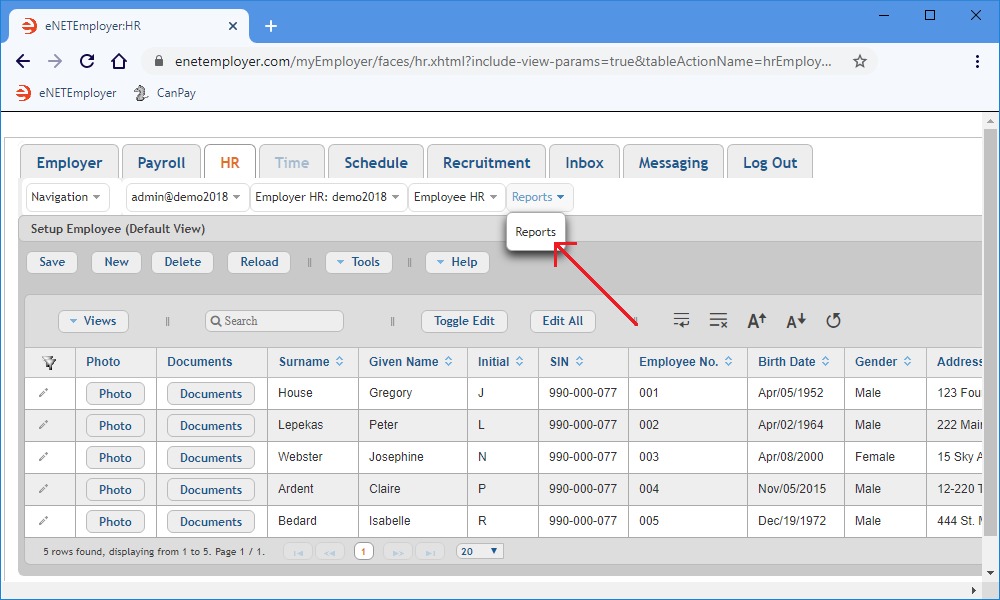
- From the HR module, select the Reports menu to view the available options.
- Choose the Reports option from the menu. This opens the Reports screen where you can work with all aspects of program reporting including viewing, printing, and exporting.
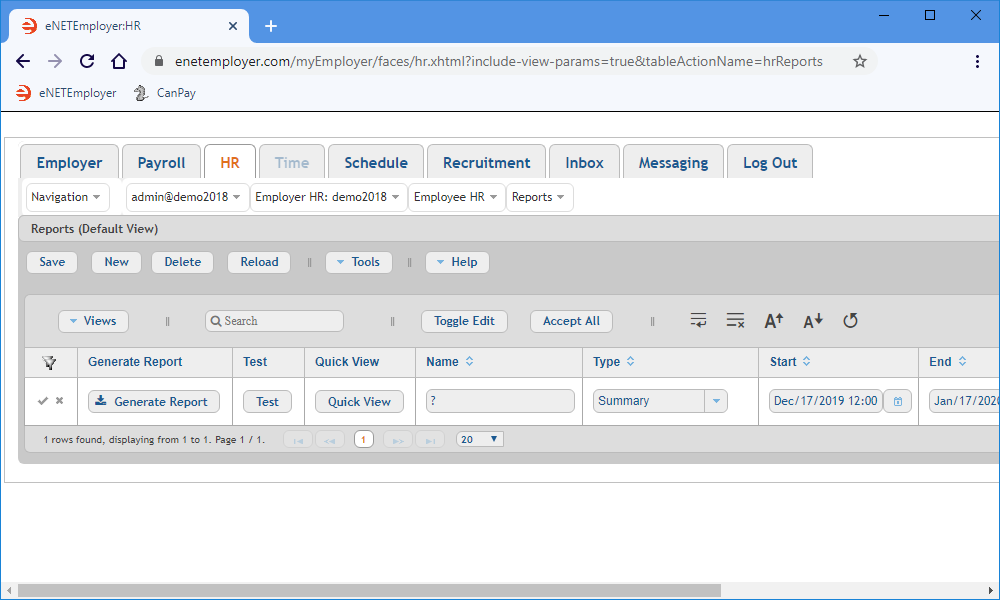
- Select the New button to insert a blank report row into the table. The report row appears in Edit Mode so that you can change the default settings if you prefer.
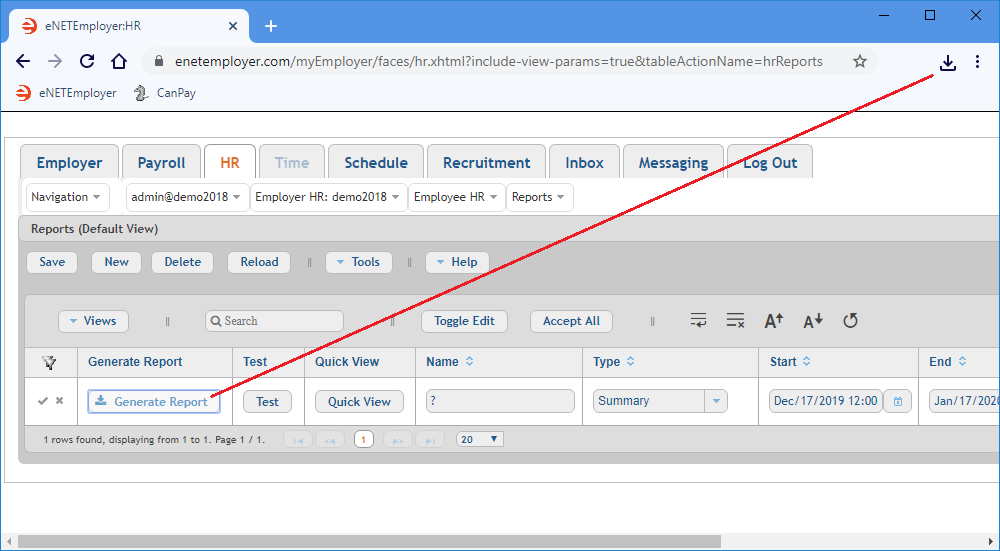
- With the default settings in place, choose the Generate Report button to create the HR Summary report as a .PDF document. Depending on your browser settings, the resulting document will either be stored in your Downloads folder or you may be presented with a window that will prompt you where to save the file. In most browsers, the document can be viewed via a link that appears at the top-right of your browser.
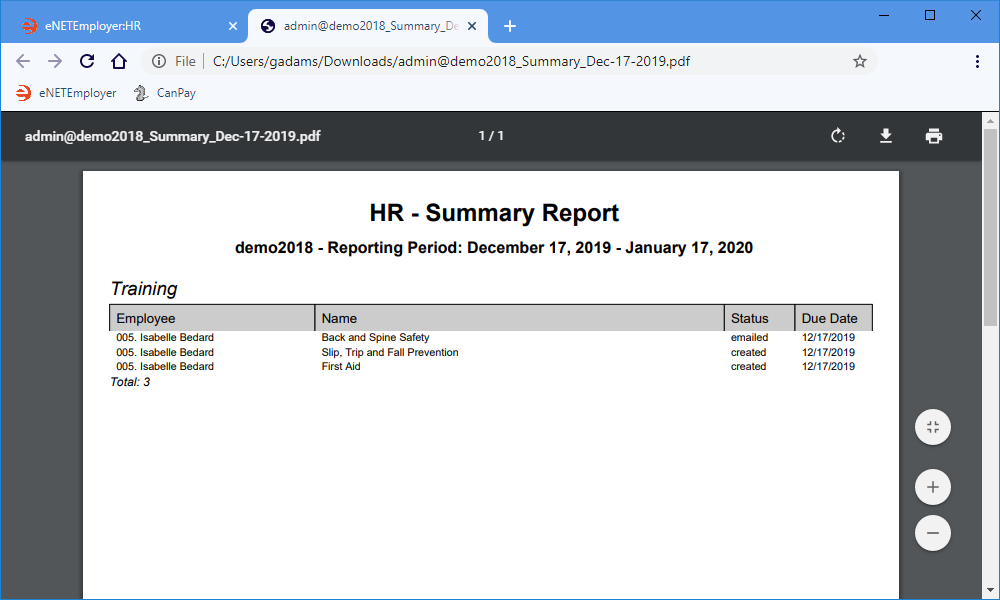
- Click the Download link to access the file, or navigate to your Downloads folder and open the document using your preferred PDF viewer. As you scroll through the document you will see a summary of each employee's HR items along with the status of each item. The total number of each employee's HR records are also shown.
- When you have finished reviewing the data, close the report and return to eNETEmployer.
- To create other HR report types, simply select an option from the Type cell before choosing the Generate Report button.
Now that you know how to create a basic report with the default settings, let's learn how to modify the settings to customize our report.
If you have never created a report, the screen will not contain any report rows (as shown in Fig. 02 below).
The default settings will vary based on your chosen report type (as defined in the Type cell). By default, the HR Summary report will be created if you choose.
To Change the Default Report Settings:
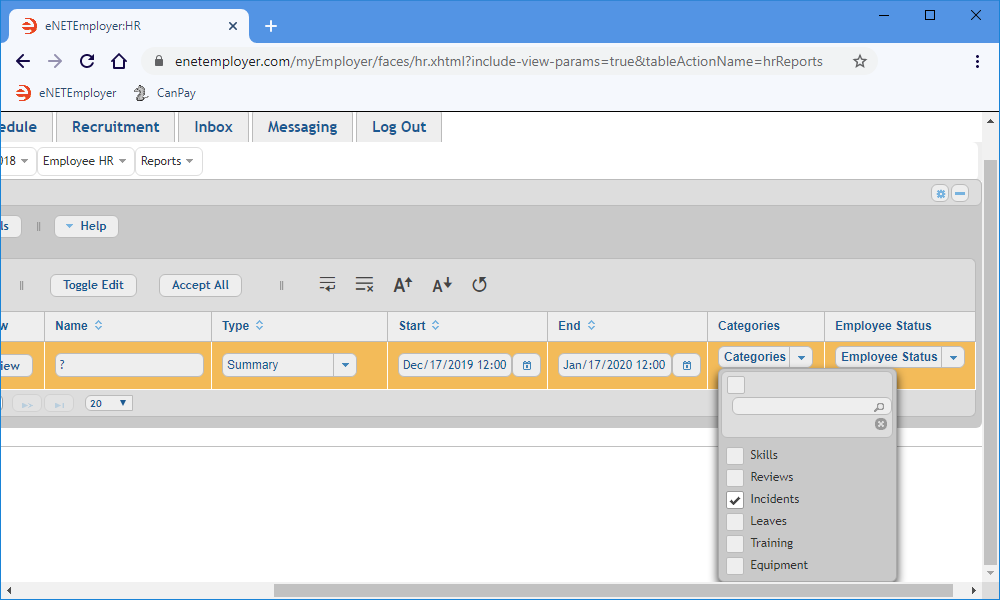
- With the row in Edit Mode, scroll over to the Categories cell and click on the downward facing arrow. This drops down a list of the available HR categories that can be included in the report (see Fig. 05 below). Note: If all of the checkboxes are empty, the program default is to include all of the categories in the report (in order to avoid generating a blank document),
- Place a check in each of specific categories that you wish to include the next time you generate the report.
Example: In the example below, we have placed a check in the Incidents box so that subsequent reports will include only incident-related items. - Scroll over to the Employee Status cell and click on the downward facing arrow. This drops down a list of the available employee statuses (see Fig. 06 below).
- Place a check in each of specific statuses that you wish to include the next time you generate the report.
Example: In the example below, we have placed a check in the Active box only so that subsequent reports will include only those employee who are actively working in your company. - Once you have completed your custom settings, choose the Save icon (the Check Mark icon at the left side of the row) to accept your changes. This action saves the changes for the row and takes you out of Edit Mode. These custom report changes will now be in place the next time that you create the report.
This completes the tutorial on how to create a basic report. We also discussed how to apply custom settings that can be used in the report at a later time.
See Also:
