Help Toolbar (select a button to browse other online help sections) Home Tutorials Resources Search Tabs & Menus Button Bar Table & Data Display |
Restoring Data from a Backup File
The payroll restore procedure is useful in cases where you need to completely revert your payroll to a previous state. For example, a restore may be necessary in a case where you have realized a number of data entry errors and it is too time consuming to review and correct each one individually. Another reason for a restore may be if a different payroll administrator has made changes to the payroll and you are unsure of its current status. In either case, restoring from the most recent backup is a sure way of returning to a safe, defined state.
CAUTION: Restoring your company database will replace the data for all program modules. This includes any changes made in all other tabs since the last backup (e.g. HR, Recruitment, Employer - not just the Payroll module). As such, the restore procedure should be used as a last resort only after you have considered other alternatives (such as the Un-Close payroll command or Reversal Pay option). |
NOTE: Click on the images below to view them at full size
To Restore a Payroll from a Backup File:
You can initiate a restore from several program locations: Restores can be performed from within the Calculations screen on both the Employer and Payroll tabs, or from the Employer tab's Tools screen. Regardless of the location you choose, the procedure is the same. The Payroll tab's Calculations screen is the most common location and will be used in this tutorial. |
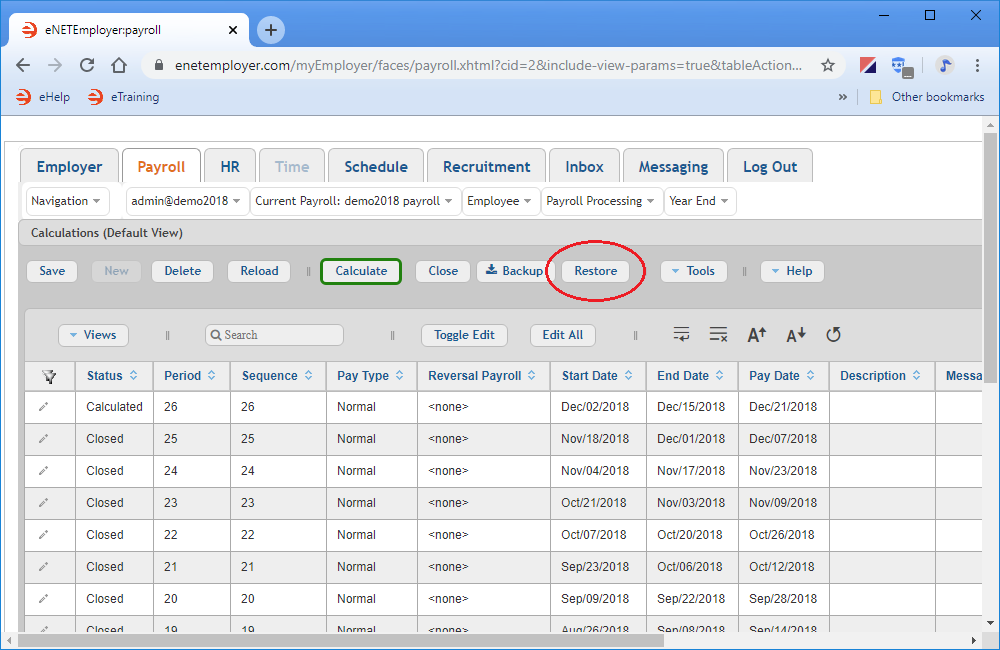
- From the Payroll tab, open the Payroll Calculations - Calculations screen which is the most common location from which to perform a payroll restore. Note: As mentioned earlier, the Restore button also appears on the Employer tab's Admin - Tools screen.
- Select the Restore button that is located in the Button Bar above the table.
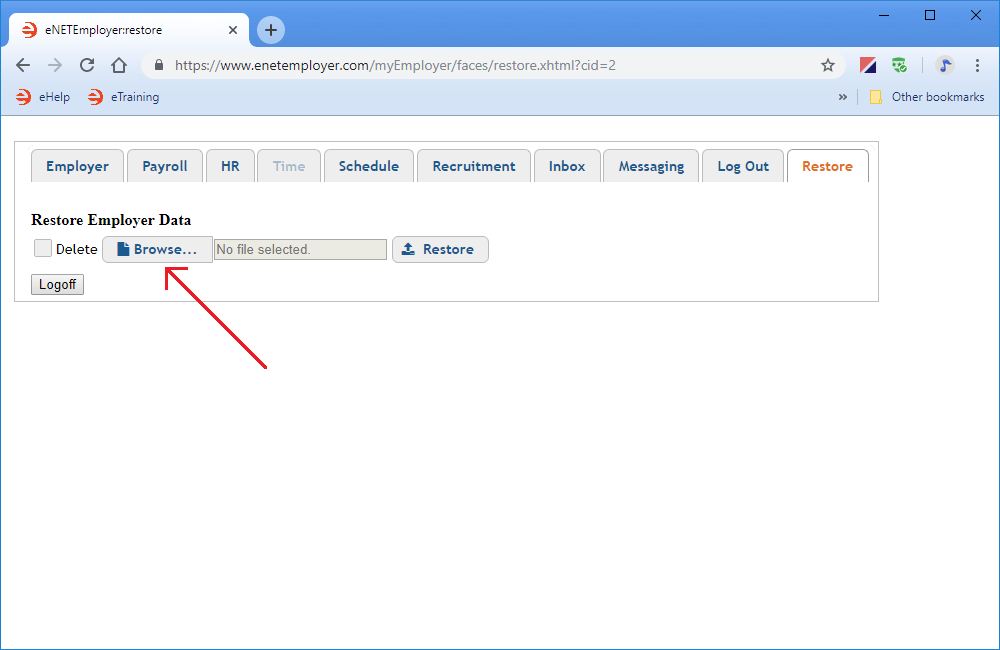
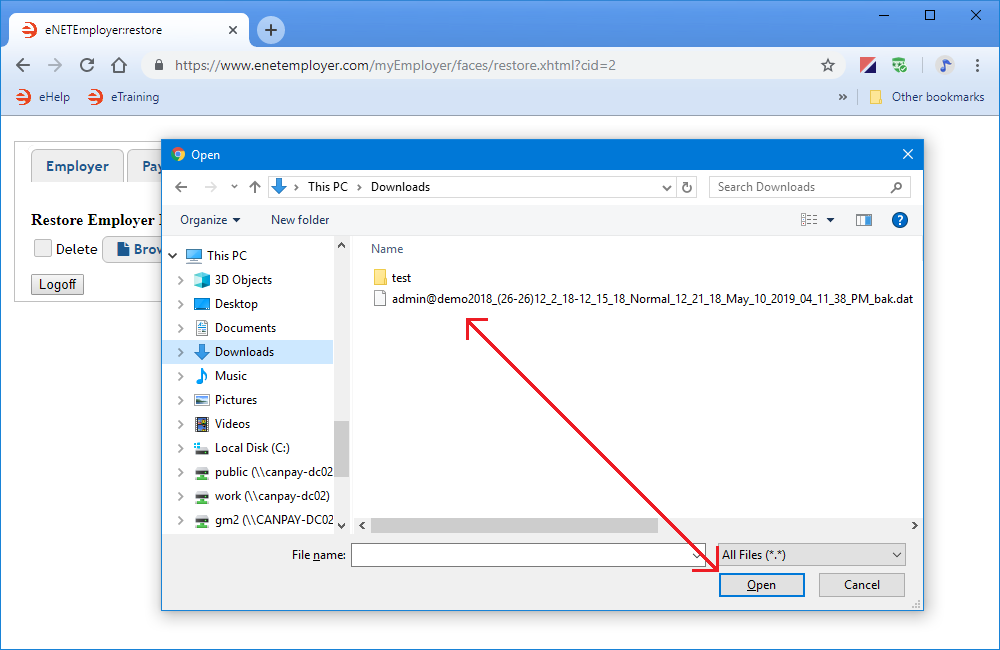
- Select the Browse button and then navigate to the location where you saved your most recent backup file. By default, this will be your Downloads folder. Note: If you have stored your backups in a different location (a payroll-specific folder, an external drive, etc.), simply navigate to that location to find your backup file.
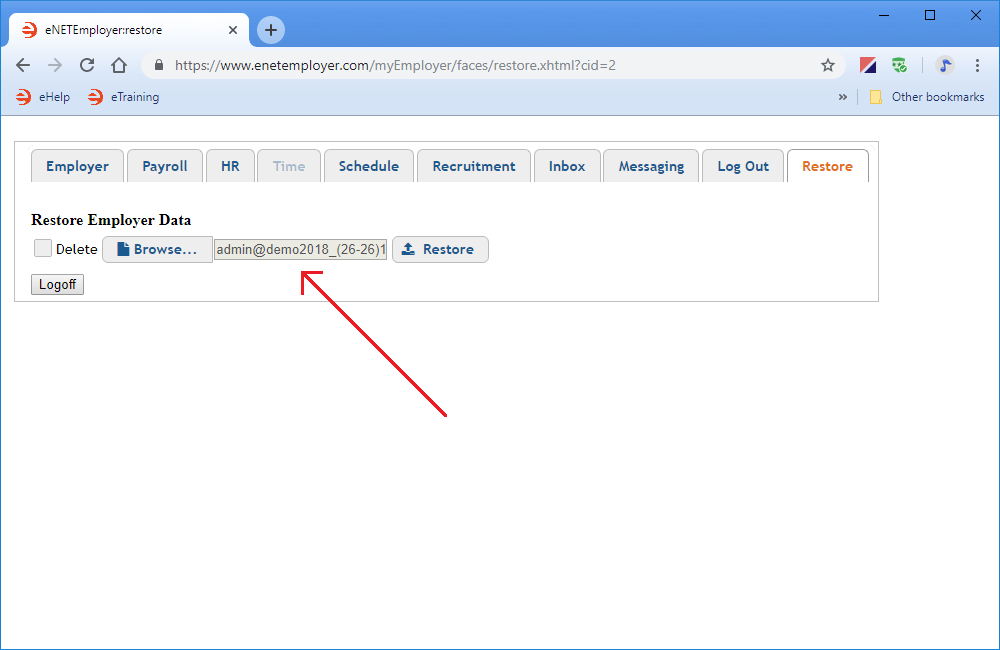
Example: In Fig.03 below, the backup file has been stored in our Downloads folder. If you have more than one backup to choose from, you can use the various identifiers in the name to ensure that you are choosing the correct file. - Select your desired backup file from the navigation window, and then choose the Open button. This places the backup file's name into the field beside the Browse button.
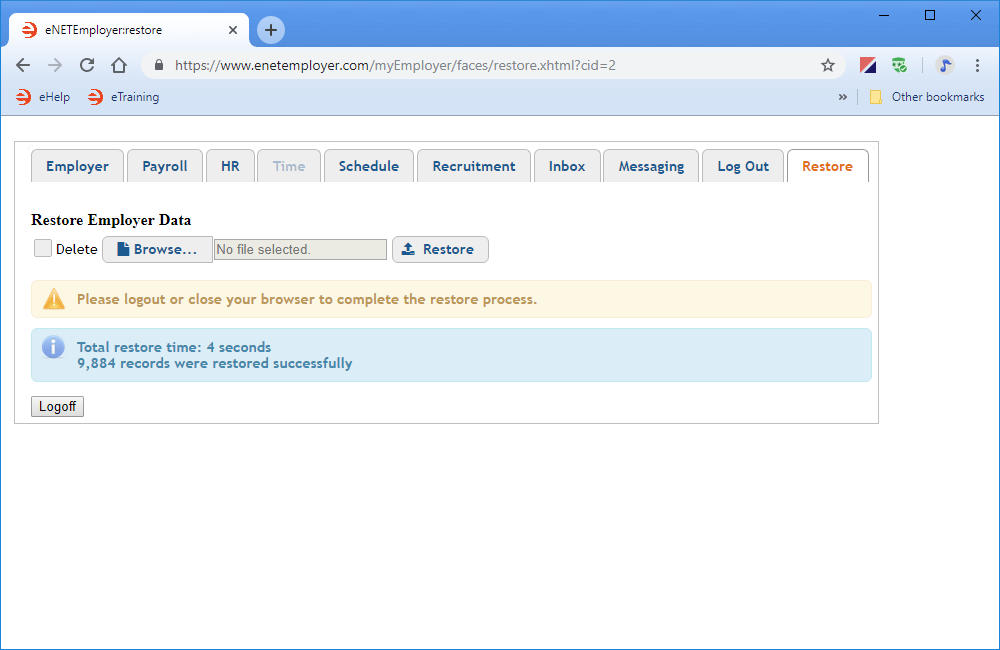
- Select the Restore button to start the restore procedure. Once the process is complete, eNETEmployer displays a message that lists the restore procedure's duration along with the number of records that were restored. It also displays a reminder to log out of the eNETEmployer system before using the newly restored payroll.
Incremental Restore vs. Full Restore: The tutorial above describes an incremental restore procedure where eNETEmployer restores the most recent changes that were made to your program database. If you encounter a warning message after selecting the Restore button above, simply place a check in the Full Restore box, and then choose the Restore button once again. This will perform a full payroll restore instead of an incremental restore only.
- Select the Logoff button to log out of the eNETEmployer system. This is an important step and helps to ensure that the your browser does not cause any issues with your newly restored payroll.
This displays the Restore Employer Data window that allows you to choose from a number of options that pertain to the restore process.
This completes the tutorial on restoring your payroll.
See Also:
