Help Toolbar (select a button to browse other online help sections) Home Tutorials Resources Search Tabs & Menus Button Bar Table & Data Display |
Calculate Multiple Payrolls
This tutorial is for multiple payrolls only: When you sign up with eNETEmployer Services, your initial account is provided with the first payroll setup and ready to use. The following tutorial should only be used if you are working with multiple payrolls, over and above your original payroll. |
If your company has more than one payroll, you can calculate them in one step by using the Employer tab's Calculations screen (as opposed to the Payroll tab's Calculations screen that allows you to calculate the active payroll only).
Each time you make a change to your payroll, you should perform a calculation. Each time the payroll is calculated, the results of the previous calculation are erased and replaced with the new results. A payroll may be calculated as many times as needed before it is closed. This provides the opportunity for reviewing the pay run details and for other testing purposes.
Each time you calculate your payrolls, you should generate a new Payroll Register report and use it to verify your results. Repeat this step until the payroll register shows the expected results. This verification process is important because once a pay is closed, it cannot be re-calculated again. If you do find data entry errors or other issues after the pay had been closed, you would need to use either the Unclose or Restore procedures.
There are two parts to this tutorial:
- Step 1: Calculate your Payrolls - How to calculate multiple payrolls in one step.
- Step 2: Review your Payrolls - How to create the Payroll Register report so that you can review the results of each payroll's calculation.
NOTE: Click on the images below to view them at full size
Part A) To Calculate Your Payrolls
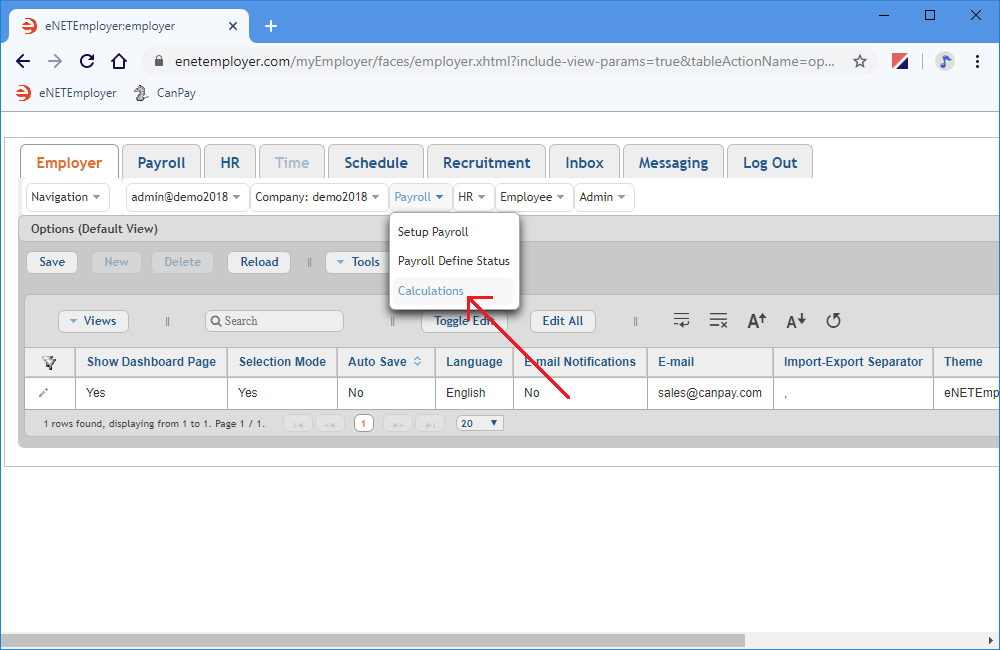
- Click on the Employer tab and then choose the Payroll menu to display the various options.
- Choose the Payroll - Calculations menu option. This opens the Calculations screen where you can define calculation settings and perform a payroll a mass calculation for all of your company payrolls.
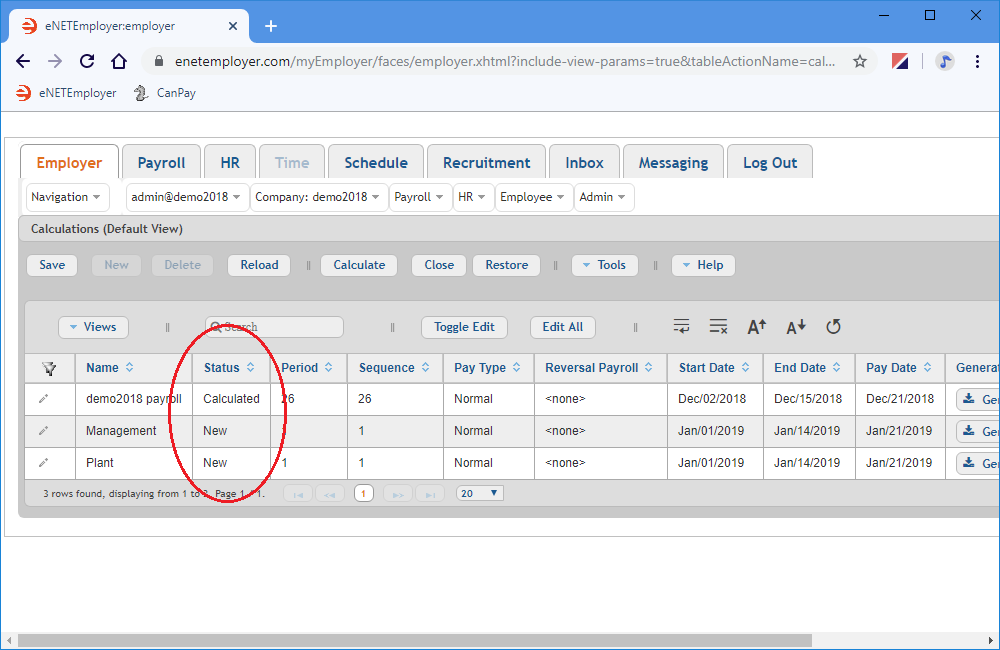
Each row in the table represents an individual company payroll. The settings for each row can be edited as needed in order to suit your calculation needs. This includes settings for start dates, end dates, pay types and more.
Example: In Fig. 02 below, we see three payrolls in total. The first payroll is already calculated, and the other two payrolls still need to be calculated. - If the dates need to be modified for any of the payrolls, you can activate Edit Mode for the desired row by double-clicking on the row (or by choosing the Pencil icon to the left side of the row).
- Edit the various cells to suit the details of each payroll run (press <F1> to use the Online Help system if you need to look up a definition for the various cells).
The mandatory items you will need to define for a typical payroll are:
- Pay Type - Use this cell to specify the calculation method that will be used.. Pay types can be any of the following; Normal, Additional, Extra, or Reversal (Special), or Reversal (All).
- Start Date - Use this cell to specify the beginning date of the current payroll run. This date represents the start of the current period in which employees worked or earned wages. For example, if your company is set up for semi-monthly payrolls (24 per year) and you are in the fourth week of January 2020 (having already ran your first payroll of the year), this cell would show Jan/16/2020 (i.e. the second semi-monthly pay run of the year begins on the 16th of January).
- End Date - Use this cell to specify the closing date of the current payroll run. For example, if your company is set up for semi-monthly payrolls (24 per year) and you are in the fourth week of January 2020 (having already ran your first payroll of the year), this cell would shows Jan/30/2020 (i.e. the second semi-monthly pay run of the year ends on the 30th of January).
- Pay Date - Use this cell to enter the actual date on which the employees receive their pay (e.g. cheques are distributed or EFT transactions occur) - commonly referred to as "Pay Day". This date is used to determine when payroll liabilities are due, based on deposit schedules. This date also is used to determine when any assigned tax calculation formulas may be applied.
- Once your changes are complete, select the Save icon (the check mark icon at the left side of the row). This accepts the new settings and the Edit Mode icons are removed to indicate that the entire row has been saved. You can also choose the Save button from the Button Bar above the table.
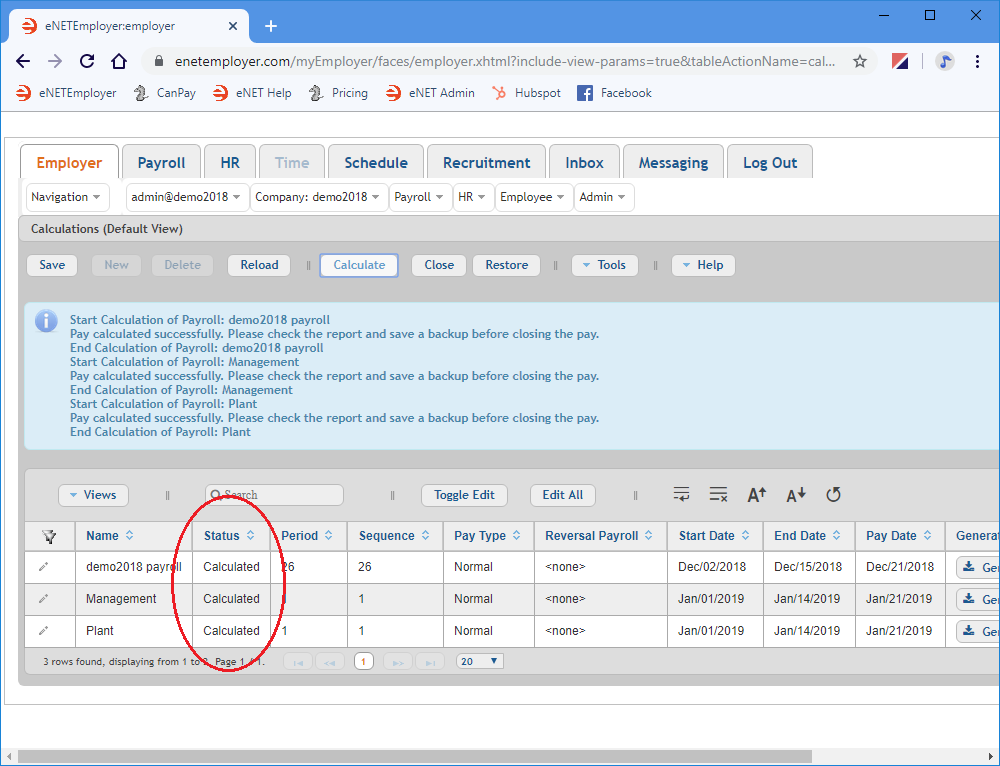
- Choose the Calculate button from the Button Bar located above the table. Once the calculations are complete, a series of messages will appear indicating the successful calculation of each payroll. If one or more payrolls have not been calculated properly, you will see a message with some useful information that will assist you in making the necessary corrections.
Example: In our example below, the Status cells for each payroll has been updated to read Calculated. These cells will read Closed once each payroll is finalized and closed. Now that the payrolls have been calculated, you can move the second part of this tutorial and learn how to review your payroll calculations.
Part B) To Review the Payroll Calculations
Once your payroll is calculated, you should view the Payroll Register report to verify your payroll calculation results.
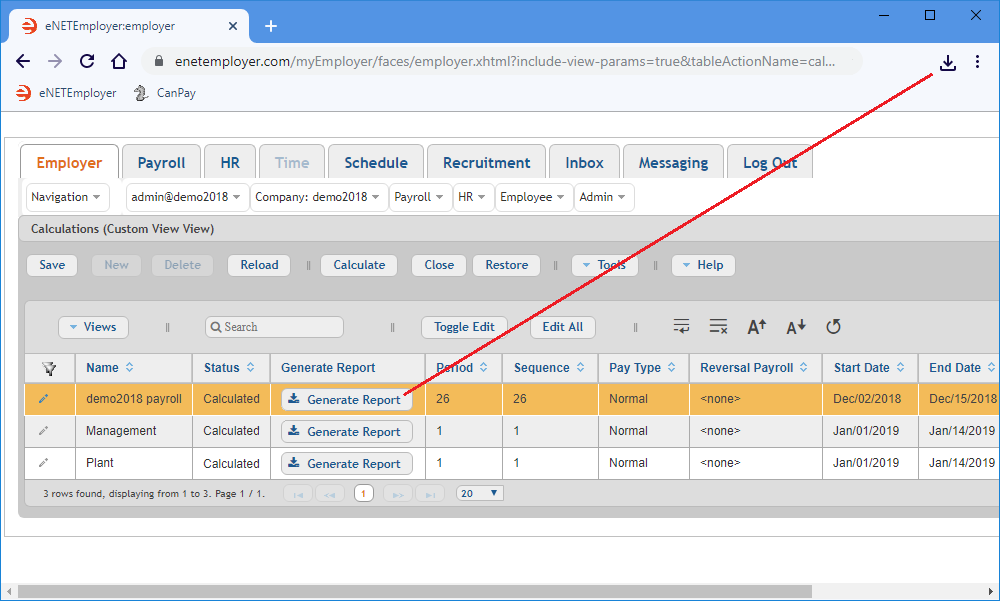
- Choose the Generate Report button from your desired payroll row to create an interim Pay Register report as a .PDF document. Depending on your browser settings, the resulting document will either be stored in your Downloads folder or you may be presented with a window that will prompt you where to save the file. In most browsers, the document can be viewed via a link that appears at the top-right of your browser.
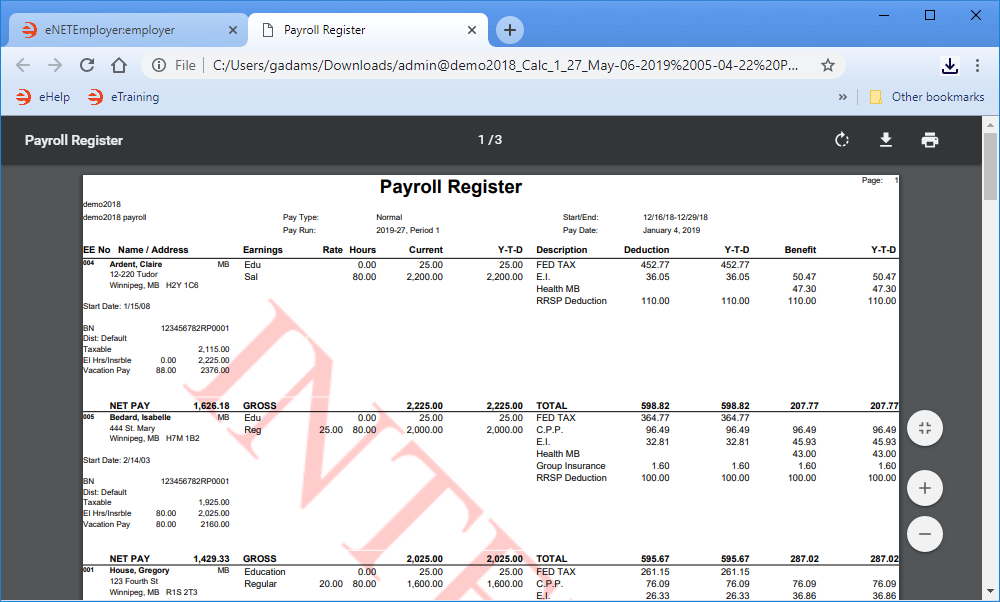
- Click the Download link to access the file, or navigate to your Downloads folder and open the document using your preferred PDF viewer. When the report appears on the screen, the word "Interim" appears as a watermark in the background. This watermark will be removed once you close the payroll and regenerate the report. As you scroll through the PDF document, you will see that each employee has been paid accordingly - both Salary and Hourly types. And once you reach the end of the employee list, the overall employee totals are shown in the second section of the report.
- Scroll down further to the last page in the report, and you will see the business accounts that are being used in the payroll, a breakdown of the Federal Tax, CPP and EI amounts, and the total government remittance amounts.
Example: In Fig. 05 below, our sample Payroll Register report shows 5 employees who have been paid for the current pay period. - When you have finished reviewing your payroll results, close the report and return to eNETEmployer.
- Repeat the preceding three steps to view and verify the results for your other payrolls.
This completes the tutorial on how to calculate multiple payrolls and to review their data.
See Also:
