Help Toolbar (select a button to browse other online help sections) Home Tutorials Resources Search Tabs & Menus Button Bar Table & Data Display |
Adding Employees to HR Manually
For this tutorial, we will add several employees to the HR module by entering their information manually. This method involves adding a blank row for each new employee, and then completing the details for each person as needed.
Sharing Employee Information Between Modules - Each employee's general address and birthdate-related information is stored in the Employee Database, and is shared between all program modules. For example, if you change an employee's address in the Payroll module, the change will also be shown in the HR module. Conversely, employee information that is payroll-specific (Start Date, Tax Province, Pay Rate, etc.) will only be visible in the Payroll module. |
Looking to Import Employees? If you wish to import a large number of employees in one step, refer to the Importing Employees from a Spreadsheet File tutorial. |
NOTE: Click on the images below to view them at full size
To manually add employees to HR:
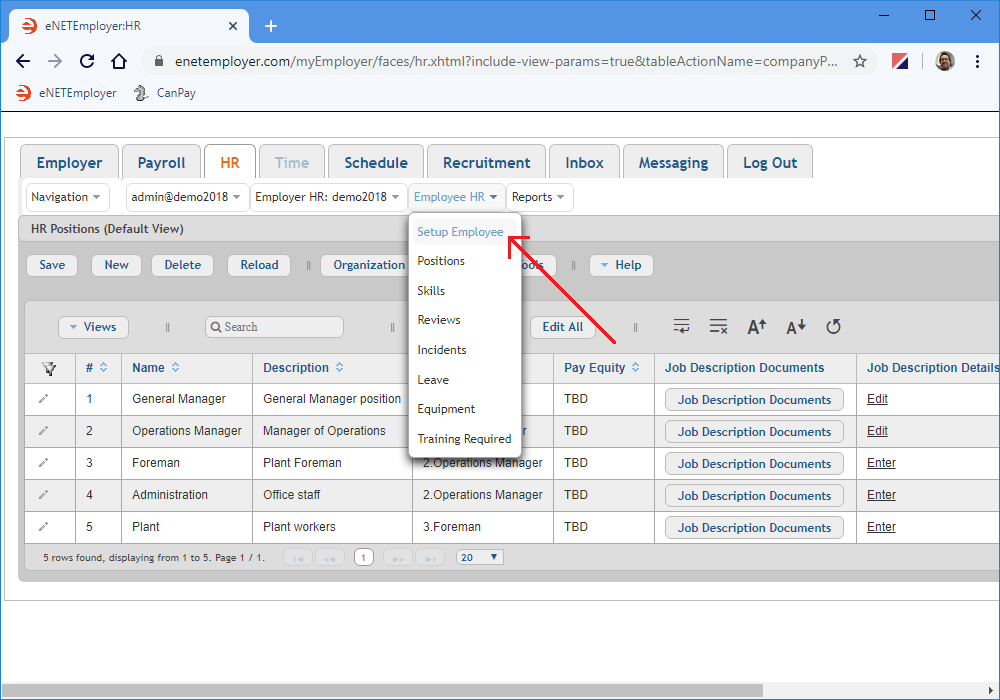
- Click on the HR tab and then choose the Employee HR menu to display the various options.
- Choose the Setup Employee menu option. This opens the Setup Employee screen that is used to define the detailed payroll, tax, payment and all other settings required for each employee in the payroll. You can use the various features to add and define settings for new employees or to review or change settings for existing employees.
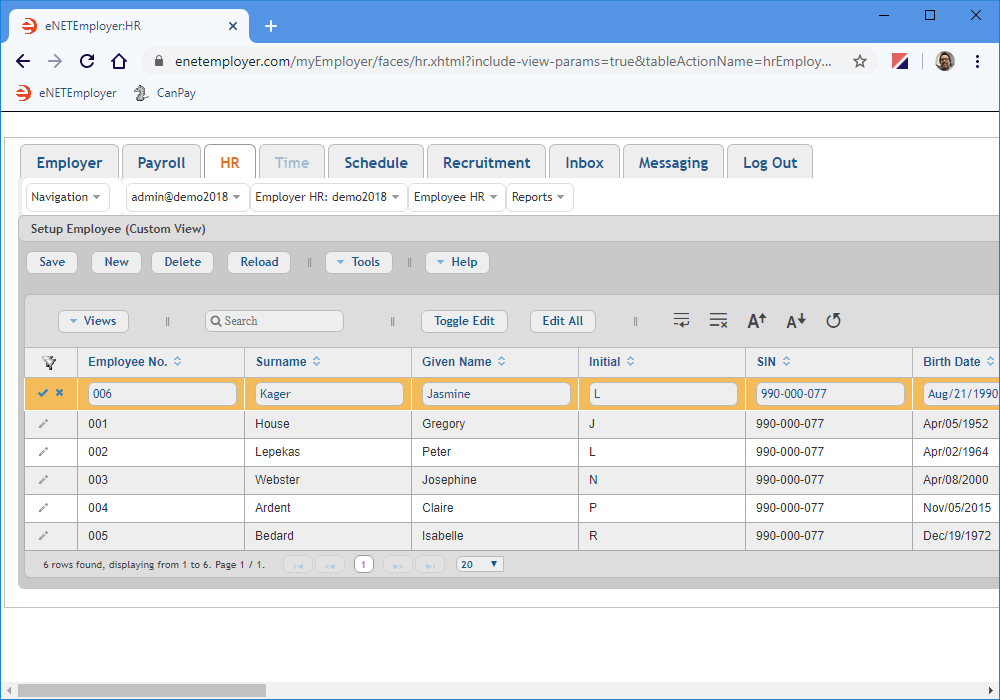
- To add an employee to HR, choose the New button that appears near the left side of the button bar. This inserts a new row into the table and activates Edit Mode for the cells.
- Complete the data for each cell as it relates to your new employee (press <F1> to use the Online Help system if you need to look up a definition for the various cells).
Example: In Fig. 02 below, our first new HR employee is Jasmine Kager. We shortened her Employee Number (006) for easier reporting and set her Language to Default to ensure that the program uses the current default language option for this employee (we used English for our lessons). - Save the row's information when you are complete.
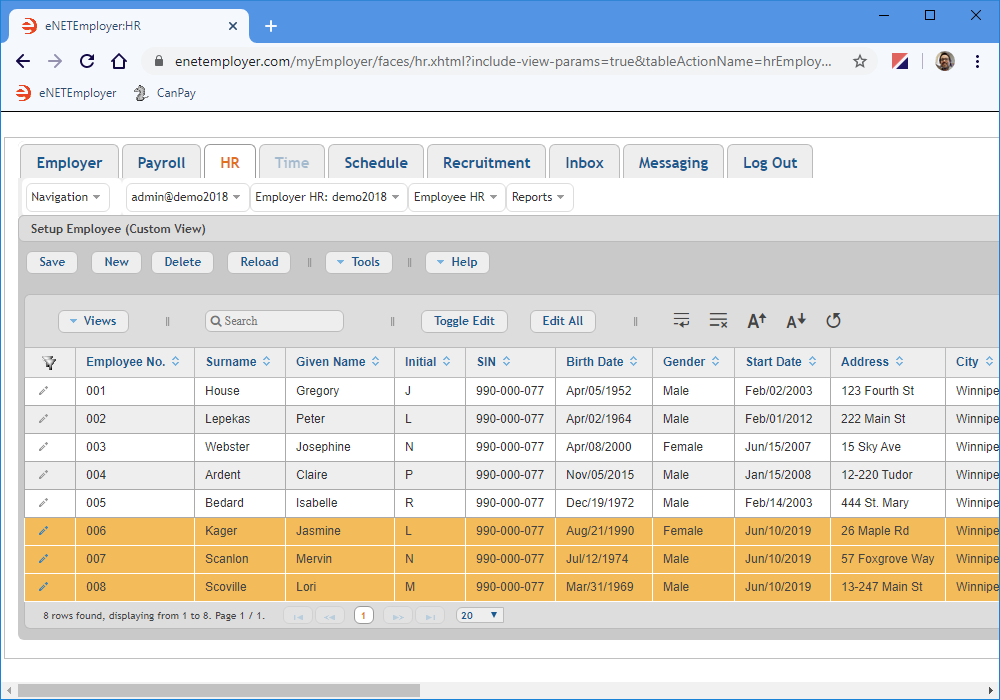
- Repeat the preceding steps to add your desired number of employees.
Example: In Fig. 03 below, we have entered basic information that is needed for two more new HR employees. Note: We have used the same "test" Social Insurance Number (SIN) for our employees. In a real payroll, you would be required to enter each employee's actual SIN. - Save the row's information as you complete each new employee.
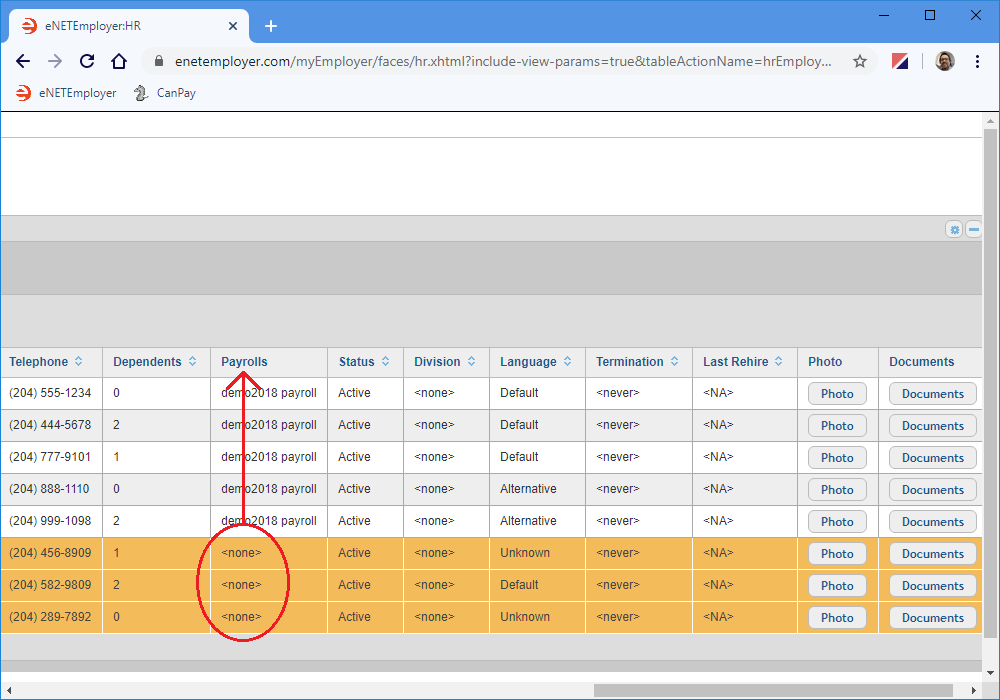
- To view the payroll designation for your employees, scroll to the right until you see the Payrolls column
Example: In Fig. 04 below, we see that our original 5 employees are assigned to a demo payroll, while the three new "HR-only" employees have no payroll designation.
Does your screen show existing employees? If you are using eNETEmployer's Payroll module, you may already see a number of employees in this screen. This is because these employees exist in the Employee Database, and are automatically part of the company's HR program. You can see the specific payroll to which they belong, by viewing the name shown in the Payrolls column for each employee. |
As mentioned at the beginning of this tutorial, each time you add an employee to HR, they are not assigned to any payroll until you explicitly import them in afterward. All new HR employees will initially have their Payroll designation set to "none".
This completes the tutorial on adding HR employees manually.
Note: If you have a large number of employees to add for your company, you may wish to import all of them in one step. Refer to the Importing Employees from a Spreadsheet File tutorial for further information.
See Also:


