Help Toolbar (select a button to browse other online help sections) Home Tutorials Resources Search Tabs & Menus Button Bar Table & Data Display |
Importing Employees (and other data) from a Spreadsheet File
Available for all program screens, this import method is generic and allows you to specify a comma-separated values (.CSV) file that can be used to easily add, update or replace the data on a given screen. Instead of editing each row manually, you can import many rows in one action.
Note: The steps below talk specifically about importing employee information into the Payroll tab's Setup Employee screen (the single-most common import task). However, you can use these same instructions to import applicable data on almost any other program screen. |
In order to correctly import data, you must use a properly formatted comma-separated values (.CSV) file. The easiest and most accurate way to produce this file is to export the contents of the current table. The resulting .CSV will serve as a template and can be edited in your preferred spreadsheet program (Excel, Open Office Calc, etc.).
Before we perform the table export, we will use the Customize View feature to reveal many more columns that will be included in our exported spreadsheet.
- From the Payroll tab, open the Employee - Setup Employee screen where you can define the detailed information for each employee in your payroll. Note: As mentioned earlier, you an export from and import to most any screen in the program - the most common import task is to import employees into the Payroll or HR modules.
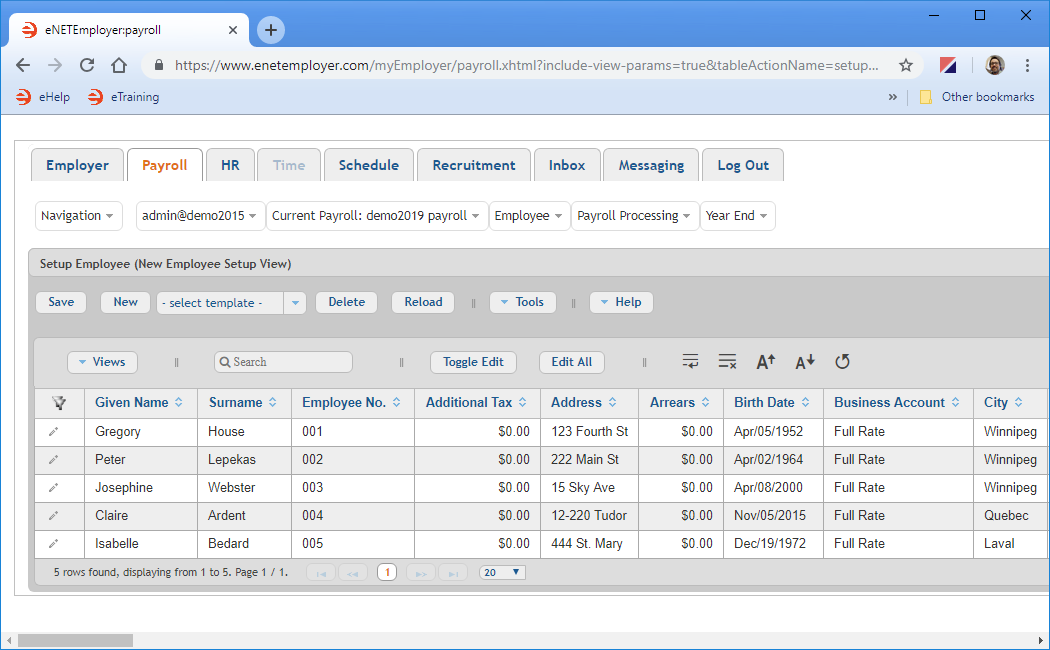
Example: In Fig. 01 below, we have used the Customized Views feature to reveal many more columns that will contain information that is relevant for new employees. In our example below, notice how the cells are ordered alphabetically and extend well past the right side of the screen (approximately 65 columns of data in all). Additionally, we have ordered the columns so that each employee's Name and Employee Number will appear at the left for easier viewing. If you wish to learn more about rearranging the columns on your own screen, refer to the Customized Views tutorial.
- Select the Tools button from the Button Bar, and then choose the Export option from the drop-down menu. This action exports the current table's data as a comma-separated values (.CSV) file. Depending on your browser settings, the resulting document will either be stored in your Downloads folder or you may be presented with a window that will prompt you where to save the file. In most browsers, the document can be viewed via a link that appears at the top-right of your browser.
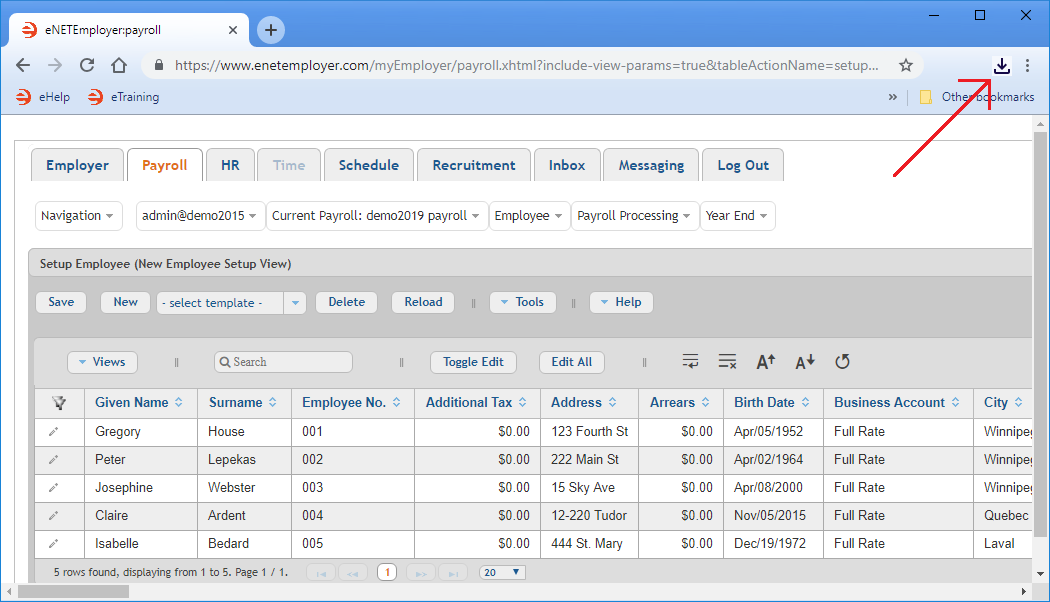
Example: In Fig. 02 below, our browser provides access to the downloaded file via an icon that appears at the top-right of the browser window. - Click the Download link to access the file, or navigate to your Downloads folder and open the .CSV file using your preferred spreadsheet program.
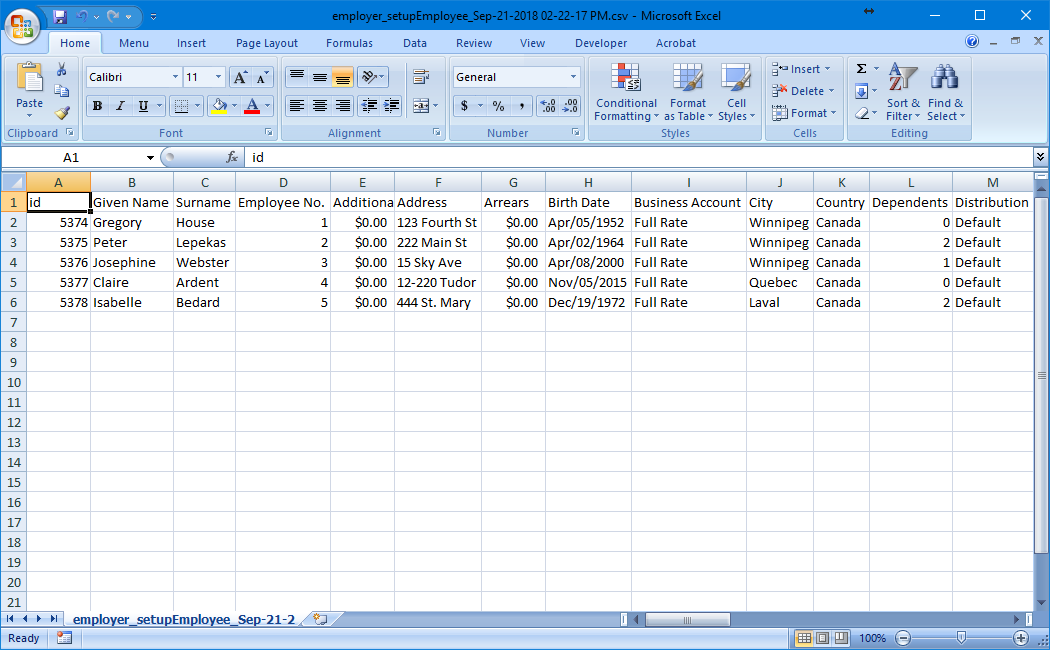
Example: In Fig. 03 below, we see the exported file that contains the information for the 5 employees who already existed in our payroll. - Using the existing rows as a guideline, add a row for each new employee and enter the data from left to right as needed. You will likely not need to fill in every column since some of the available data types will not apply to your payroll. For example, if your employees have not requested to have any extra amounts to be deducted from their pay, you can leave the Additional Tax cell blank for them.
- As you enter the data for each employee, keep the following important cells in mind:
- Employee No. - Ensure that this value is unique for each employee.
- SIN - Ensure that this value is unique for each employee.
- Start Date (and all other "date" fields) - Ensure that these date values are formatted in the same manner as the exported employee start dates: mmm/dd/yyyy.
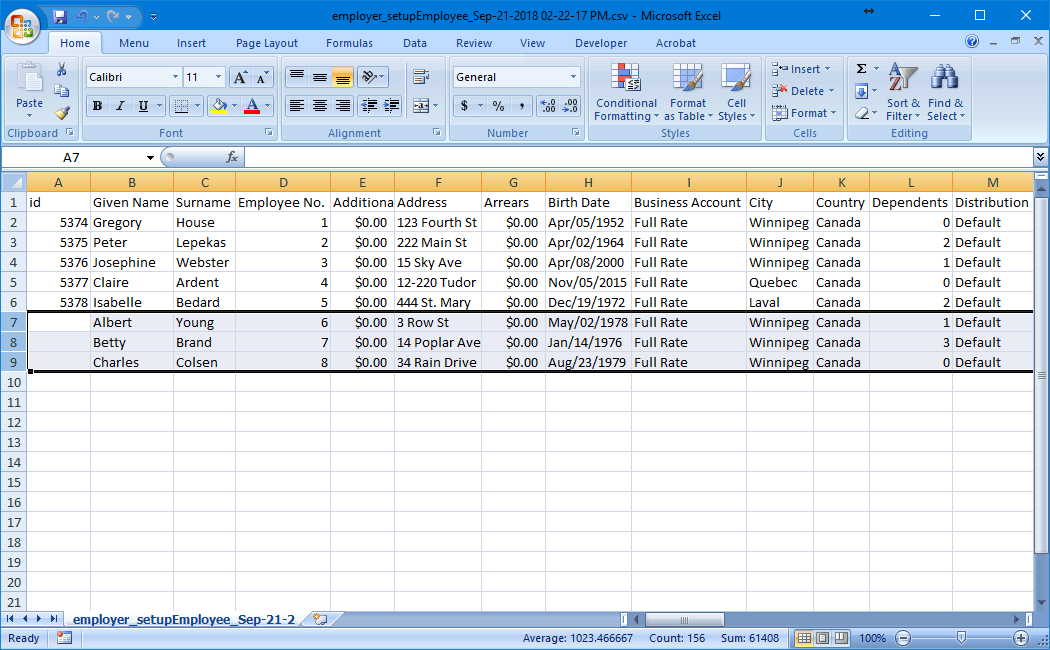
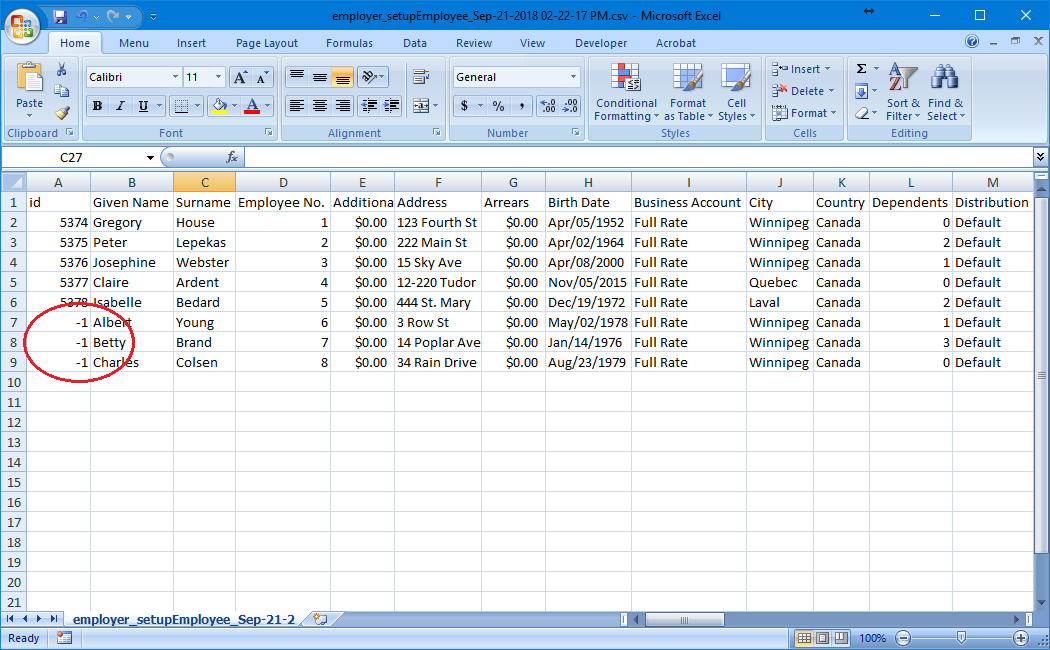
- Move to the ID column for the three new employee rows and and enter -1 for each person. When the import process occurs, the program will substitute the -1 for a new program ID.
Example: In Fig. 05 below, we have added a "-1" to the ID column so that eNETEmployer will create a new employee for each of the three new rows. - With the new employee rows in place, save the file to complete the editing procedure. You are now ready to import the file into your payroll.
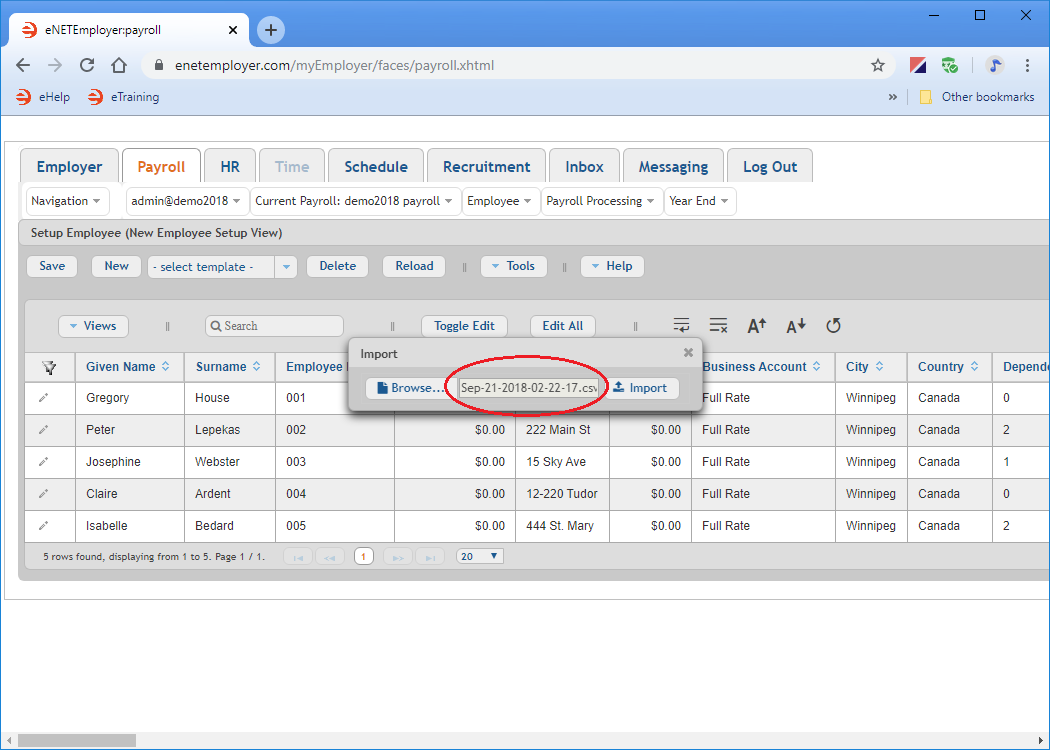
- Return to eNETEmployer and then click the Tools button from the Button Bar above the table. This displays a pop-window that allows you to browse to the location of your desired import file.
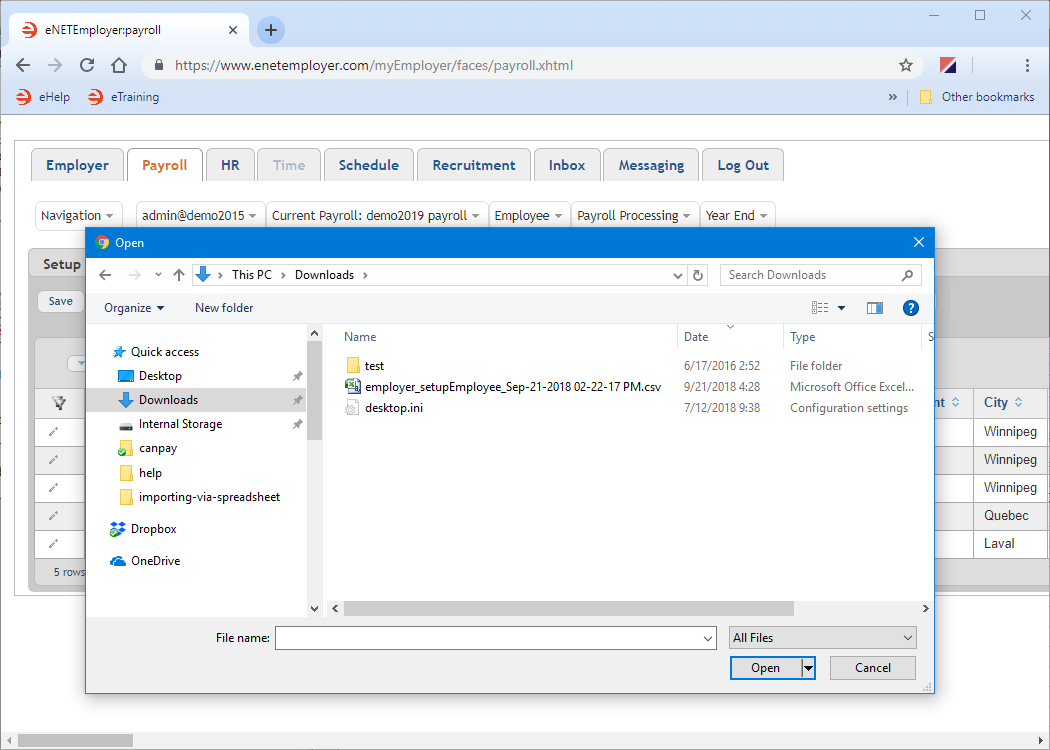
- Select the Browse button to display the Open dialog box, and then navigate to the location where your edited .CSV employee list is stored. As mentioned earlier, the default file location is your Downloads folder.
- Select the desired import file from the dialog box, and then choose the Open button. This places the name of the import file into the pop-up window.
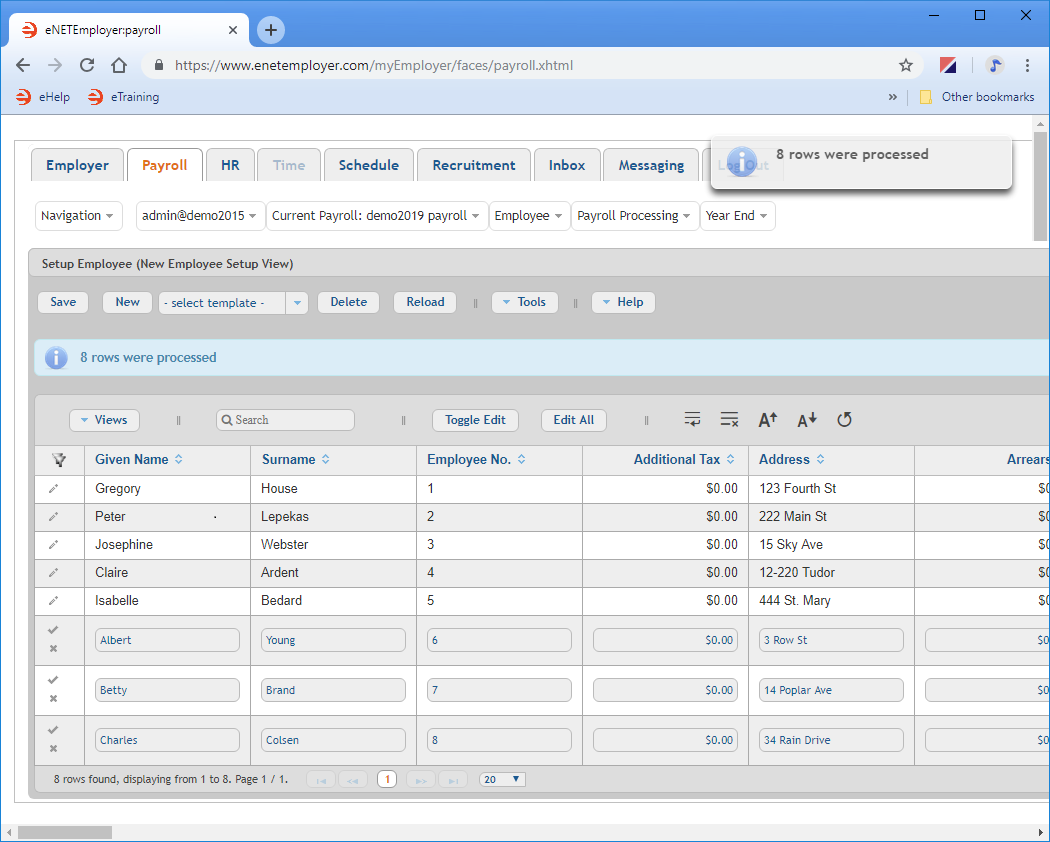
- Select the Import button to complete the process. Once the data is imported, a message appears on the screen indicating how many rows were successfully processed. The newly imported rows are displyed in Edit Mode so that you may make further changes if required.
- Scroll to the right and you will see that each column has been populated with the data from the imported spreadsheet.
Notice how the ID column displays a 4-digit ID for the 5 exported employee rows. This ID is assigned by the program and must never be changed. You must leave this column in place during the import process so that each row can be referenced during the import process. If you change, move or delete these cell, the program will not update the employee information as requested or the import may fail entirely.
For the three new rows, we will use one of the program's automated features to generate an ID for each of the new rows.
If you need to add further employees, simply repeat the preceding 2 steps as needed.
- If you are updating information for an existing row, remember to leave its ID cell unchanged. If you alter the ID, the import will not be performed for the row.
- If you are adding a new row, remember to add a -1 in the ID cell so that the program will create the new row when the import process is performed.
Importing Existing Data: Before importing the data back into eNETEmployer, we could have further edited our spreadsheet to remove the 5 original employee rows. Since we did not perform any edits to these existing rows, the net result of the import would have been the same (i.e. no changes to the original 5 employees, just 3 new employees added). If you are importing a large number of rows, the import process can be sped up by removing any rows that do not need to be processed. |
This completes the tutorial. As mentioned earlier, you can use the preceding instructions on almost any program screen in order to update or replace large amounts of data. Just remember;
See Also:
