Help Toolbar (select a button to browse other online help sections) Home Tutorials Resources Search Tabs & Menus Button Bar Table & Data Display |
Add an HR Training Course
This tutorial will show you how to add training courses that can be assigned to your employees as part of their onboarding or ongoing education. eNETEmployer allows you to enter custom training courses that are already part of your company's courseware, or you can choose from a series of pre-designed courses that are all ready to go.
This tutorial has two parts:
NOTE: Click on the images below to view them at full size
To Add a Pre-Designed Training Course:
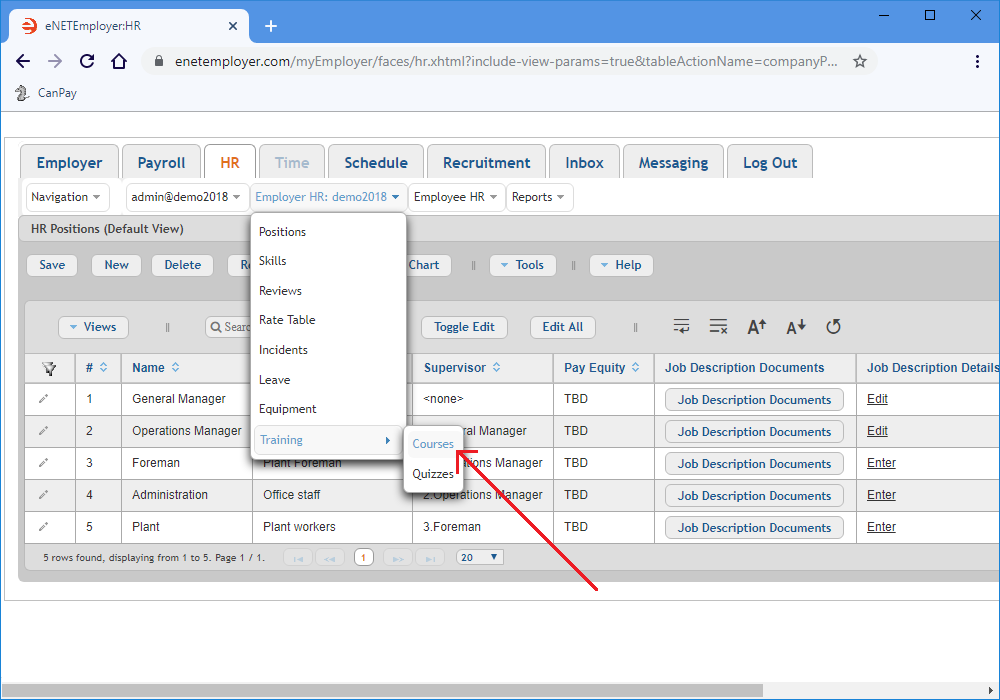
- Click on the HR tab and then choose the Employer HR menu to display the various options.
- Choose the Training - Courses menu option. This opens the HR Training Courses screen where you can work with your company training courses.
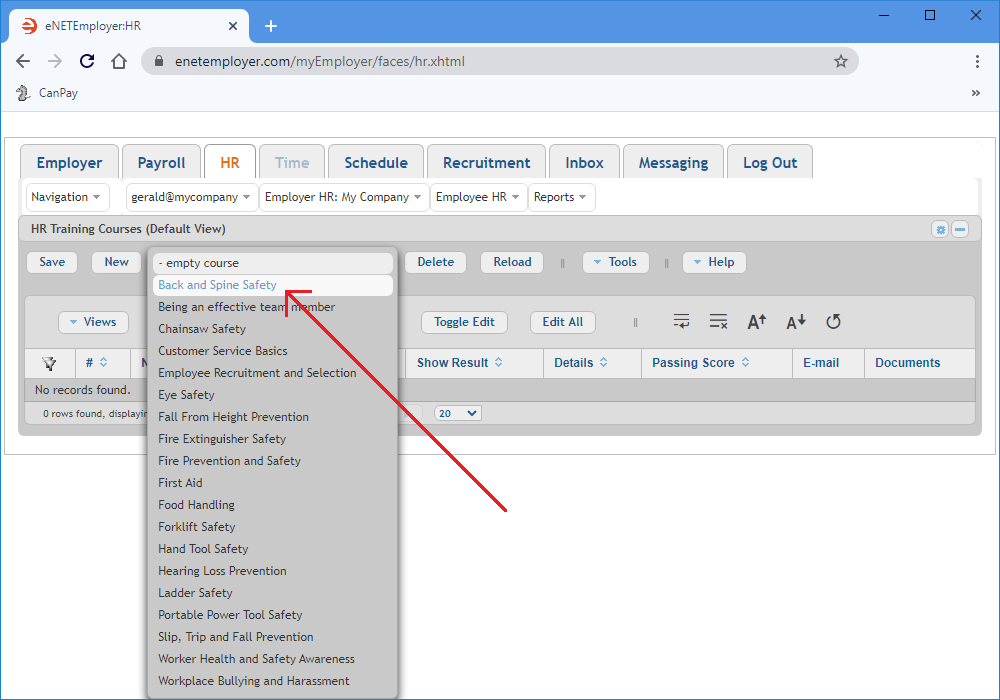
- When the HR Training Courses screen appears, select the drop-down list immediately to the right of the New button. This displays options for adding either a custom-content course, or a pre-designed course with content already provided. A wide variety of topics are covered including employee improvement, workplace safety, and equipment usage and task-based lessons. For this tutorial, we will work with the Back and Spine Safety course.
- Click on the Back and Spine Safety option, and then choose the New button to insert the course row into the table.
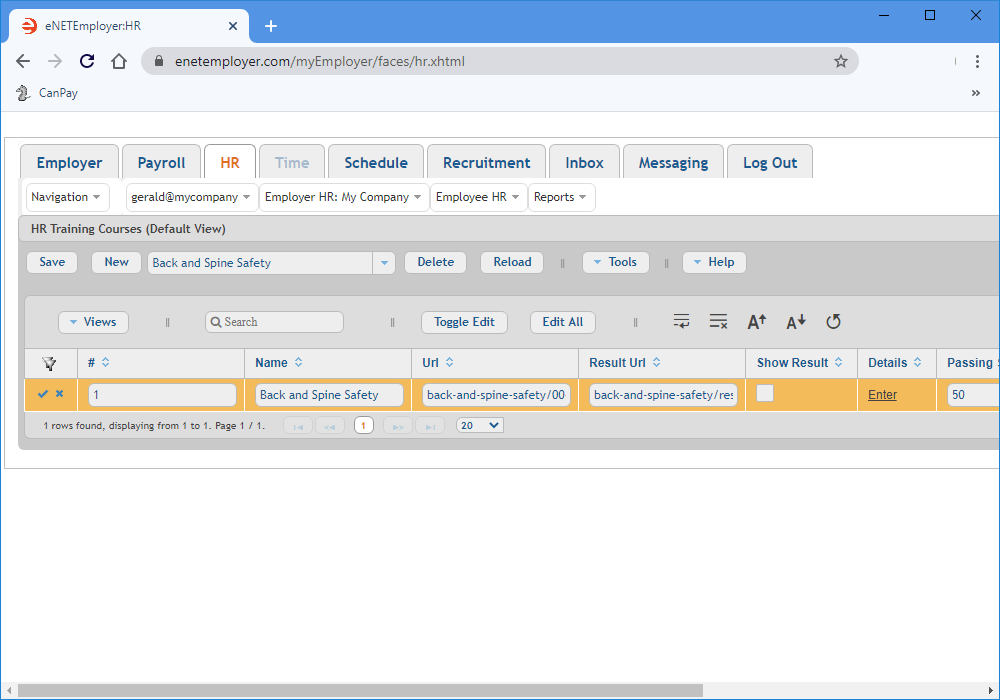
- When the new row appears, use the Name cell to modify the descriptive name for the course if desired.
- Do not change the data for the URL and Result URL cells. These items are preset, and must remain as shown so that your employees will be directed to the correct training course and employee results pages while they interact with the course.
Example: In Fig. 03 below, we have added the Back and Spine Safety course. This course can be assigned to all employees who work in a position where they may be prone to a back-related injury. - If you wish to provide your employees with a link to the quiz answers after they submit their quiz, move to the Show Result cell and place a check in the box. This can be beneficial for some courses, as it will help the employee know which questions they answered incorrectly and the reason for the incorrect response.
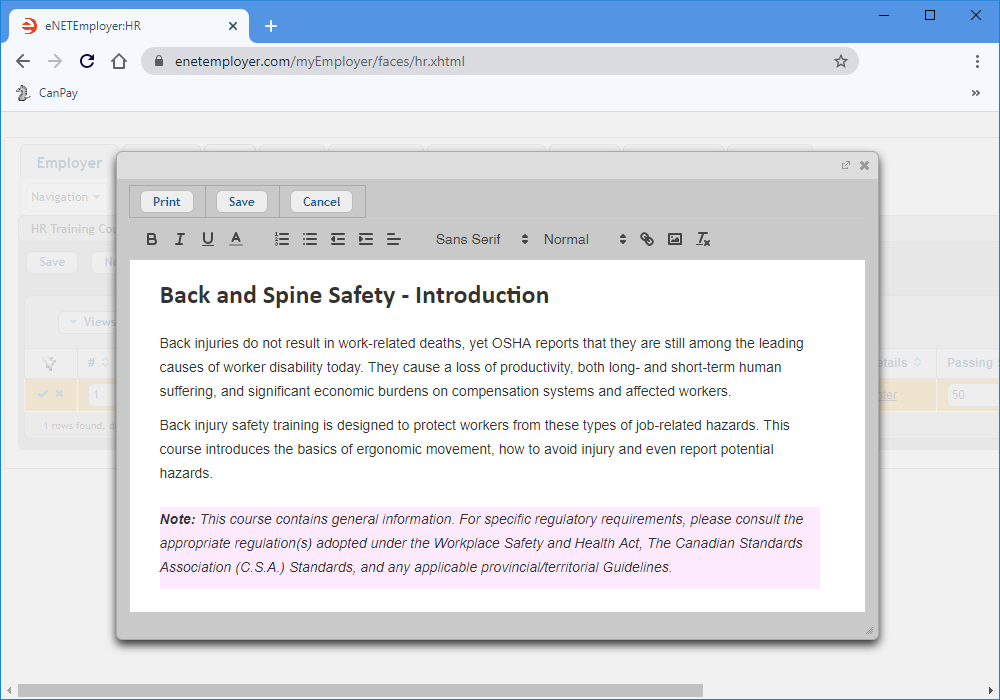
- Move to the Details cell and click on the Enter hyperlink. This opens a window that allows you to enter a detailed description for the course. Although these courses are pre-formatted, you may wish to customize the description with your company's logo or other branding.
- Enter the course's details as needed. You can use the formatting bar to change the font size, color, etc. You can also paste content into the window from another program (word processor, email, website, etc.).
Example: In Fig. 04 below, we have pasted the text from eNETEmployer's Back and Spine Safety course. - When the course details are complete, choose the Save button to close the pop-up window. This returns you to the main screen where the cell's original hyperlink has been replaced with the word "Edit" to indicate that you can perform further changes to the details when needed.
- Move to the Passing Score cell and enter the value that the student needs to achieve on order to successfully pass the course. If the student does not achieve this value, they will fail the course and the HR administrator will receive an email that shows the failing score along with the questions that the student answered incorrectly.
- Move to the Email cell and enter the email address of the person who will be responsible for receiving or reviewing the completed courses. This is typically the HR Manager or someone in your company's Training department.
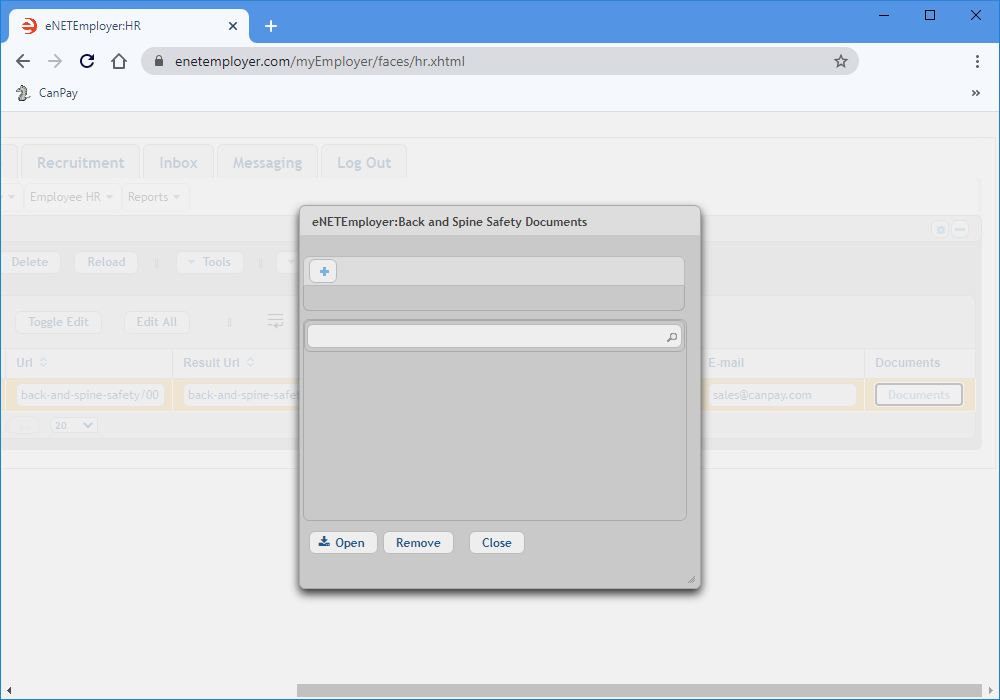
- Select the Documents button to open a window where you can attach documents and files that relate to the current course. This can include PDFs, word processing documents, spreadsheets and images.
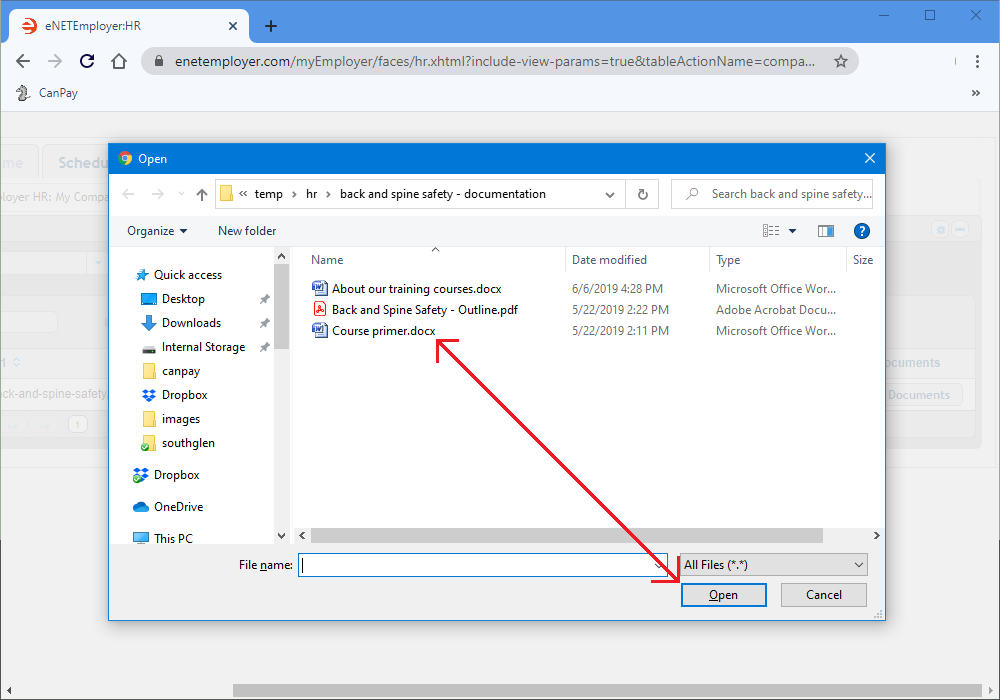
- When the Documents window appears, select the "+" (plus sign) icon to display the Open dialog box, and then use this window to navigate to the location of the document(s) that you wish to add.
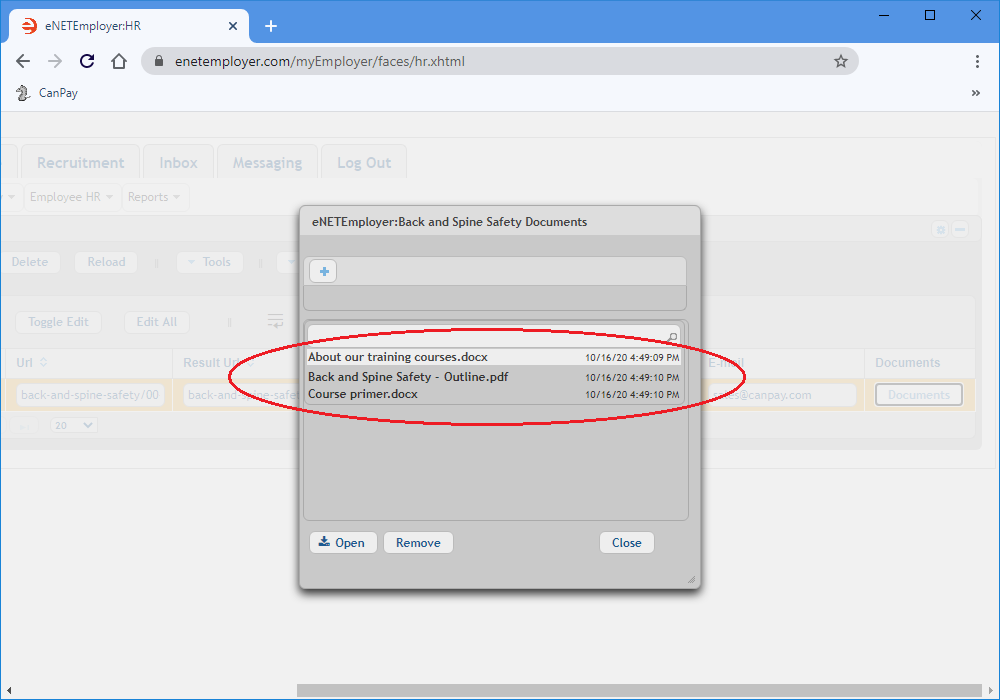
Example: In our example below, we see several documents that relate to our course. - Select one or more documents as needed, and then choose the Open button. This adds the selected document(s) to the eNETEmployer Documents window.
- Select the Close button to exit the Documents window and return to the HR Training Courses screen.
- Choose the Save icon (the Check Mark icon at the left side of the row) to accept your changes. This action saves the changes for the row and takes you out of Edit Mode.
- Repeat the preceding steps to enter additional courses to support your company's HR needs.
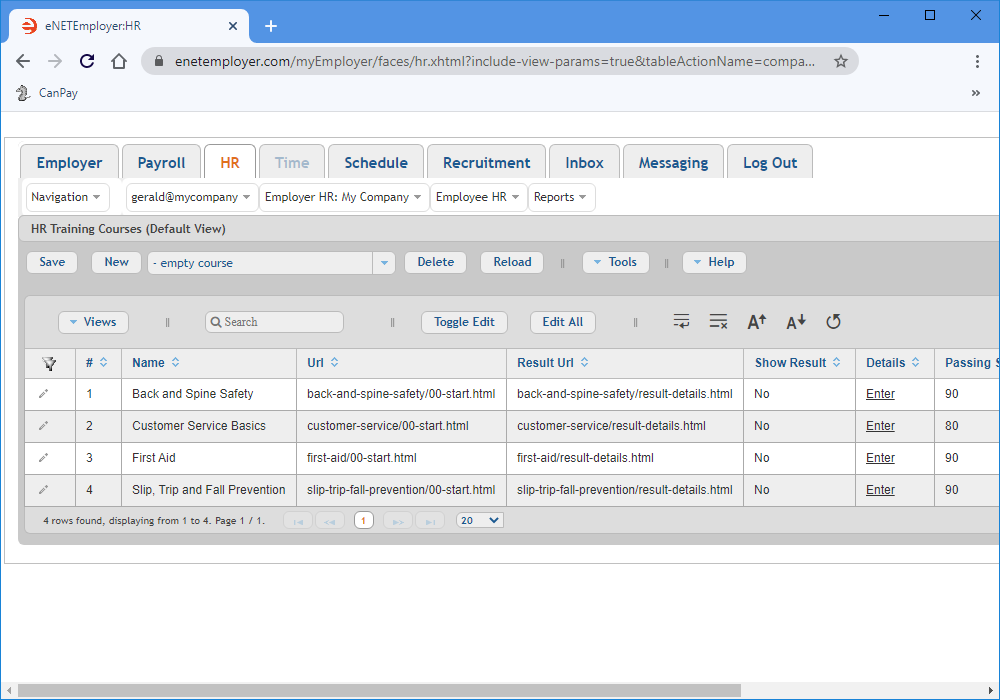
Example: In Fig. 08 below, we have added a total of four courses that can be assigned to our employees as needed.
Follow Up Steps: Now that you've added the courses, the next step would be to review the associated quizzes to ensure that the questions and scoring weights are suitable. This process is described in the Editing HR Training Quizzes tutorial.
Now that you know how to add a predesigned course, let's learn how to add a custom course with content of your own choosing.
HR Training Courses Help page...
To Add a Custom Training Course:
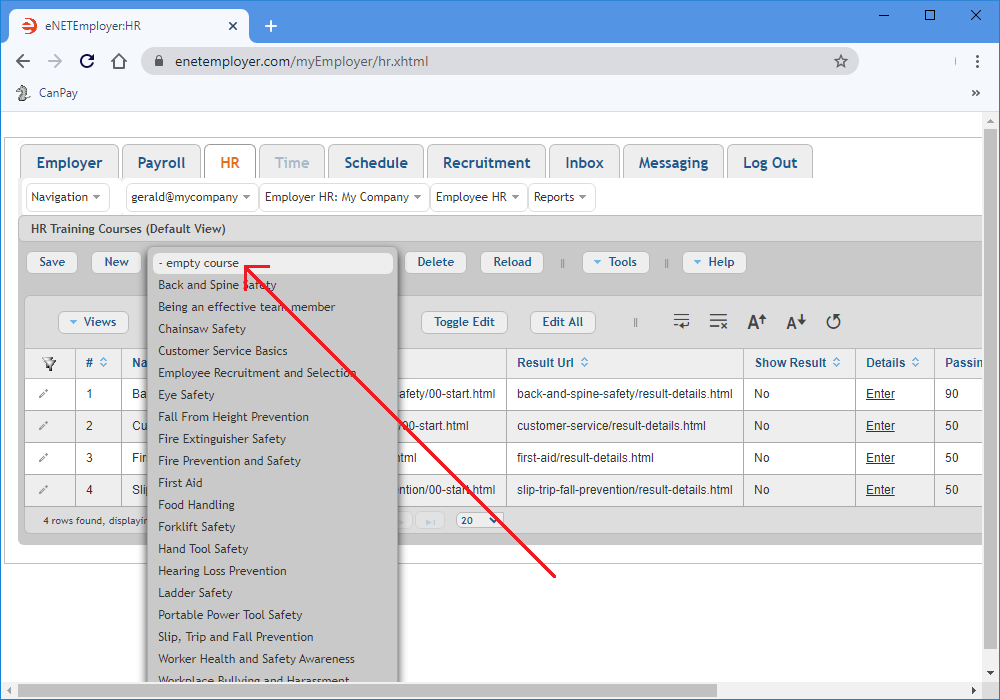
- With the HR Training Courses screen open, select the drop-down list immediately to the right of the New button and then choose the Empty Course option.
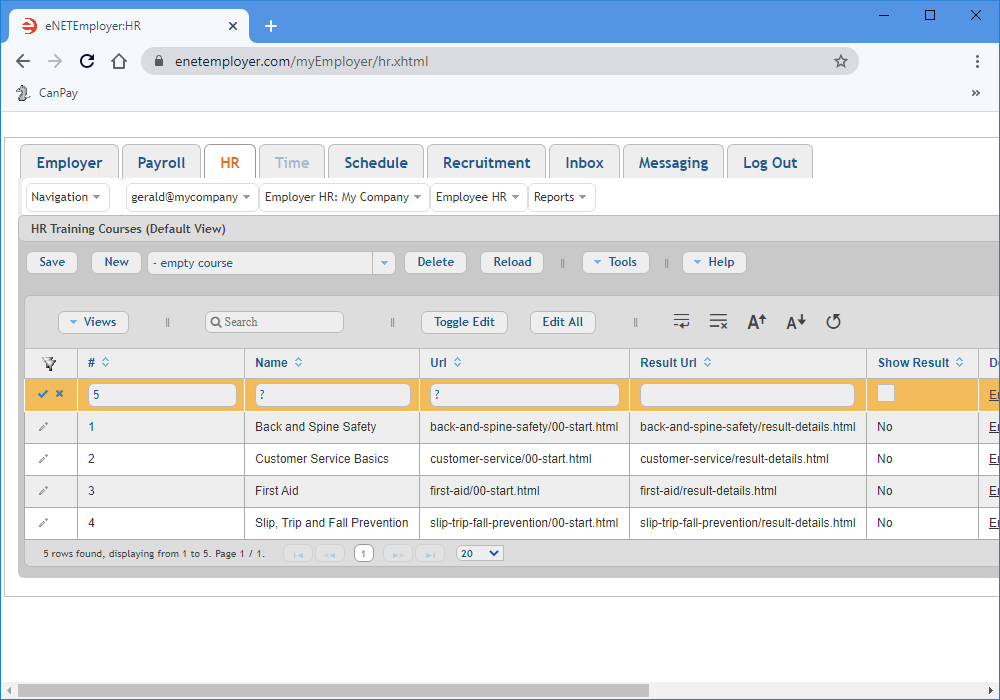
- Select the New button to insert the custom course row into the table.
- When the new row appears, use the Name cell to assign a descriptive name for the course.
- Move to the URL cell and enter the full pathname to the course location on the internet. This could be somewhere on your company's own web servers, or a location that hosts courseware. Note: If the course exists at a location where the employee will be required to login, you must remember to send your employee(s) an email with the login details.
- Move to the Result URL cell and enter the full pathname to the location of course's results/answers page. This step is optional and can be used if you have a page that shows the correct answer for each question.
- Place a check in the Show Results box if you wish to provide your employees with a link to the quiz answers after they submit their quiz.
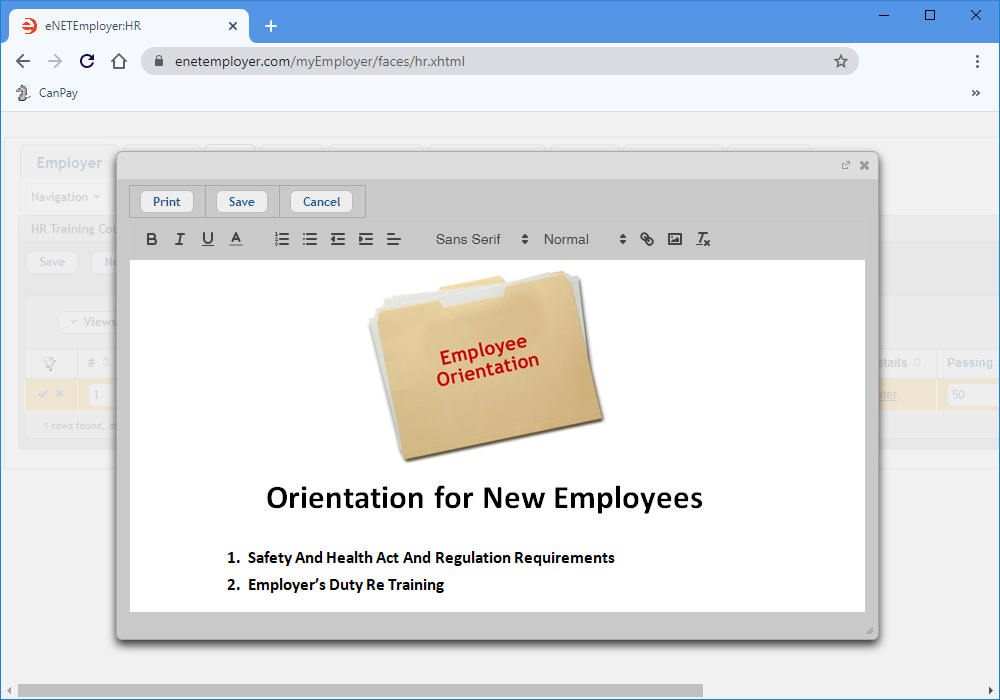
- Use the Details cell's Enter hyperlink to provide a detailed description for the course, and then Save the details when you are complete.
Example: In Fig. 11 below, we have entered text for a sample new employee orientation course. - Enter the course's required passing score in the Passing Score cell. If the student does not achieve this value, the HR administrator will receive an email that shows the failing score along with the questions that the student answered incorrectly.
- Use the Email cell to enter the email address of the person who will be responsible for receiving or reviewing the completed courses.
- Use the Documents button to attach files that relate to the current course (e.g. PDFs, word processing documents, spreadsheets, images).
- When the detals for your custom course are complete, choose the Save icon (the Check Mark icon at the left side of the row) to accept your changes.
- Repeat the preceding steps to enter additional custom courses as needed.
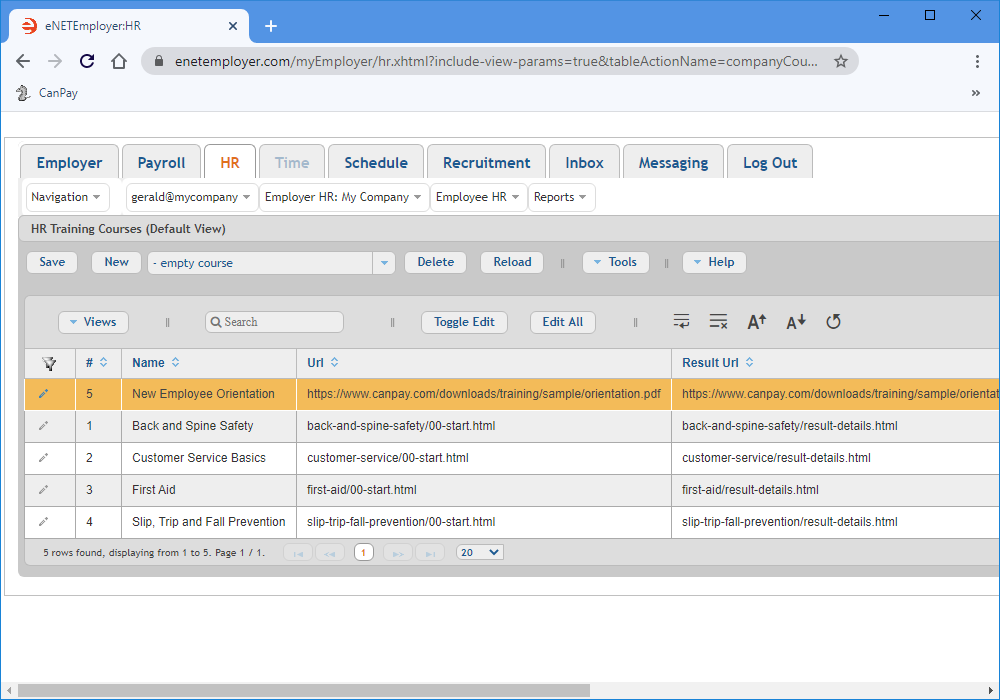
Example: In Fig. 12 below, we have added a custom course that we can assign to new employees.
Follow Up Steps: Now that you've added the custom course, the next step would be to add the custom quiz that each emnployee must take in order to pass the course. This process is described in the Editing HR Training Quizzes tutorial.
This completes the tutorial on adding HR training courses. To learn how to assign these training courses to your individual employees, refer to the Assigning Training Courses tutorial.
See Also:
