Help Toolbar (select a button to browse other online help sections) Home Tutorials Resources Search Tabs & Menus Button Bar Table & Data Display |
Working with the Mailboxes Screen
This tutorial will show you how to work messages that have been removed from the various Messaging mailboxes. This can include viewing the content of deleted message and/or moving them to other mailboxes to avoid permanent removal.
There are two parts to this tutorial:
NOTE: Click on the images below to view them at full size
1) General Usage:
This section of the tutorial will discuss some common uses of the Mailboxes screen, including message count viewing and accessing other mailboxes.
- To view how many messages exist in each mailbox, select the Messaging tab, and then choose the Mailbox - Mailboxes menu option. This opens the Mailboxes screen where you can view information about each of your mailboxes and create custom mailboxes.
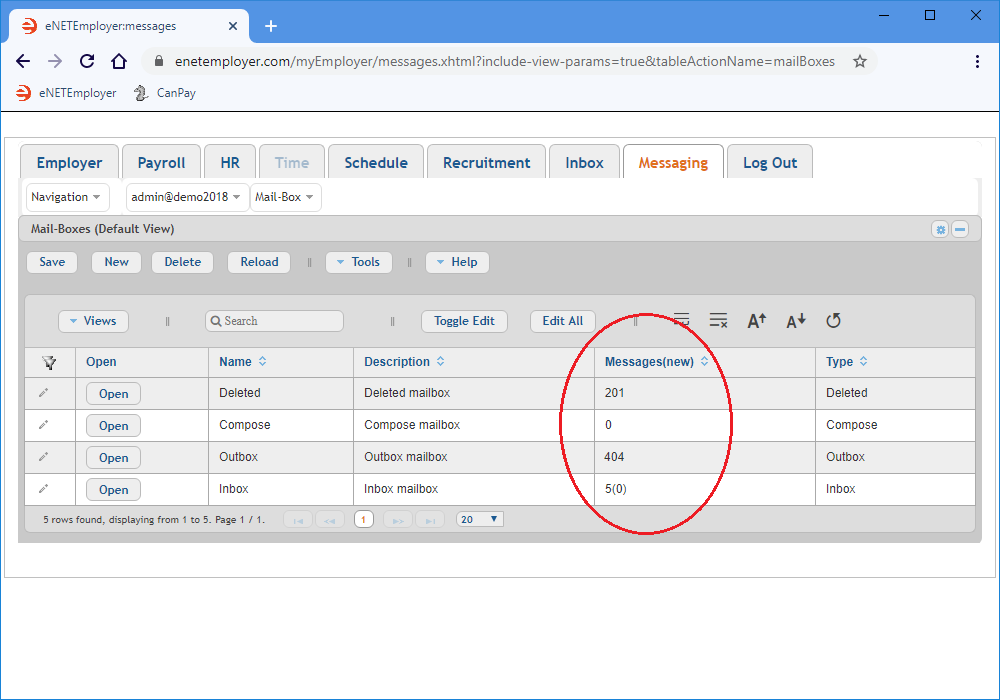
- Move to the Message column and take note of the various message counts for each mailbox.
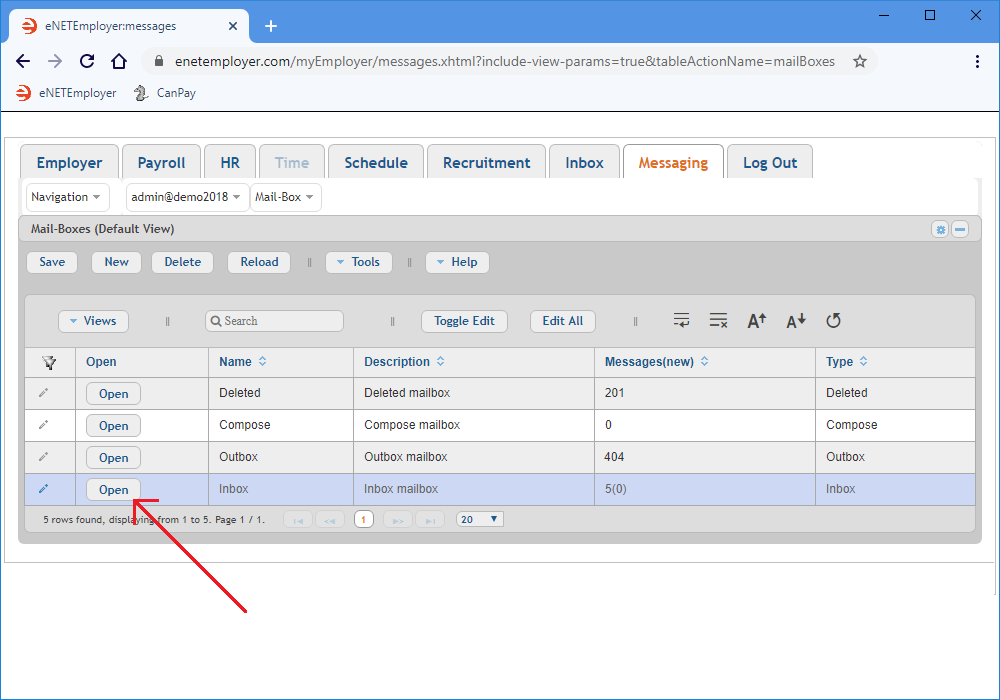
Example: In Fig. 01 below, we see the number of messages that exist in each mailbox. - To view the content of any mailbox, choose the Open button beside its name. This will immediately direct you to the chosen mailbox so that you can begin working with those messages.
Example: In Fig. 02 below, we see the Open button highlighted for the Inbox.
Now that you know how to review the message count and to navigate to other common mailboxes, let's learn how to create our own custom mailbox.
2) To Create a Custom Mailbox:
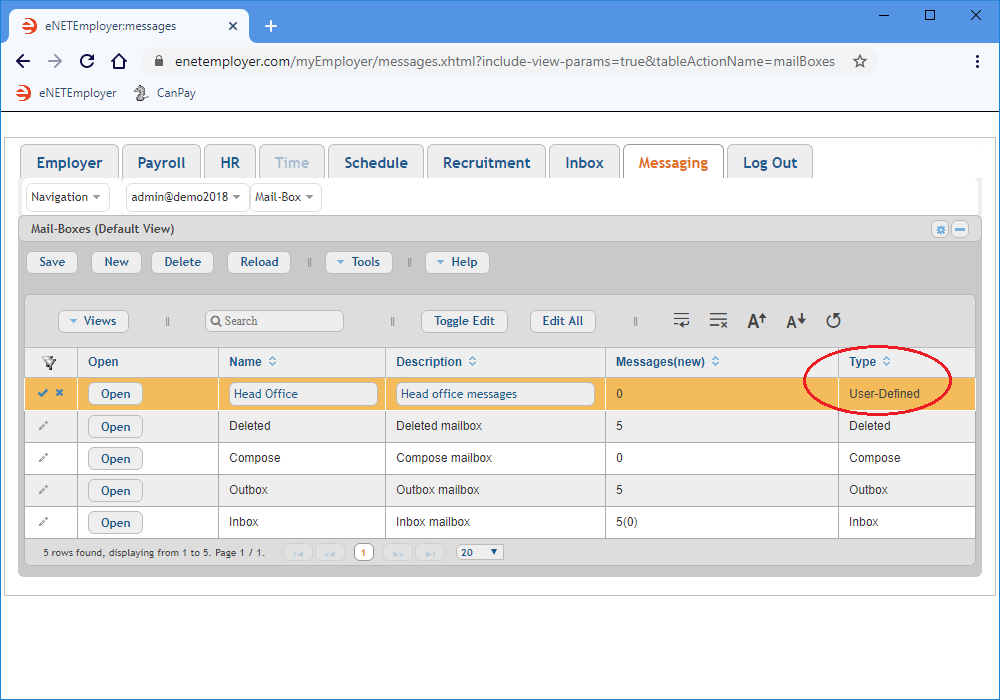
- Select the New button to a new mailbox row into the table.
- Move to the Name cell and enter a name for your mailbox. the name should be concise
- Move to the Description column and enter a brief description that will help you to understand the purpose of this mailbox.
Example: In Fig. 03 below, we see our custom mailbox with its name (Head Office) and description completed. The Type column shows that the new mailbox is "User-Defined".
This completes the tutorial on working with the Mailboxes screen.
See Also:


