Help Toolbar (select a button to browse other online help sections) Home Tutorials Resources Search Tabs & Menus Button Bar Table & Data Display |
Working with User-Defined Mailboxes
eNETEmployer allows you to create custom mailboxes so that you can store messages in a place other than the main Inbox. This tutorial will show you how to create a custom mail box and how to manage messages using the user-defined mailbox.
This tutorial has two parts:
NOTE: Click on the images below to view them at full size
To Open a Custom Mailbox
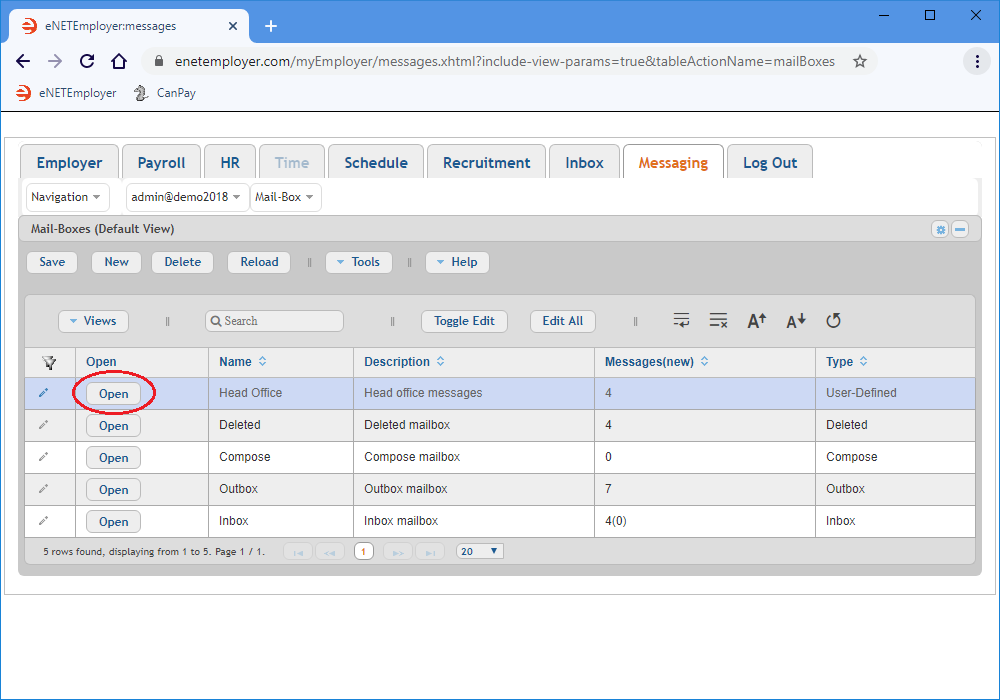
- Select the Messaging tab and then choose the Mailbox - Mailboxes menu option. This opens the Mailboxes screen where you can manage all of your eNETEmployer mailboxes.
- Choose the Open button beside the name of your desired custom mailbox. This will immediately direct you to the chosen mailbox so that you can begin working with those messages.
Example: In Fig. 02 below, we see the Open button highlighted for the custom Head Office mailbox.
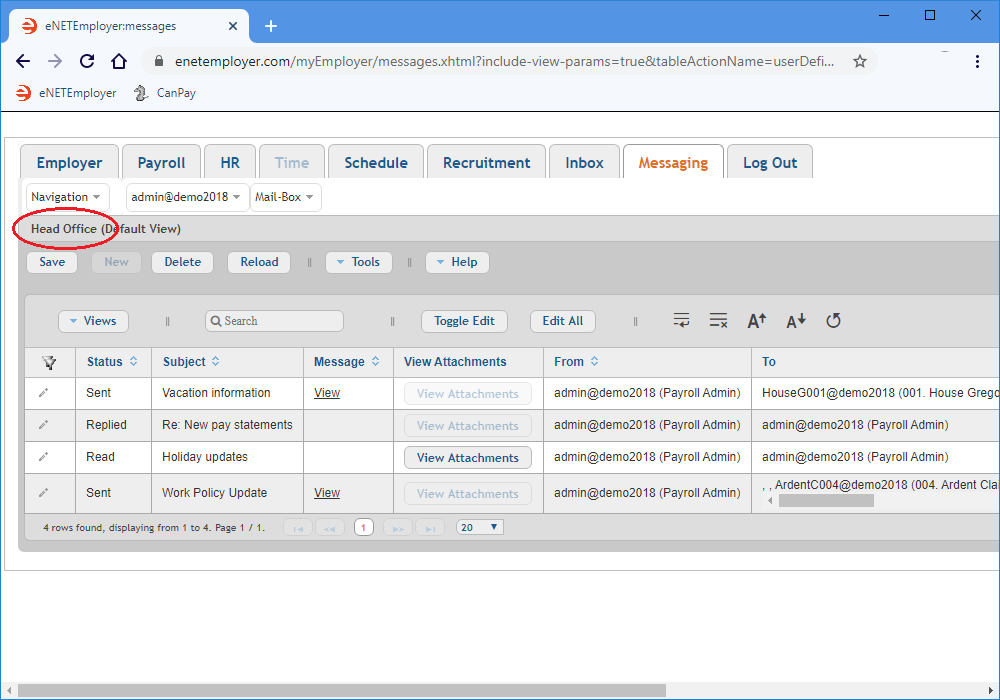
- Choose the Open button beside the name of your desired custom mailbox. This will immediately direct you to the chosen mailbox so that you can begin working with those messages.
Example: In Fig. 02 below, we see a custom mailbox that contains several messages. The mailbox's name is displayed at the top left of the table for easy reference.
Now that you know how to open a custom mailbox, let's learn how to move a message from your Inbox to a custom mailbox.
2) Move a Message to a Custom Mailbox:
- Select the Mailbox - Inbox menu option. This opens the Inbox screen where we see the messages that have been sent to us.
- Move to the message row that you wish to move, and then double-click on the row to activate the applicable cells for editing (you can also choose the Pencil icon at the left side of the row perform this action).
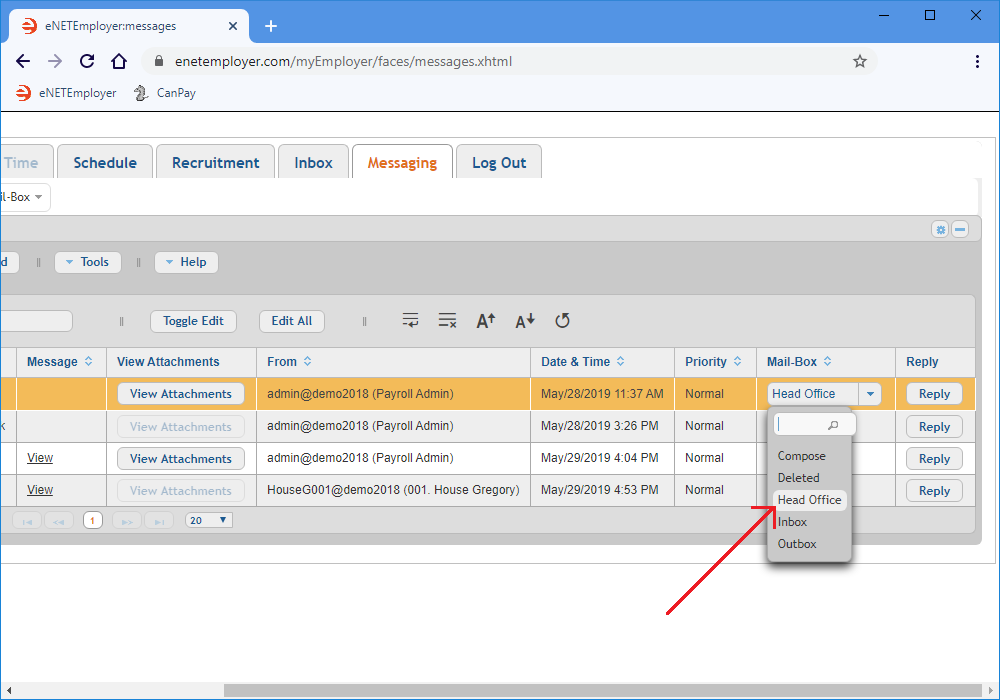
- Move to the Mailbox column for the edited row, and then click on the downward arrow. This displays a list of the available mailboxes.
- Select the custom mailbox from the list of mailbox options. This closes the drop-down list and displays the target mailbox in the cell.
Example: In Fig. 03 below, we have selected the Head Office mailbox - the location where the message will be moved.
- Choose the Save button to store your changes. The message is immediately removed from the screen and stored in the mailbox that you selected.
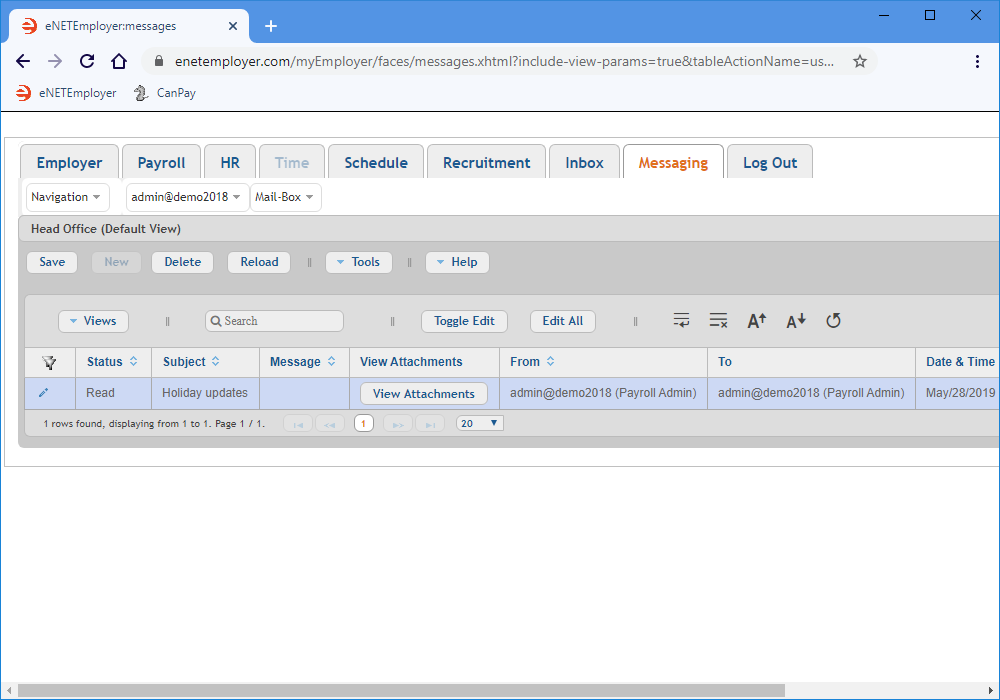
- To view the moved message, choose the Mailbox - Mailboxes menu command, and when the Mailboxes screen appears, select the Open button for your custom mailbox. This displays your custom mailbox along with the newly moved message.
Example: In Fig. 04 below, we see Head Office folder with one message - the one we just moved from the Inbox folder.
- Repeat the preceding steps to move other messages as needed.
This completes the tutorial on working with user-defined mailboxes.
See Also:


