Help Toolbar (select a button to browse other online help sections) Home Tutorials Resources Search Tabs & Menus Button Bar Table & Data Display |
Creating Payroll Distributions
This tutorial will discuss distribution records and how eNETEmployer uses them to allocate an employee's work time between multiple departments. These allocated hours and amounts can then be exported to your company's General Ledger (GL). For example, if Joe worked 40 hours and you needed to split his time evenly between the Sales and Marketing departments respectively, you would create two distribution codes entitled "Sales" and "Marketing", then you would assign 20 hours to each. eNETEmployer will then split the employees wage costs and all benefit costs proportionately between the two. Refer to the Distributions help page for more details on this topic.
This tutorial includes instructions for creating two sample distributions - Default and Factory. Later on when we setup the employee's earnings, we would associate the distribution to each as needed.
NOTE: Click on the images below to view them at full size
Step A) Create a Default Distribution
We will begin by entering the Default distribution details. You can substitute your own company data for the sample data shown in this tutorial.
- From the Payroll tab, open the Current Payroll - Distributions screen where you can work with your payroll distributions.
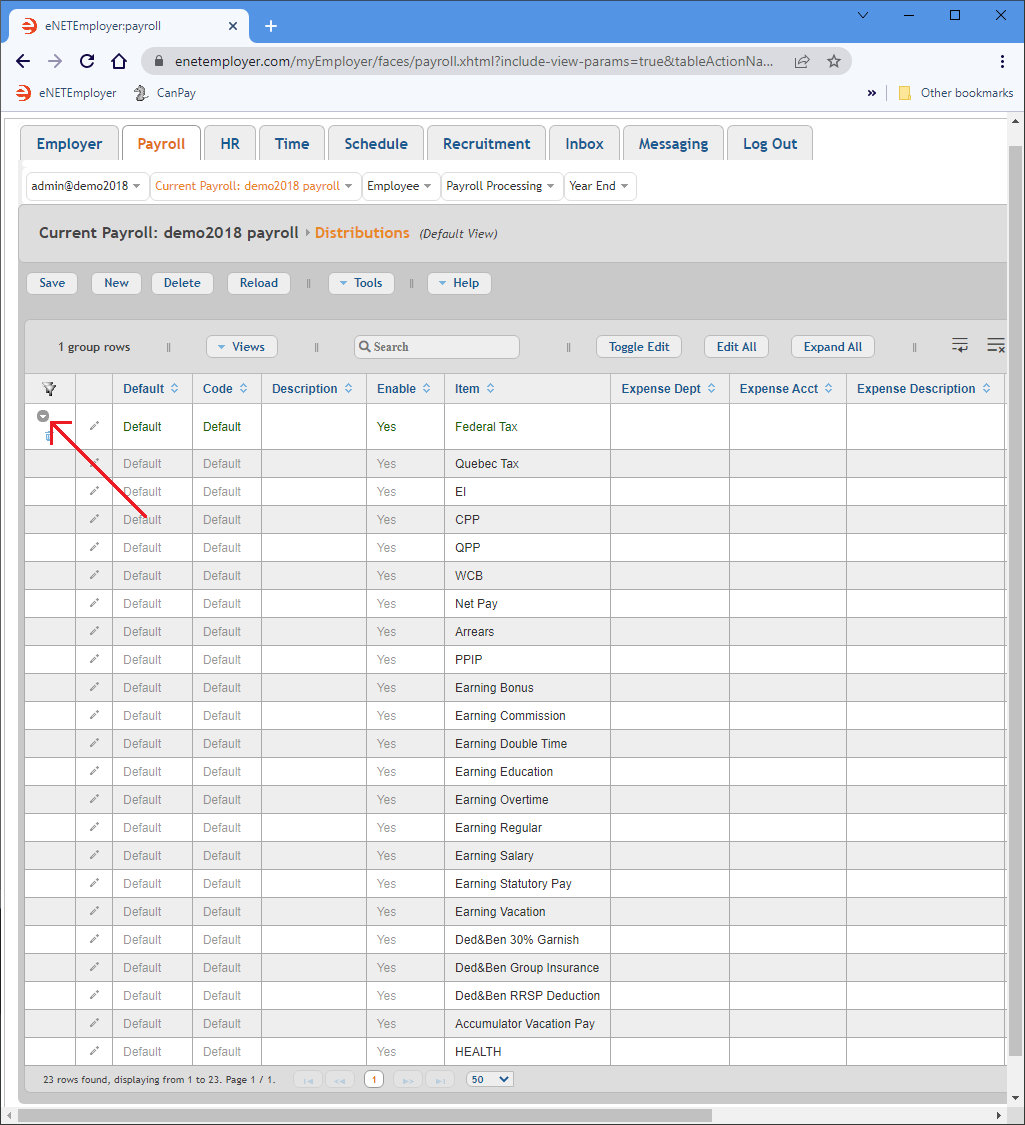
- Choose the New button to insert a blank distribution row in the table, and then choose the Expand icon (the right-facing triangle at the beginning of the row) to reveal the sub rows.
- If you do not plan to allocate any employee hours by department, then simply save the row to complete the default distribution process (you are finished with the tutorial at this point).
- If you wish to allocate employee hours by department, please proceed to the next step.
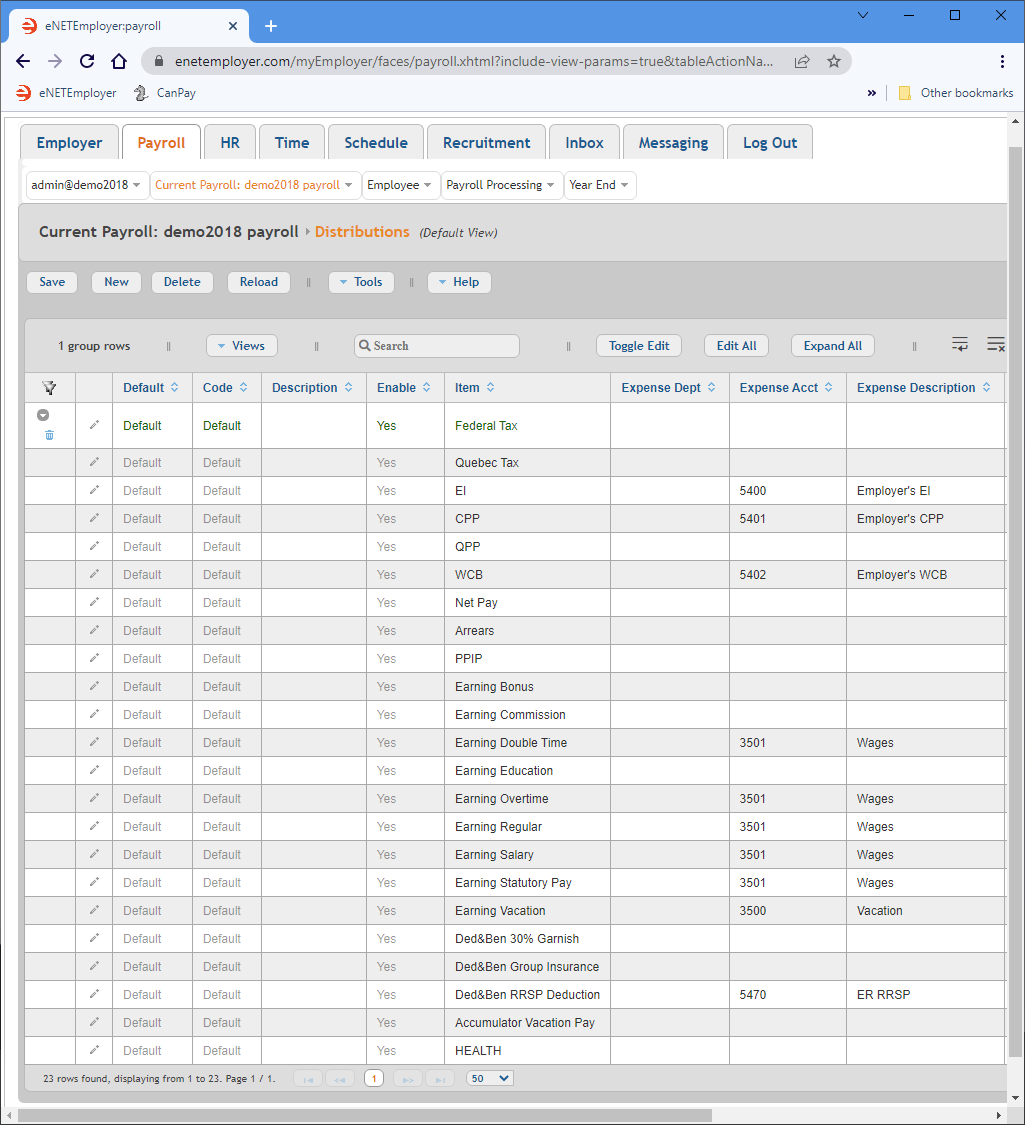
- Edit the various cells as needed as they relate to your payroll and general ledger (press <F1> to use the Online Help system if you need to look up a definition for the various cells).
Example: In our example, we have assigned expense and liability accounts to a variety of items - accounts that correspond to our fictional GL account.
Default Name Enable Item Expense Acct Expense Description Liability Acct Liability Description Default Default Yes Federal Tax 2200 CRA Remittance Quebec Tax EI 5400 Employer's EI 2200 CRA Remittance CPP 5401 Employer's CPP 2200 CRA Remittance QPP WCB 5402 Employer's WCB 2201 WCB Net Pay 1070 Net Pay Arrears PPIP Earning Bonus Earning Commission Earning Double Time 3501 Wages Earning Overtime 3501 Wages Earning Regular 3501 Wages Earning Salary 3501 Wages Earning Statutory Pay 3501 Wages Earning Vacation 3500 Vacation Ded&Ben 30% Garnish Ded&Ben Group Insurance 5470 ER RRSP 2271 RRSP Ded&Ben RRSP Deduction Accumulator Vacation Pay Health 5403 - Once your data is complete, select the Save icon for each row (the check mark icon at the left side of the row). This accepts the changes and the Edit Mode icons are removed to indicate that the entire row has been saved. You can also choose the Save button from the Button Bar above the table.
- When you are finished working with the default distribution, choose the Collapse icon (the left-facing triangle at the beginning of the row) to hide the various sub-rows.
Step B) Create a Second Distribution
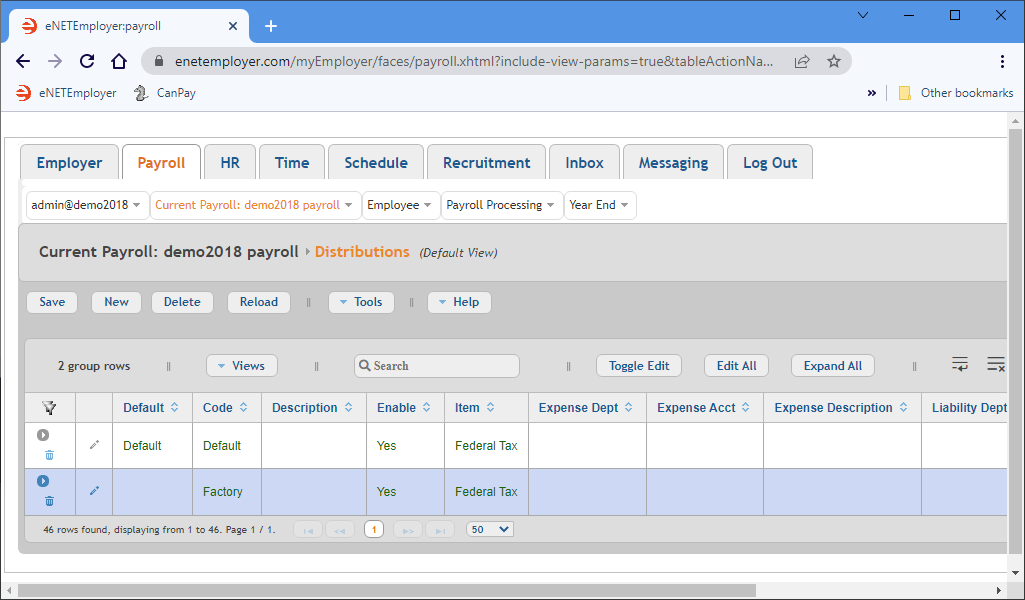
We will continue the tutorial by adding one more distribution entitled Factory. This sample distribution can be used to allocate hours for employees who work in the company's factory.
- Select the New button to insert an additional distribution row into the table.
- Expand the new row to reveal its sub-rows (if necessary), and then edit the various cells as needed.
- When you are finished editing the second distribution, Save the changes.
This completes the Distributions tutorial.
Note: If you created the distributions shown in this tutorial (or a custom distribution of your own), you should also review and/or complete the Adding Employee Earnings Tutorial so that your distributions and related earnings will be associated correctly.
See Also:
- Distributions help topic
- Employee Earnings help topic
- Assigning Employee Earnings Manually
- Assigning Employee Earnings Using a Template


