Help Toolbar (select a button to browse other online help sections) Home Tutorials Resources Search Tabs & Menus Button Bar Table & Data Display |
Enter Employee Work Hours with Speedy Update
Before you can calculate a payroll, you must specify the hours that each employee has worked for the pay period. Note: Hourly-based employees will require their time to be entered for each pay period since it is assumed that these hours may fluctuate from one period to the next. Conversely, Salary-based employees do not need to have their hours entered each pay period since the program sets them to reoccur every pay period (unless you override them).
There are two methods for entering employee work hours:
- Manual Entry: This method involves entering each employee's regular work hours into either the Speedy Update or Earning Items screens so that the program can calculate the wages. Hours entry is typically required for Hourly employees only since their rates are subject to change each pay period. Salary employees do not require hours entry as their wage amounts are typically "fixed" and are not based on the number of hours worked. Note: The manual method is described in the tutorial on this page.
- Import Hours: This method involves importing work hours from a spreadsheet file so that you do not have to perform any manual data entry. Since the import procedure is performed in one easy step, it is not only expedient, but also reduces the chance of data entry error. If you wish to learn how to import work hours, please refer to the Importing Employee Work Hours tutorial.
NOTE: Click on the images below to view them at full size
To enter hours using Speedy Update:
- From the Payroll tab, open the Payroll Processing - Speedy Update screen where you can input the hours that your hourly employees have worked for the pay period.
Note: You are also able to enter the work hours for both salaried and hourly workers in the Earning Items screen (that is the location where you originally assigned earnings to each employee). However, the Speedy Update page makes the data entry process more efficient for Hourly employees only, by simplifying the options and including only those that pertain to hours entry.
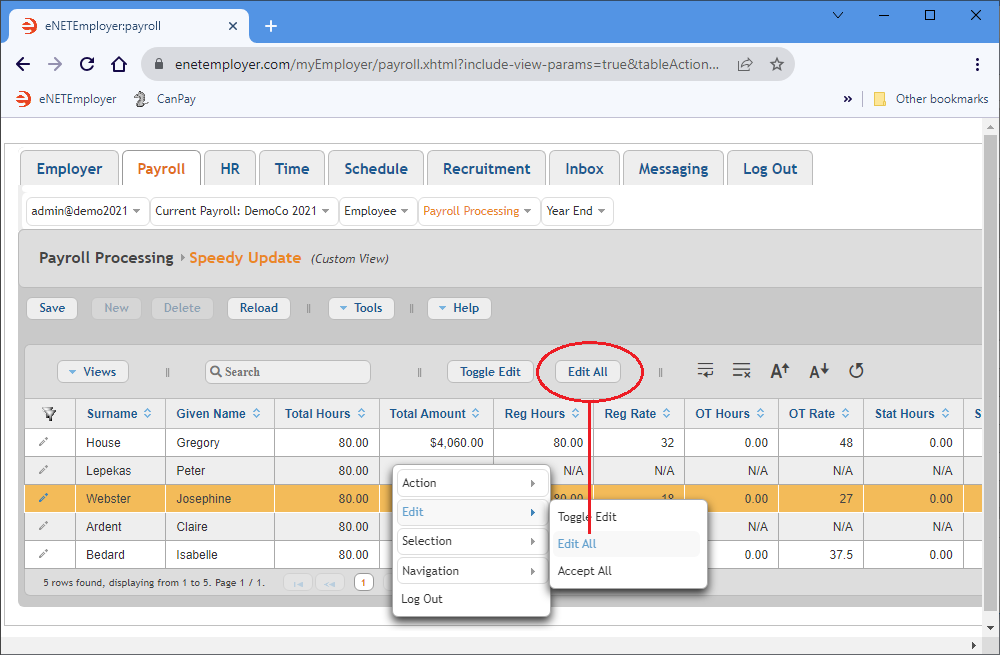
- Choose the Edit All button from the Button Bar. This activates Edit Modefor all of the employees on the screen. The button label immediately changes to read "Accept All" to indicate that you can save all of your changes in one step after you have completed entering the work hours. Note: You can also activate Edit Mode for all of the rows by right-clicking on one of the rows in the table, and then choosing the Edit - Edit All command from the pop-up menu that appears.
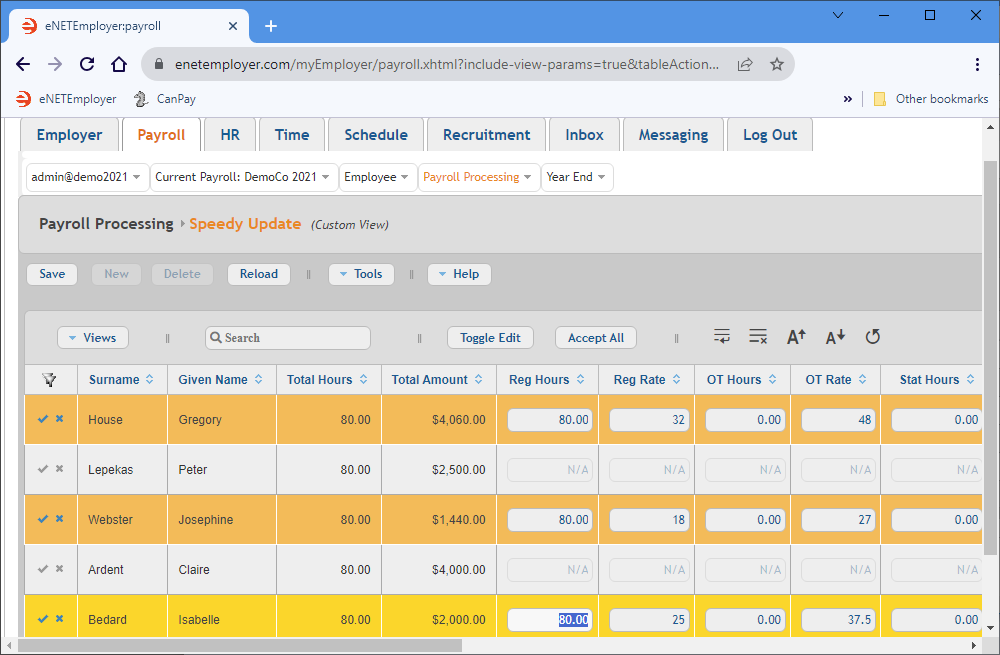
- With all of the cells now available for editing, move to the cell that corresponds to your "regular" hourly earning, and then enter the number of hours that each employee has worked for the pay period.
Example:In our example below, we have entered 80 hours for each hourly employee - this represents the time worked over a typical two-week work period.. We have entered these hours in the Reg Hours cell (the Reg Hours column name is taken from the Short Name setting for the Regular earning as set in the Earnings screen).
Note: Salary-based earnings do not need to be entered here since they are programmed to reoccur every pay period. However, if you do need to edit a recurring Salary earning (or to add a one-time earning for the current period only), you would do so via the Earning Items screen.
Employee Total Hours Reg Hours Gregory House 80.00 80 Peter Lepekas 80.00 n/a Josephine Webster 80.00 80 Claire Ardent 80.00 n/a Isabelle Bedard 80.00 80 - If your employees have worked overtime hours, move to the corresponding earning cell and enter the appropriate number of hours for each category.
- Repeat the preceding 2 steps for any other earning type for which the employee(s) have worked.
- Once you have entered the work time for the hourly employees, right-click on one of the rows in the table, and then choose the Edit - Accept All command from the pop-up menu that appears. This saves the changes for all rows. You can also choose the Accept All button from the Button Bar to perform the same action.

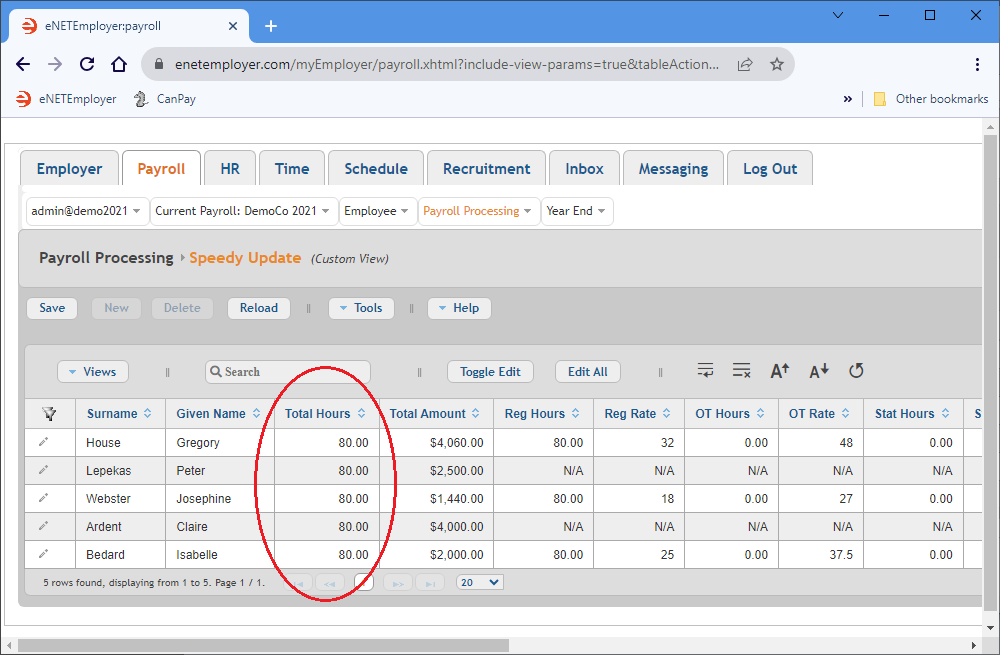
Notice how each hourly employee's Total Hours and Total Amount columns update to reflect the hours that we just entered.
This completes the tutorial on entering employee work hours in the Speedy Update screen.
See Also:

