Help Toolbar (select a button to browse other online help sections) Home Tutorials Resources Search Tabs & Menus Button Bar Table & Data Display |
Importing Employee Work Hours (Custom Format)
eNETEmployer provides two methods for importing work hours:
- Method 01: Work Hours (Custom Format): Available for the Employee - Earning Items screen only, this special method gives you the ability to import time sheet records from any third-party system via a comma-separated values (.CSV) file. This method is described in the tutorial on this page.
- Method 02: Generic Table Import: Available for all program screens, this generic import method allows you to specify a comma-separated values (.CSV) file that can be used to update the data in the main table on each screen. Refer to the Importing Data from a Spreadsheet (.CSV) File tutorial for more information on this method.
To Import Employee Work Hours using the Custom Format:
As mentioned above, the following tutorial will use the "Custom" method to import the employee work hours. We will import hours for three sample employees using a comma-separated values (.CSV) file.
- Choose the Employee - Earning Items menu option. This opens the Employee - Earning Items screen where you can import the hours that your employees have worked for the pay period.
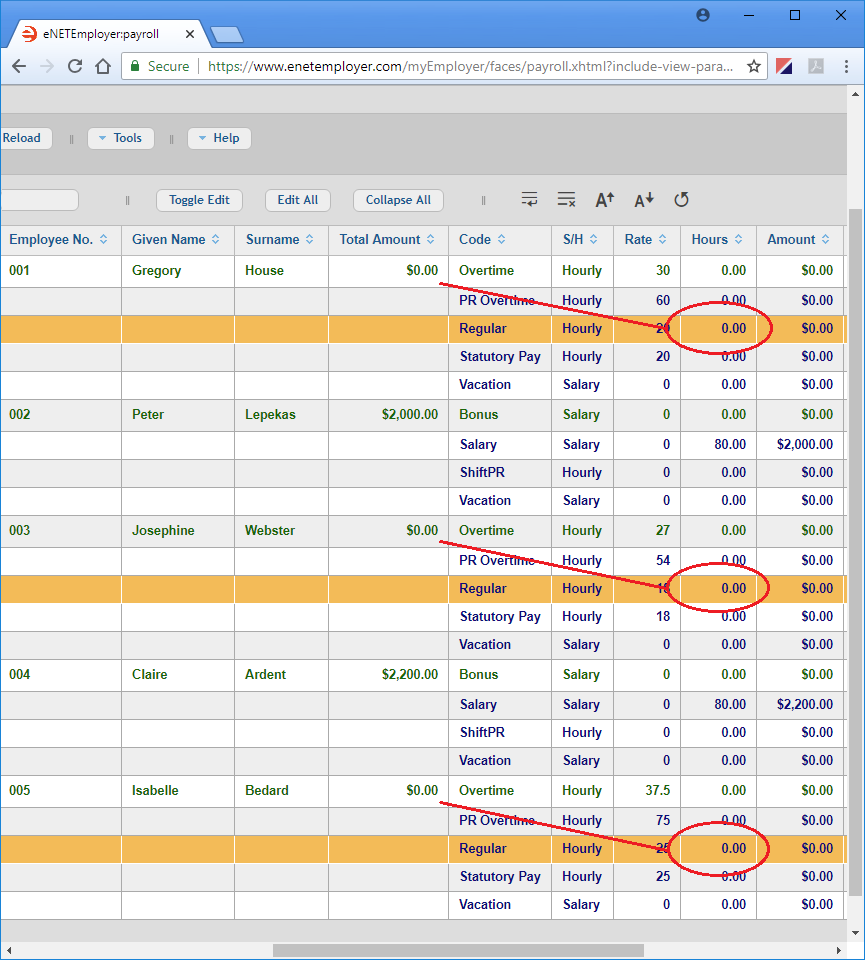
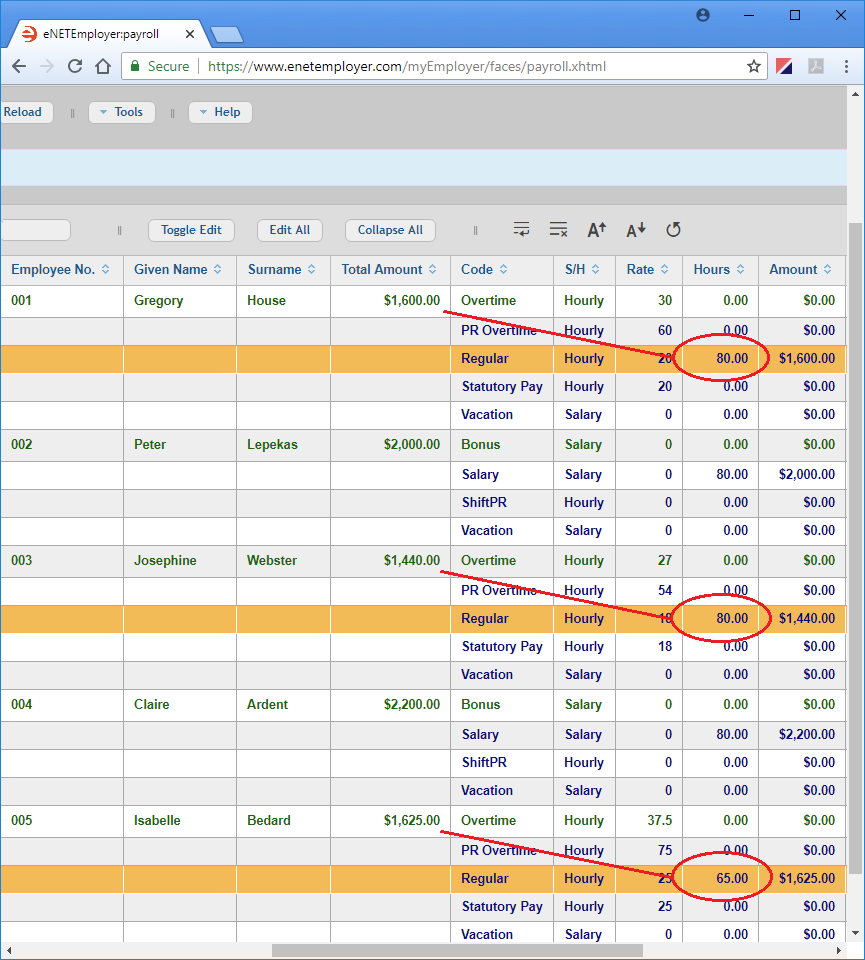
Example: In our example below, we have used the Customized View feature to reshuffle the columns for easier viewing. For this import lesson, we will focus on the Hours cell for Regular earning type (as shown in the highlighted rows for our three hourly employees below). In our example, notice how the Total Amount cells show $0.00 because the hours for these three employees have not yet been entered.
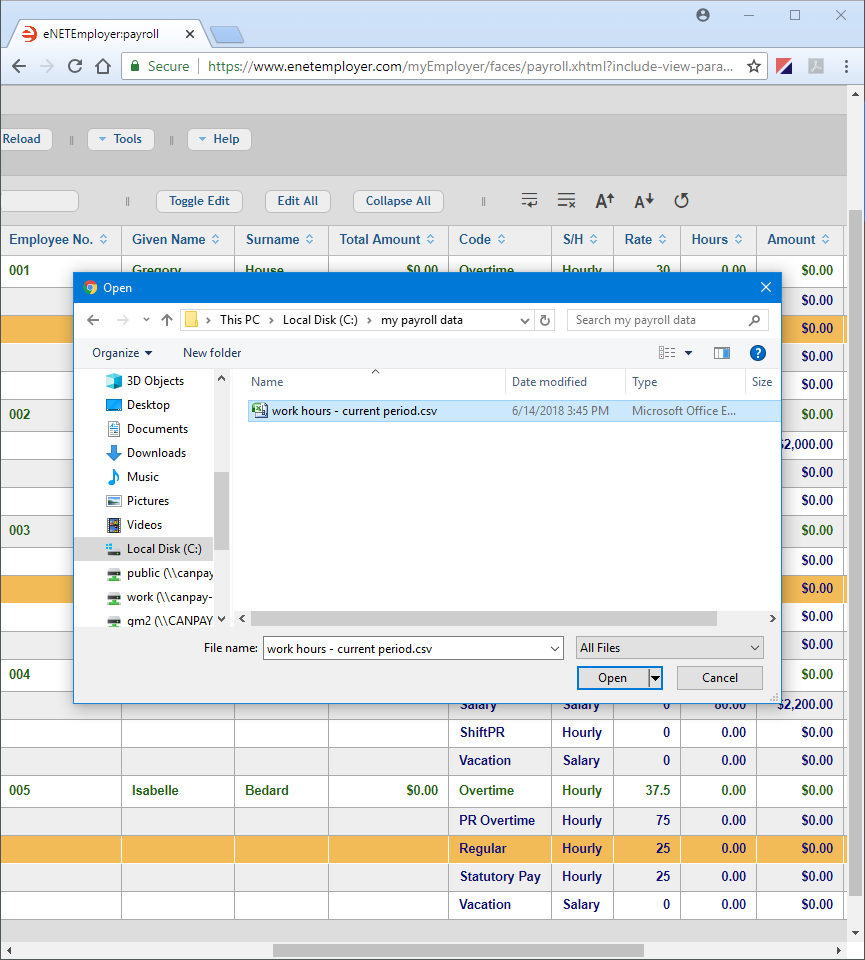
- Select the Browse button from the Button Bar above the table and when the Open dialog box appears, navigate to the location where your .CSV work hours file is stored. In our example below, the import file is located in the "my payroll data" folder on our C: drive.
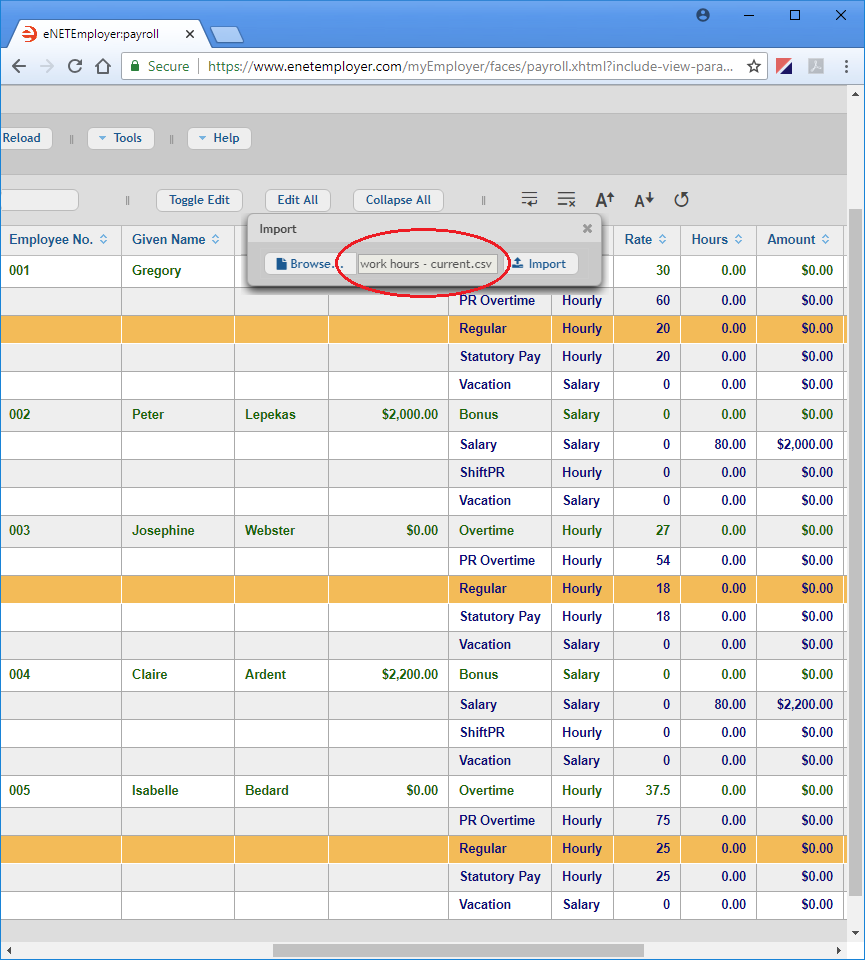
- Select the desired import file from the Open dialog box, and then choose the Open button. This places the name of the import file into the cell that is adjacent to the Import button as shown below.
The Custom Work Hours Import Format: The required format of the work hours file is:
<employee#>, <earning#>, <hours>.
In plain text form, the sample .CSV file for our three employees is formatted as follows:
001,1,80.00
003,1,80.00
005,1,65.00Click here for detailed instructions on this special import format.
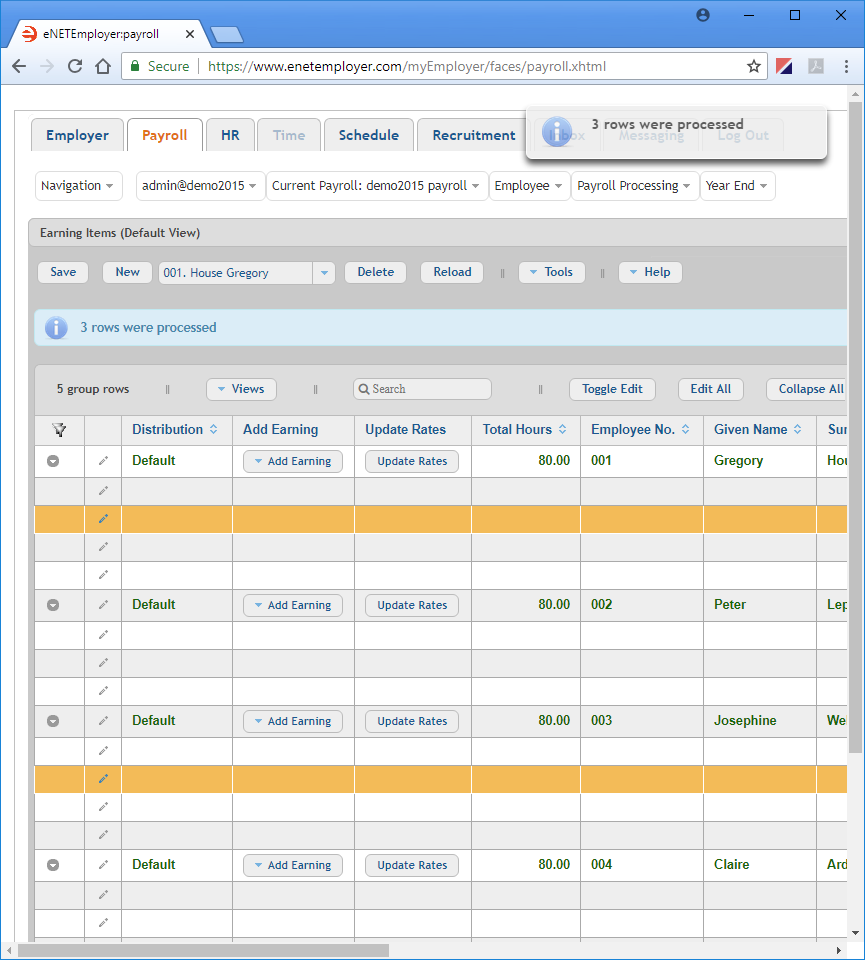
- Select the Import button to complete the process. Once the data is imported, a message appears on the screen indicating how many rows were successfully processed, as shown below.
- Move to the Hours column and review the data that was imported. In our example below, we see that the Hours cells (that were previously empty) now show values for the three employees. You will also notice that the Total Amount column for the employee is updated to reflect the resulting income amounts.
This completes the tutorial on importing employee work hours using the custom import format.
See Also:
- Importing (an Overview of Import Types)
- Importing Employees (and other data) from a Spreadsheet File
- Importing Employees from a Different Payroll (the Employee Database)
- Importing Employee Work Hours
- Custom Work Hours Import Format
- Extended Import Format (for importing other item types)
