Help Toolbar (select a button to browse other online help sections) Home Tutorials Resources Search Tabs & Menus Button Bar Table & Data Display |
Working with User Options
This tutorial will show you how to define options that will affect the current user's interaction with eNETEmployer. This includes such items as the user's preferred language, the preferred method of selecting and editing rows, and more. It also allows you to control the email address that will be used for email notifications if the user requests this feature.
NOTE: Click on the images below to view them at full size
To Work with User Options:
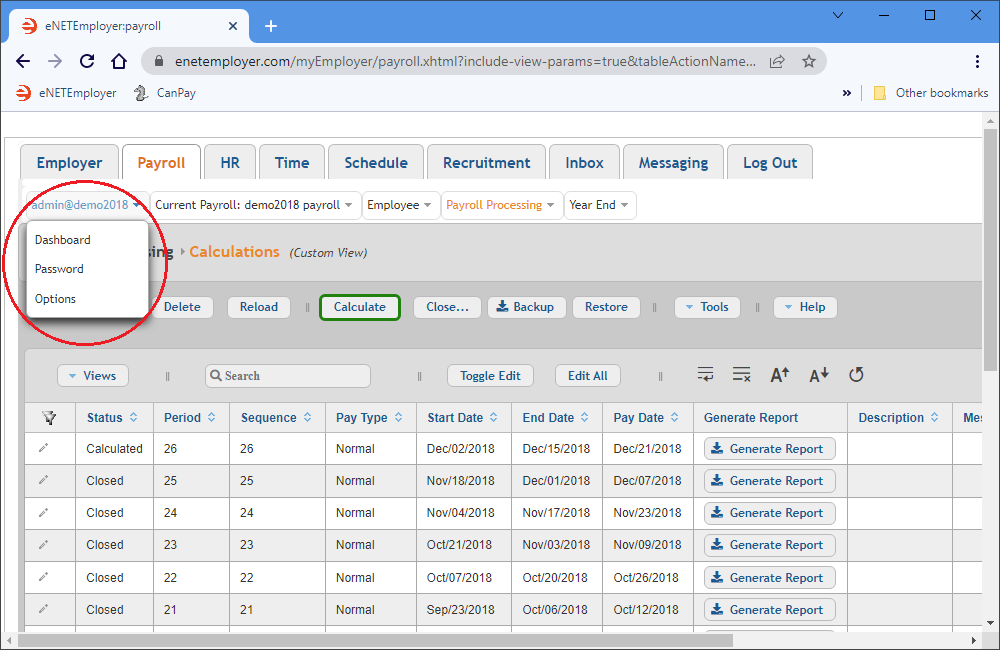
- Click on the User menu (the first menu located at the top left of the screen just underneath the program tabs). This displays a drop-down menu with several options.
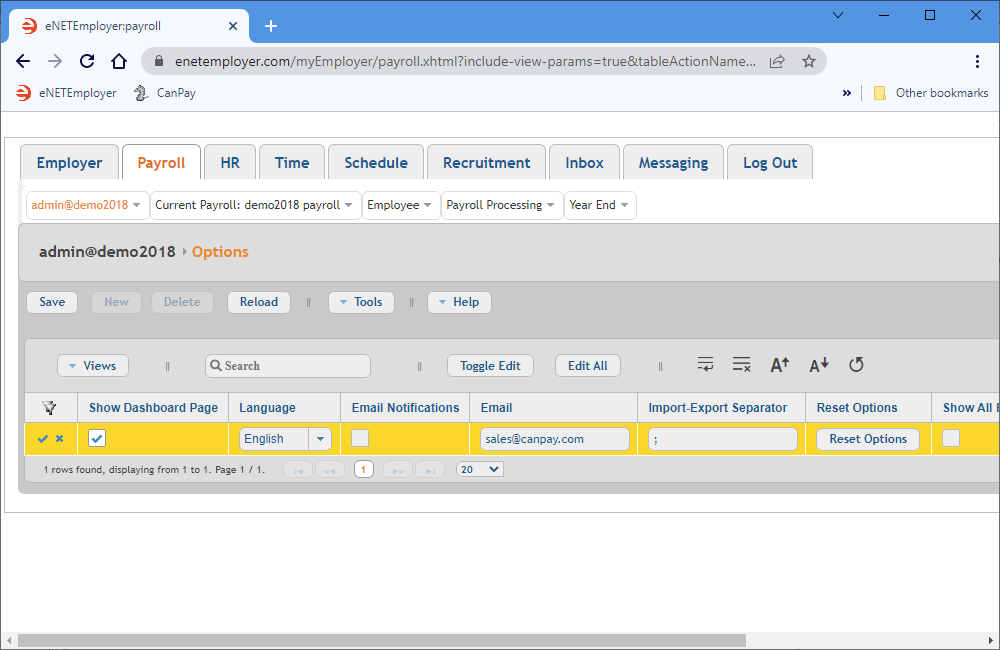
- Choose the Options command to open the User - Options screen. This screen is used to define settings that will affect the current user's interaction with the program.
- To make a change to one of the options, you must first activate Edit Mode by double-clicking on the row (you can also click on the Pencil icon at the left side of the row).
- To change an option that is controlled by a toggled check box, simply add or remove the check as needed.
- To change an option that offers a drop-down menu, simply click on the downward arrow inside the cell, and then make your selection from the list of options that are provided.
- To change an option that requires text entry into an edit field, simply click the cursor inside the text field, and then type your text as needed (replacing any text that may have already been in place).
- If you need to look up a detailed explanation for the various cells and options, press <F1> on your keyboard to open the Online Help System for the current page.
- Once your changes are complete, select the Save button. This accepts the changes and the Edit Mode icons are removed to indicate that the row changes have been stored.
Note: If you are working through the payroll setup process in order, you will need to continue on through the Payroll menu to finish entering the data that is required for your particular payroll.
Varying Option Types:
See Also:

