Help Toolbar (select a button to browse other online help sections) Home Tutorials Resources Search Tabs & Menus Button Bar Table & Data Display |
Adding Users to eNETEmployer
Each eNETEmployer user must be added to your account by an Administrator. Users can be assigned a variety of rights and privileges based on the types of tasks they will perform in the program.
There are two parts to this tutorial:
- Adding a Program User: This section of the tutorial will discuss how to add users who are responsible for administering the payroll system. This can include controllers, payroll administrators, technical support staff, and so on.
- Adding Employee Self-Service User Accounts: This section of the tutorial will show you how to create self-service accounts for your employees. These types of user accounts are for employees who do not work directly with the payroll system, but who need to view their personal pay statements and pay history only. Such users are designated as Employees, and are restricted to viewing their personal details only.
NOTE: Click on the images below to view them at full size
1) To Add a Program User:
- From the Employer tab, choose the Admin - Users menu option. This opens the Users screen where you can add and edit users of the eNETEmployer system.
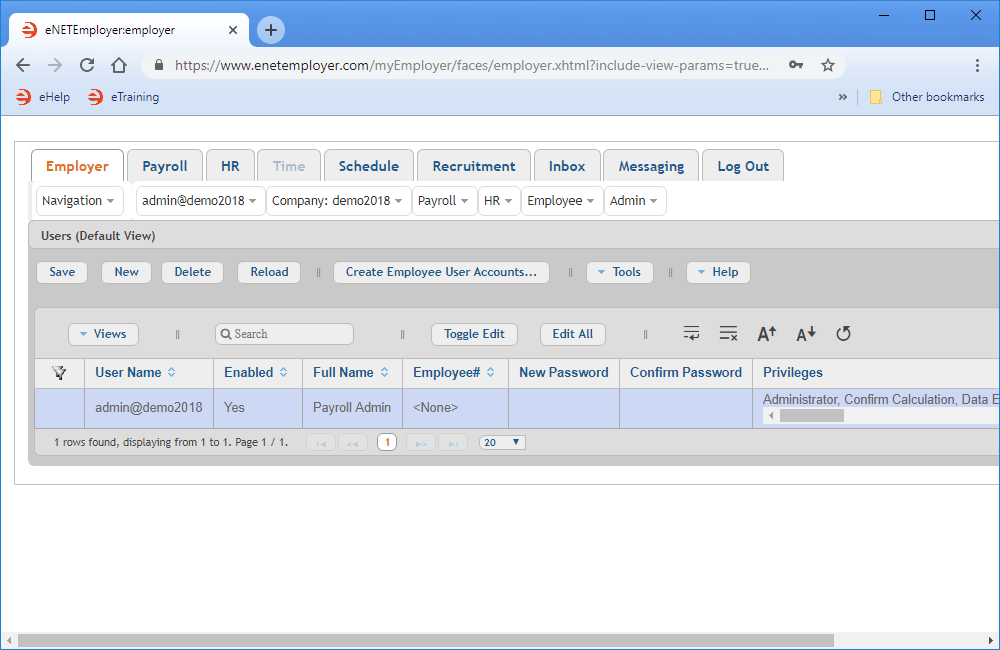
At least one user will always be present in this screen. In most cases, this will be the administrator that was set up by eNETEmployer Services when you signed up for the eNETEmployer service.
Example: In Fig. 01 below, we see the default Administrator account. This account can be used to create additional eNETEmployer user accounts.
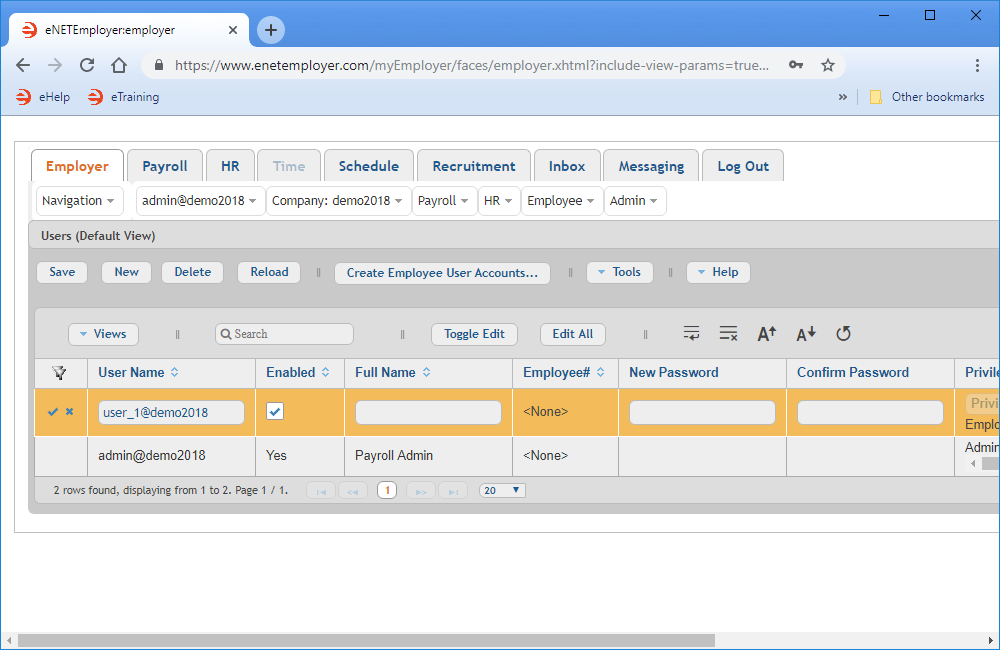
- To add an additional user account, choose the New button that appears near the left side of the Button Bar. This inserts a new row into the table and activates Edit Mode for the cells.
- Move to the Name cell and replace the default prefix with the name that is representative of the person you are adding. This could be either the person's name (e.g. jsmith), or a name that is based on the person's role in your payroll (e.g. dataentry).
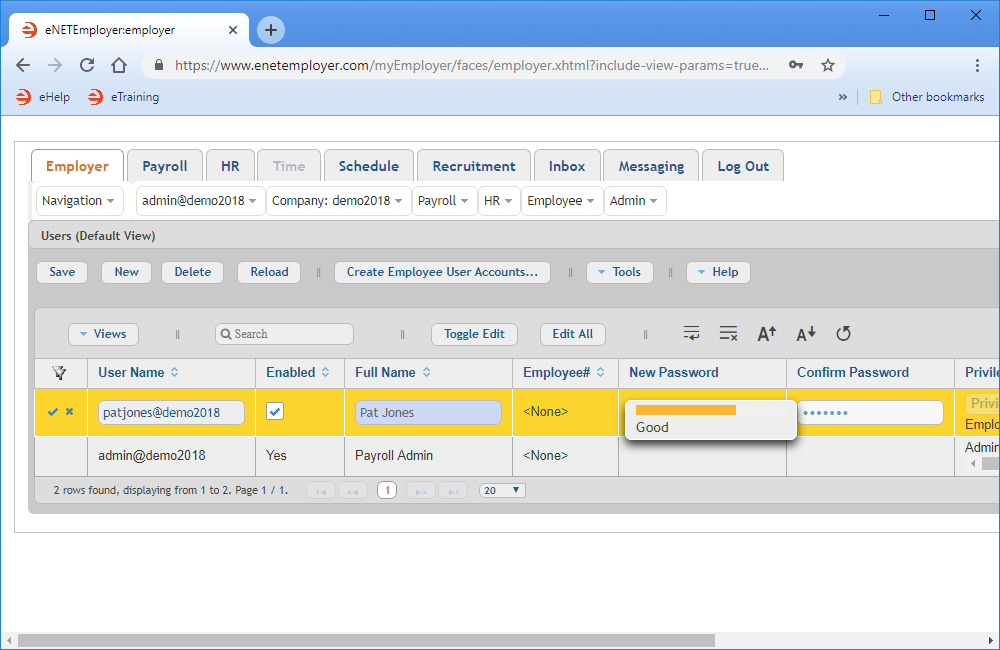
- Move to the New Password cell and enter a password for the new user. A password strength meter will appear while editing this field so that you have immediate feedback on the validity and strength of the password while it is being typed (see Fig. 03 below). You must use a combination of alphanumeric characters (at least 6 character in length) until a Good or Strong designation appears in the meter.
- Next, move to the Confirm Password cell and re-enter the password. This step helps to ensure that you enter the correct text for the new password (in case you entered a typo in the New Password cell - since you cannot see the characters while you are typing).
Example: In Fig. 03 below, we have created a password that satisfies the strength requirements (as indicated by the "Good" term in the password strength meter).
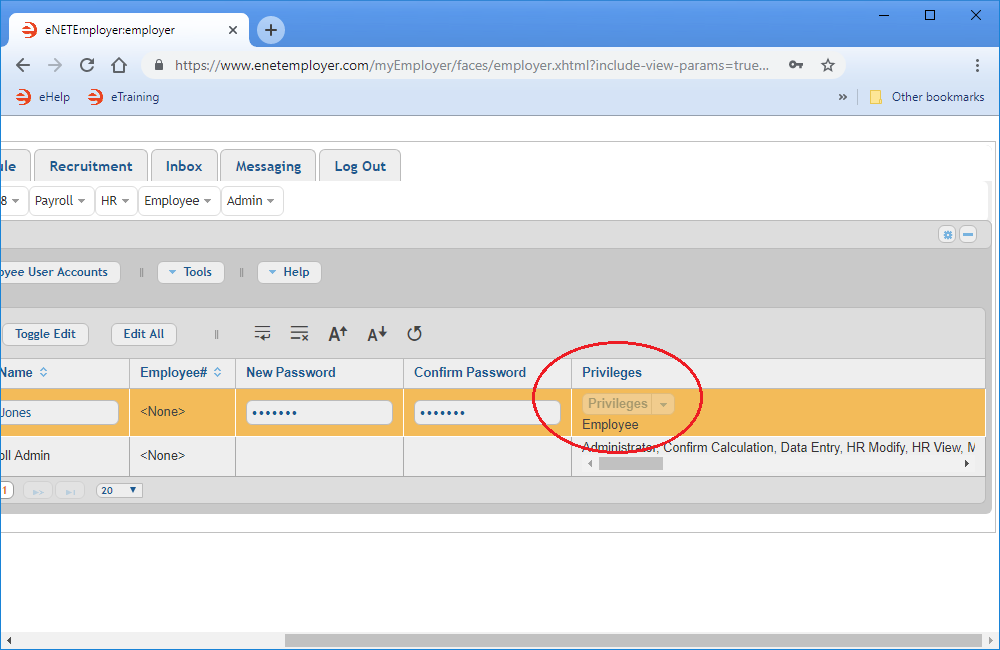
- Move to the Privileges column (scroll to the right if necessary), and you will see that the cell is unavailable. This cell will become editable after you save the row.
- Lastly, move to the Require Change Password and place a check in the box. This will remind the user to replace their temporary password with one of their own the first time they log into eNETEmployer. Note: If you cannot see this option, use the Views button to create Customized View where you can add this column to your screen.
- Choose the Save icon from the left side of the row (or the Save button from the Button Bar), and then double-click the new user's row once again to enter Edit Mode. You will see that the Privileges cell is now active and ready to be modified as needed.
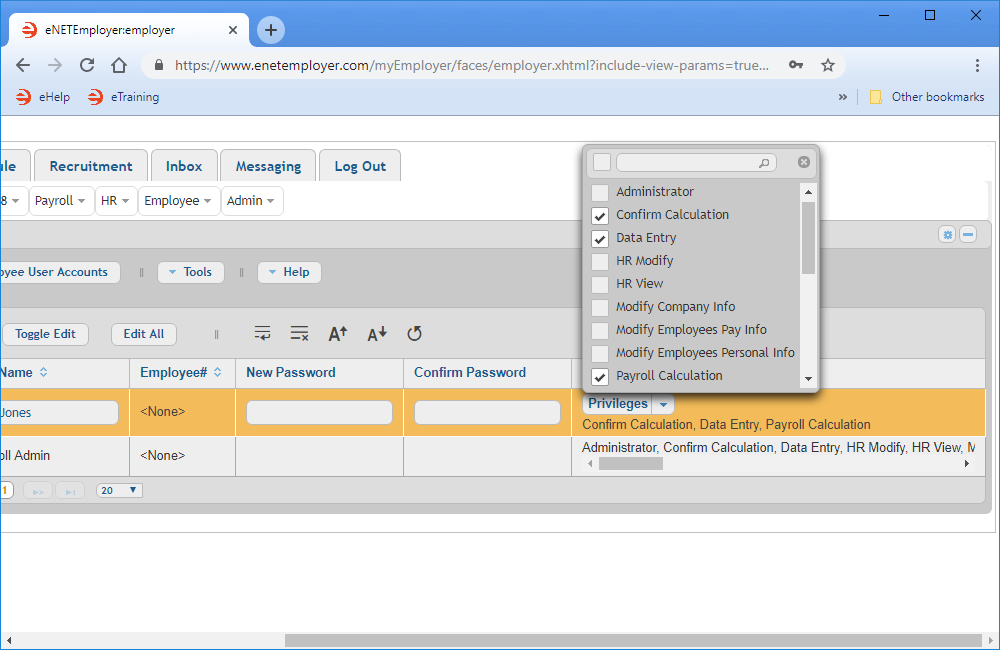
- Click on the downward facing arrow in the Privileges cell to display the various rights and privileges that can be assigned to the new user account.
- Click once in each checkbox that represents a privilege that you wish to assign to the new user.
Example: In Fig. 05 below, we have assigned a limited number of privileges that will allow our new user to perform data entry duties, and to calculate the payroll.
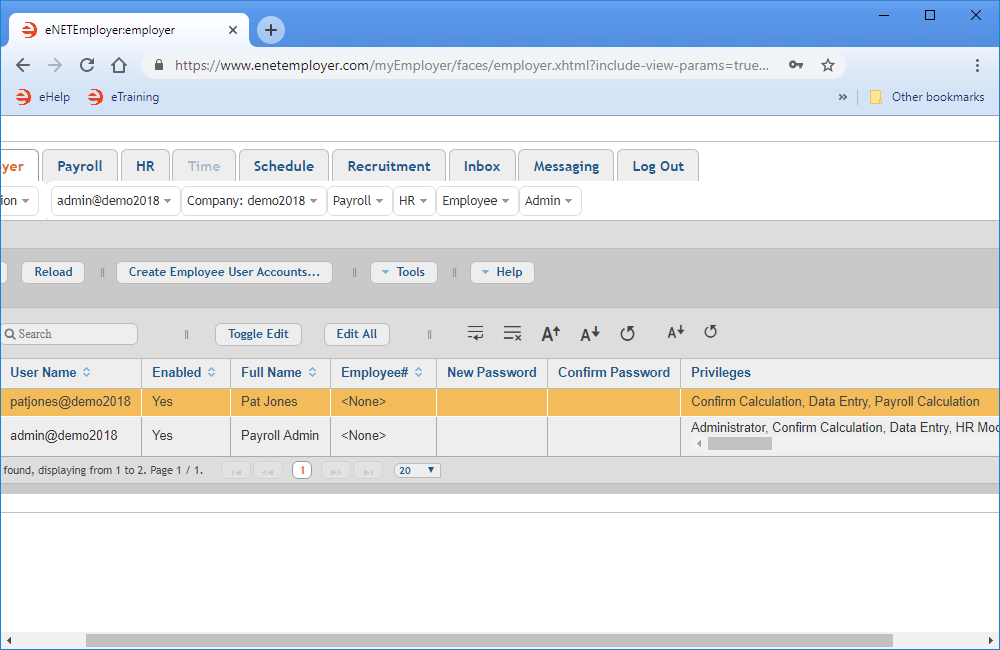
- When you have finished assigning the privileges, close the pop-up list (by choosing the "x" icon in the top right of the list), and then save the changes to the row. The user account is now complete, and the assigned privileges are shown in the Privileges column.
Note: After a program user has been added, you may consider logging into the new account to make sure that it is set up correctly. It also gives you the opportunity to open the User - Options screen to set the user's Email address for them (eNETEmployer will pop up a yellow warning if the user's email address is not entered there). This email address is used for password resets, program notifications, etc. |
Now that you know how to add an eNETEmployer program user with varying privileges, let's proceed to the next section of this tutorial and learn how to add an employee-only self-service account, where each person can view their pay stubs and personal information.
2) To Create Employee User Accounts (Employee Self-Service):
Employee Self-Service user accounts have limited program privileges and are used to provide company staff with access to their pay stubs, T4s, and the ability to edit their address and basic personal information.
There are two ways to create self-service user accounts:
- Create an Account for a Single Employee - This tutorial will show you how create a self-service user account for one employee.
- Create Accounts for Multiple Employees - This tutorial will show you how create self-service user accounts for multiple employees at the same time.
This completes the tutorial on working with users and their accounts.
See Also:
