Help Toolbar (select a button to browse other online help sections) Home Tutorials Resources Search Tabs & Menus Button Bar Table & Data Display |
Creating Employee Templates
eNETEmployer provides employee templates to help simplify the set up process for new staff members. Templates store payroll items and settings that can be applied to employees that share the same employment characteristics. Refer to the Templates help page for more details on this topic.
For this tutorial, we will discuss how to create the two most common template types (see below). Using the sample data as a reference, enter your own company data to reflect the default settings that should be applied to your new payroll employees.
NOTE: Click on the images below to view them at full size
Part 1 - Create an Hourly Employee Template
- From the Payroll tab, open the Current Payroll - Templates screen where you can work with your employee templates.
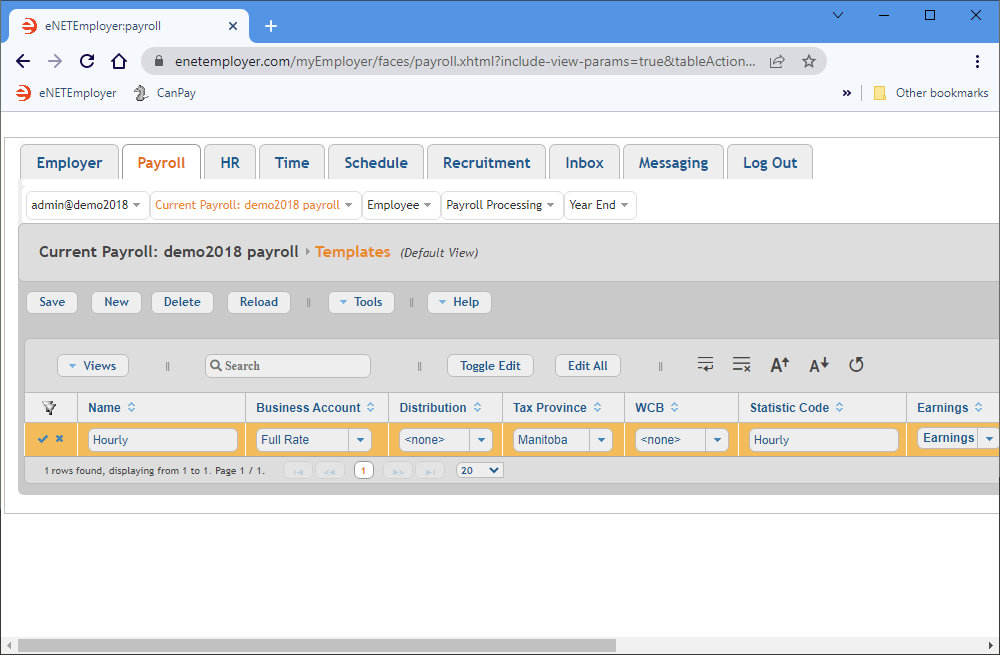
- Choose the New button to insert a new template row in the table. The row appears with its cells ready for editing.
You can now move through the row from left to right as you specify the various settings that will be assigned to any new hourly-based employees. - Select the Name cell, and then enter the word Hourly. This name will help you identify the template as you refer to it in subsequent program screens.
- Move to the Business Account cell and choose the account that will be applied to each employee who uses the template. The chosen account will be used when calculating each employee's payroll information and is required for reporting and T4 processing. Note: As mentioned in the Before You Begin note at the top of this page, if you have completed an earlier tutorial involving Business Accounts, then you will see several accounts in the list.
- Move to the Distribution cell and choose the desired distribution that will be assigned to new hourly employees. Distributions can be used if you wish to allocate an employee's work time to various departments. The distributions shown in this drop-down list can be added via the Payroll tab's Current Payroll - Distributions menu option.
- Move to the Tax Province cell and specify which province the hourly employees will be taxed (eNETEmployer assigns a default tax province based on the address of your company - you can change the template's province setting as needed), Note: In most cases the employee's Address Province and Tax Province are the same. An exception would be a case where an employee works in one province and lives in another.
- Move to the WCB cell and specify the rate at which the hourly employees' WCB amounts will be calculated. If WCB premiums do not apply to your business, you can leave this cell blank.
- Move to the Statistic Code cell and specify the designated wage method that will be applied to hourly employees for Statistics Canada reporting.
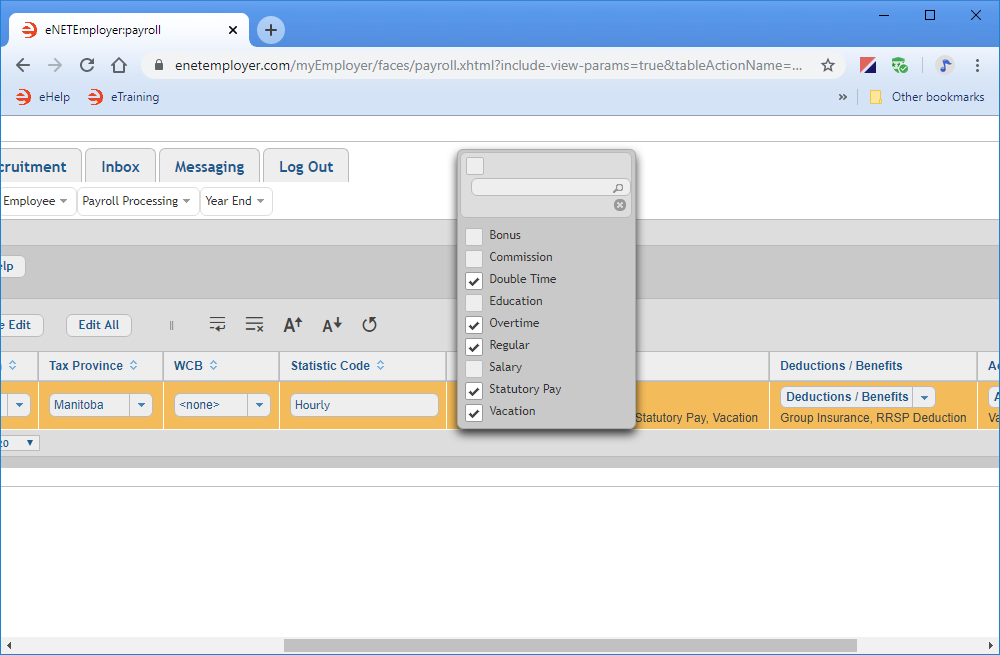
- Choose the drop-down list in the Earnings cell, and then place a check in each box for the earning types that will be applied to hourly employees. Select hourly-based earnings only, and leave the checkboxes blank for salary-based earnings. If all of the earnings in the list will apply, you can choose the check box at the top of the drop-down list to select the entire list of earnings. The earnings shown in this drop-down list can be added via the Payroll tab's Current Payroll - Earnings menu option.
- Choose the drop-down list in the Deductions/Benefits cell, and then place a check in each box for each of the deduction and benefit types that will be applied to hourly employees. The items shown in this drop-down list can be added via the Payroll tab's Current Payroll - Deductions & Benefits menu option.
- Choose the drop-down list in the Accumulators cell, and then place a check in each box for each of the accumulator types that will be applied to hourly employees. The items shown in this drop-down list can be added via the Payroll tab's Current Payroll - Deductions & Accumulators menu option.
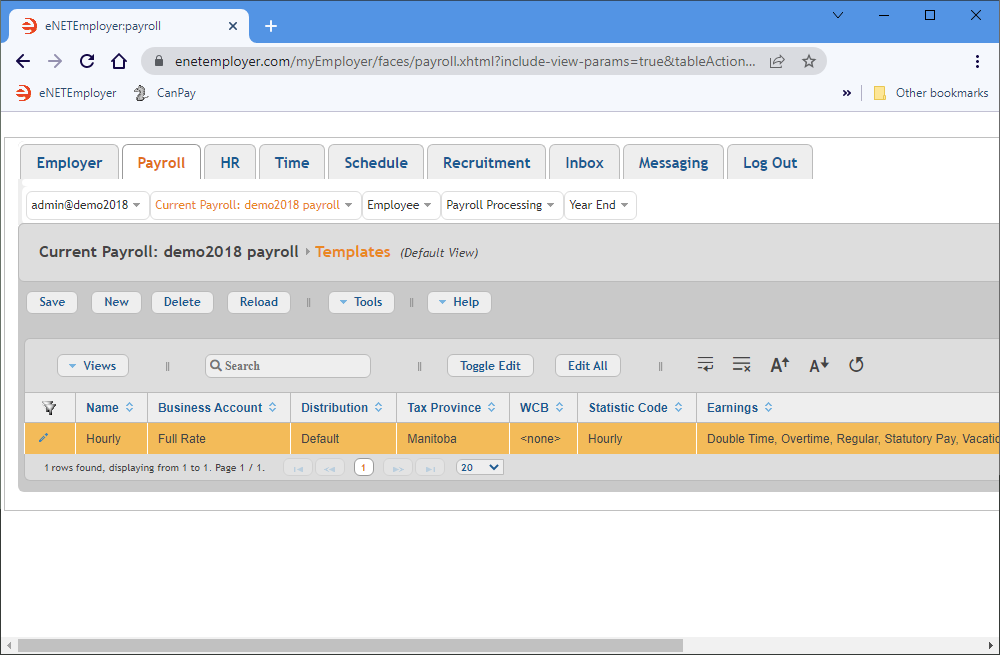
- Save the row's information when you are complete.
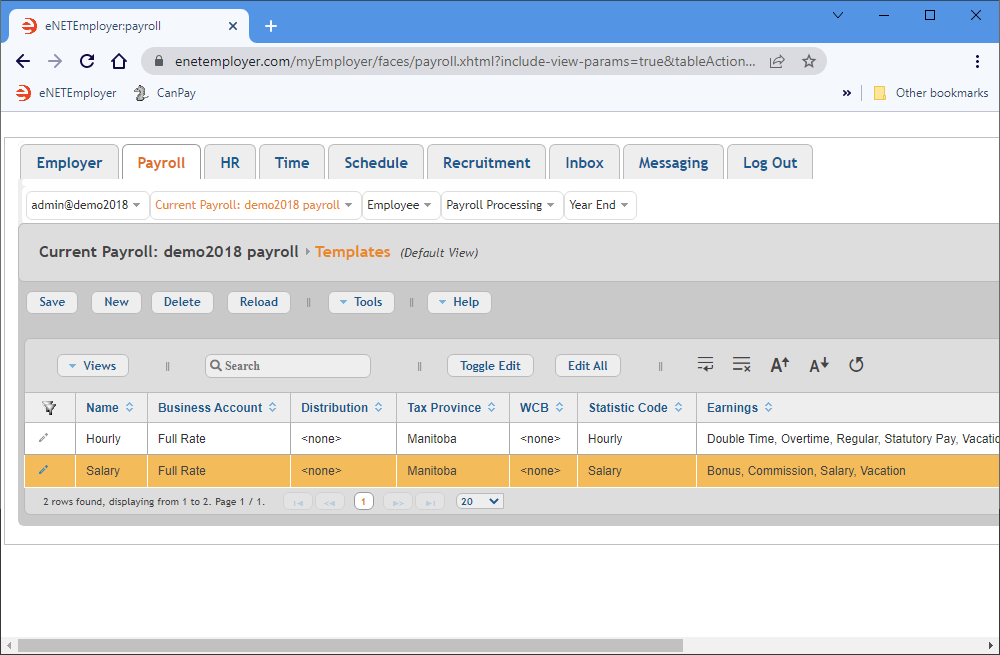
Example: In the example below, we have created an hourly employee template. Employees who are created using this template will be assigned the Hourly Statistic Code along with hourly-based earnings (e.g. Regular, Overtime, Double Time, Statutory Pay). Each time we wish to add an hourly-based employee to our payroll, the program will apply the appropriate earning types and settings.
Name Business Account Distribution Tax Province WCB Stat Code Earnings Deductions/Benefits Accumulators Hourly Full Rate Factory Manitoba Manitoba Hourly Vacation, Statutory Pay, Overtime, Double Time, Regular RRSP Deduction, Group Insurance Vacation Pay
We will now add a second template for our salary-based employees.
Part 2 - Create a Salary Employee Template
Salary-based employee templates are created in the same manner as you've just read in the previous section of this tutorial, except that that you designate salary-related earnings, instead of hourly.
- Open the Templates screen and choose the New button to insert a new template row in the table.
- Move to the Name cell and enter the word Salary.
- Repeat steps 4 through 8 from the preceding section (substituting salary-based options where necessary) to define the settings for all subsequent salary-based employees who will be created using this template.
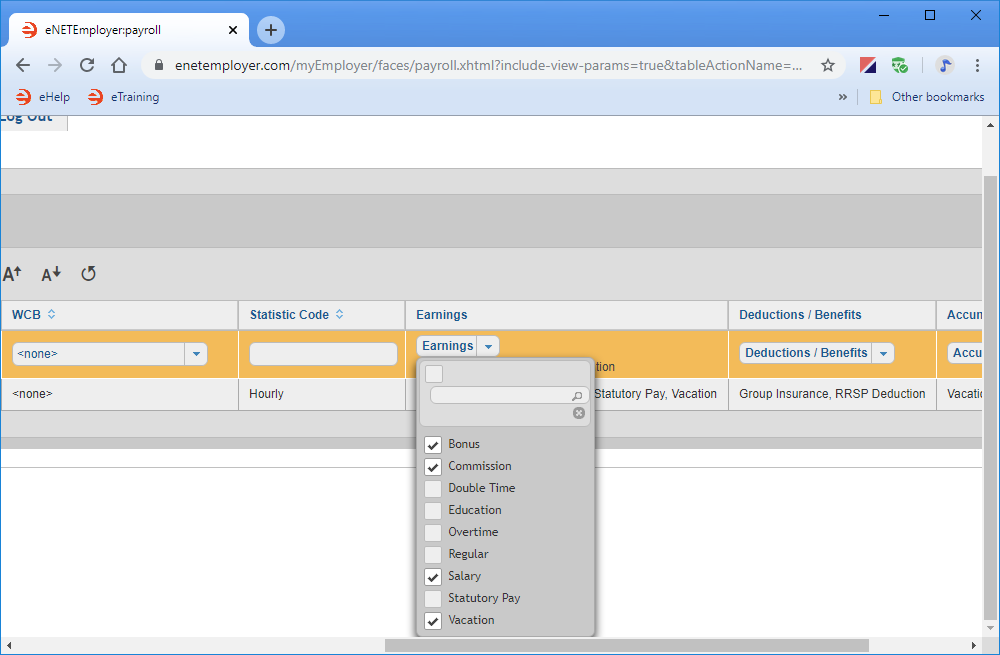
- Choose the drop-down list in the Earnings cell, and then place a check in each box for the earning types that will be applied to salary employees. Choose salary-based earnings only, and leave the checkboxes blank for hourly-based earnings.
- Move to the remaining two cells and assign the appropriate Deductions/Benefits and Accumulators as needed for your salary-based employees.
Example: In the example below, we have created a salary employee template. Employees who are created using this template will be assigned the Salary Statistic Code along with various salary-based earnings (e.g. Salary, Commission, Bonus). The Vacation earning type will be assigned to all employees, regardless of their payment method. Each time we wish to add an salary-based employee to our payroll, the program will apply the appropriate earning types and settings.
Name Business Account Distribution Tax Province WCB Stat Code Earnings Deductions/Benefits Accumulators Salary Full Rate Default Manitoba Manitoba Salary Salary, Vacation, Commission, Bonus RRSP Deduction, Group Insurance Vacation Pay - Save the row's information when you are complete.
This completes the tutorial on creating employee templates.
Note: If you are working through the payroll setup process in order, you have now completed the Current Payroll menu requirements. You can now proceed to the Employee menu and begin adding your employees.
See Also:
