Help Toolbar (select a button to browse other online help sections) Home Tutorials Resources Search Tabs & Menus Button Bar Table & Data Display |
Working with Administrative Tools
The following tutorial will show you how to perform important administrative operations including: how to create a payroll backup; how to restore a payroll from a backup, and how to assign a company logo for use on your employee pay statements.
This tutorial has four parts:
NOTE: Click on an image below to view it at full size.
1) To Backup a Payroll:
Payroll backups must be created after you have finalized your payroll and before you close the period. eNETEmployer mandates that you create a backup before you close the payroll, so that you always have a fall-back point should you ever need to restore a payroll for a future need.
The first step is to open the Employer tab's Admin - Tools screen, and then to choose the Backup button from the Button Bar above the table. Note: The Backup button also appears in the Payroll tab's Payroll Processing - Calculations screen. Regardless of the location you choose, the backup procedure is the same.
Show Me How...
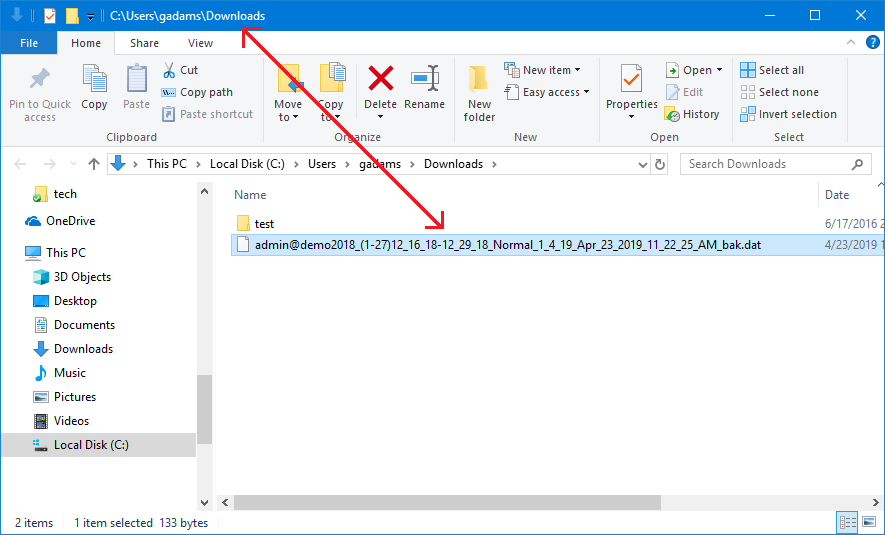
Example: In Fig. 01 below, we have created a backup and the file has been stored in our Downloads folder.
This completes the section on creating a payroll backup.
2) To Restore a Payroll:
The payroll restore procedure is useful in cases where you need to completely revert your payroll to a previous state. For example, a restore may be necessary in a case where you have realized a number of data entry errors and it is too time consuming to review and correct each one individually. Another reason for a restore may be if a different payroll administrator has made changes to the payroll and you are unsure of its current status. In either case, restoring from the most recent backup is a sure way of returning to a safe, defined state.
The first step is to open the Employer tab's Admin - Tools screen, and then to choose the Restore button from the Button Bar above the table. Note: The Restore button also appears in the Payroll tab's Payroll Processing - Calculations screen. Regardless of the location you choose, the restore procedure is the same.
Show Me How...
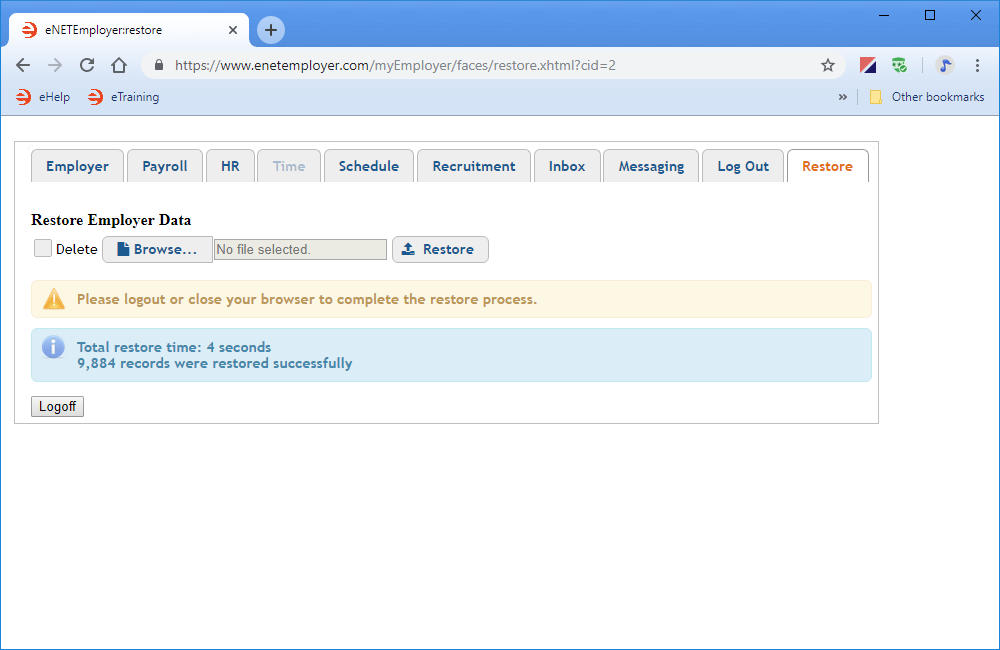
Example: In Fig. 02 below, we have successfully restored our payroll from a backup file.
This completes the section on restoring your payroll.
3) To Add a Company Logo:
If you use the Pay Statements (Pressure Seal Mailer) report, you can add a company logo/banner to the statements for branding purposes.
The first step is to open the Employer tab's Admin - Tools screen, and then to choose the Logo button. This displays the eNETEmployer Logo window where you can choose your desired image.
Once the logo is assigned, you can regenerate the report and the logo will appear at the top left and in the bottom window section.
This completes the section on adding a company logo to your pay statements.
4) To Add a Company Banner:
If you use eNETEmployer's Recruitment system, you can add a company banner to top of the recruitment web page for branding purposes.
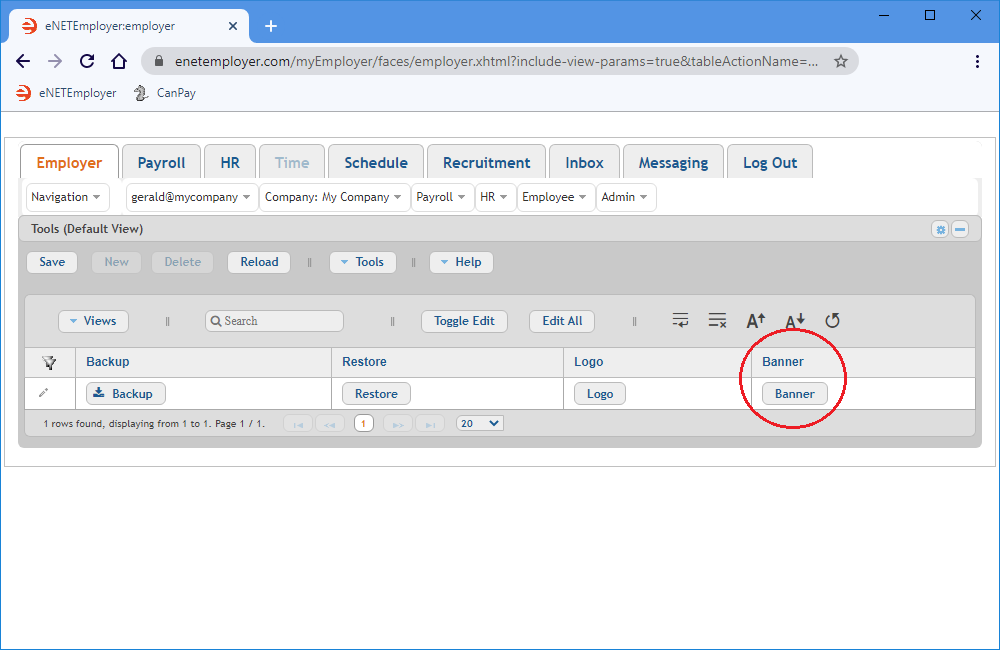
The first step is to open the Employer tab's Admin - Tools screen, and then to choose the Banner button. This displays the eNETEmployer Banner window where you can choose your desired image.

Once the image is assigned, you can see the banner atop the Recruitment web page.
This completes the section on adding a company banner.
See Also:


