Help Toolbar (select a button to browse other online help sections) Home Tutorials Resources Search Tabs & Menus Button Bar Table & Data Display |
Creating Payroll Accumulators
For this tutorial, we will create a common accumulator type - Vacation Pay. Once created, the program will calculate the accumulator in conjunction with its associated function.
Note: If you wish to create the accumulator shown in this tutorial, you should also review/complete the Functions tutorial so that your accumulator will have a function to which it can be linked.
NOTE: Click on the images below to view them at full size
To create a payroll accumulator:
- From the Payroll tab, open the Current Payroll - Accumulators screen. Accumulators are used to collect or build up amounts that will be used in various payroll calculations. The most common use of accumulators is to calculate vacation pay owing to the employee as well as to disburse vacation pay on each cheque. Other common uses of accumulators are to calculate sick entitlements, seniority time, banked time, etc.
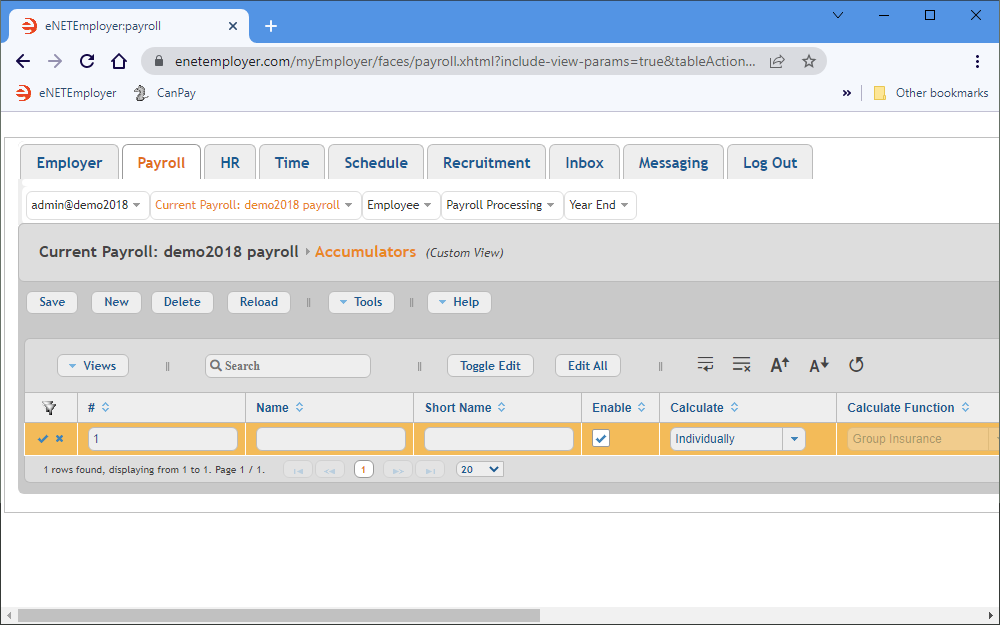
- Choose the New button to insert an accumulator row in the table. The row appears in Edit Mode with the cells ready for editing.
- Edit the various cells as needed as they relate to your accumulator (using the Online Help system if you need to look up a definition for the various cells).
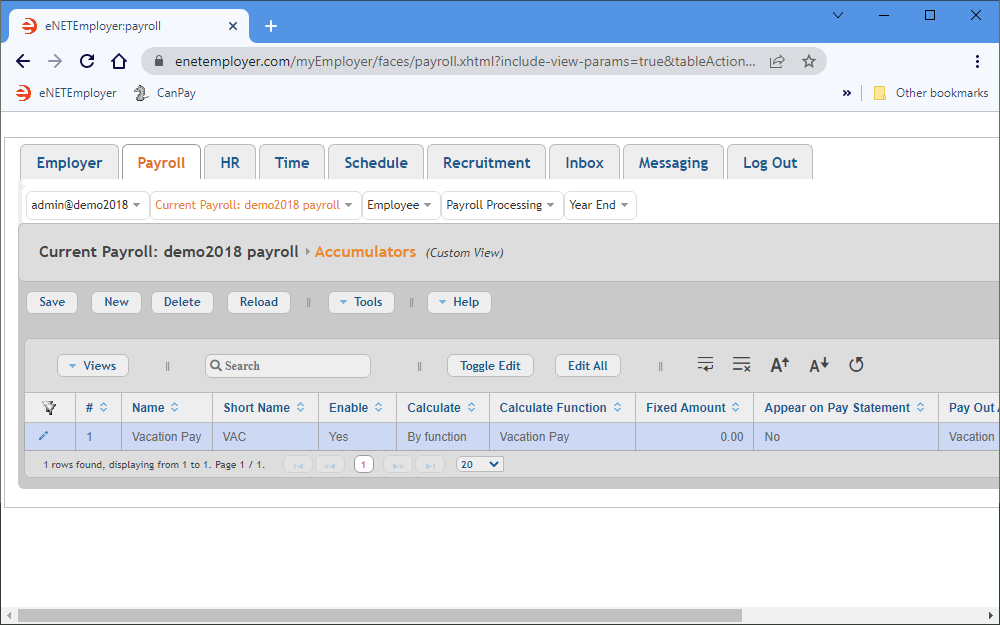
Example: In our example below, we have defined one accumulator that will be used to accrue employee vacation time. eNETEmployer will use the accumulator in conjunction with an associated Vacation function (as discussed in the Functions tutorial).
Name Short Name Enable Calculate Calculate Function Pay Out As Vacation Pay VAC Yes By function Vacation Pay Vacation - Some considerations about this sample accumulator:
- The Short Name (VAC) will be used when space restrictions are limited for screen display or printing (e.g. the employee pay stub).
- Since this accumulator will be calculated By Function, we need to ensure that the corresponding function is selected in the Calculate Function cell. In our example, we have selected the Vacation Pay function (which was discussed in the Functions tutorial).
- Once your data is complete, select the Save icon (the check mark icon at the left side of the row). This accepts the changes and the Edit Mode icons are removed to indicate that the row changes have been saved. You can also choose the Save button from the Button Bar above the table.
- Use the New button to add additional accumulators for your payroll scenario, using the sample instructions as a guideline.
- If your accumulator is to be calculated based on a factor of an employee's pay, then the accumulator will also need to be linked to a corresponding Function. For example, your payroll may also have several other common accumulators such as Sick Time or Banked Time, etc. If you add these two accumulators, you add also require a corresponding Sick Time or Bank Time function.
- If your other accumulators are to be calculated individually or based on a fixed value, then no functions are required.
This completes the tutorial on creating payroll accumulators.
Note: In this example, we created one basic accumulator only, whereas in a live payroll scenario you would likely have several other accumulators, depending on your payroll requirements. For example, common accumulators such as Sick Time or Banked Time could be added in a similar manner to the Vacation example. Each new accumulator would also require a corresponding Function record (i.e. a Sick Time and Bank Time function), both of which would be base their calculations on the employee's corresponding earnings.
Note: If you created the accumulator shown in this tutorial (or a custom accumulator of your own), you should also review and/or complete the companion Functions tutorial so that your related function will be linked correctly.
See Also

