Help Toolbar (select a button to browse other online help sections) Home Tutorials Resources Search Tabs & Menus Button Bar Table & Data Display |
Creating an XML T4/T4A Data File
Use the following tutorial to learn how to create the XML data file that contains your company's T4, T4A and other year end data.
Before You Begin: - This lesson assumes that you have already completed the following required steps:
|
NOTE: Click on the images below to view them at full size
To Create an XML Data File:
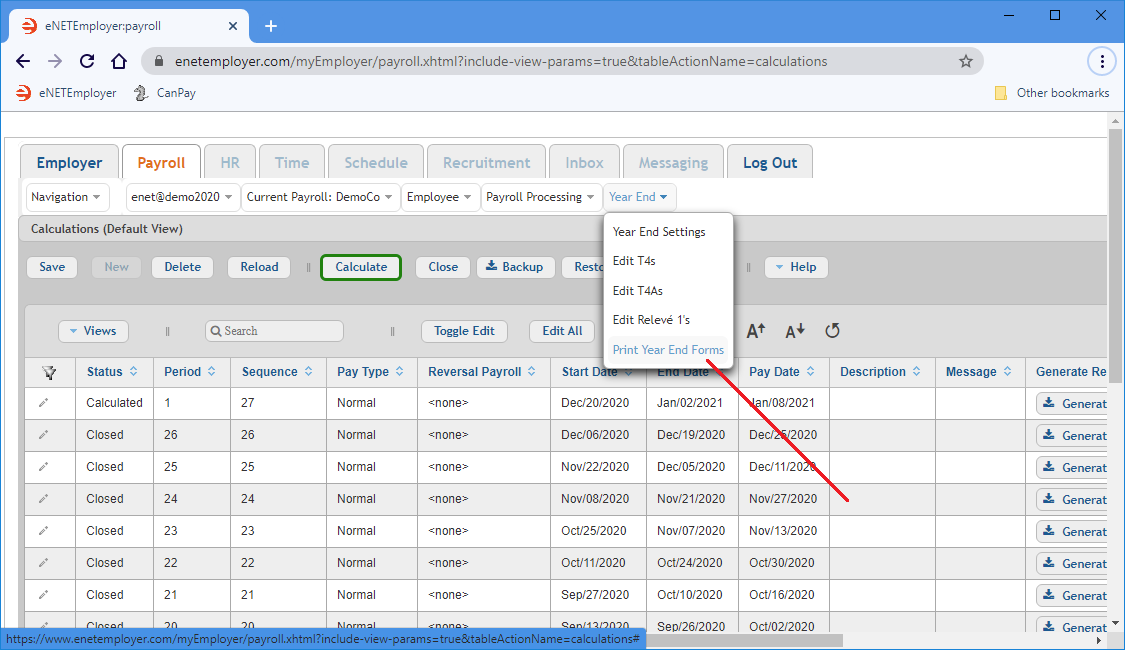
- From the Payroll module, select the Year End menu to view the available options.
- Choose the Print Year End Forms option from the menu. This opens the Year End - Print Year End Forms screen where you can work with all aspects of year end reporting including viewing, printing, and exporting.
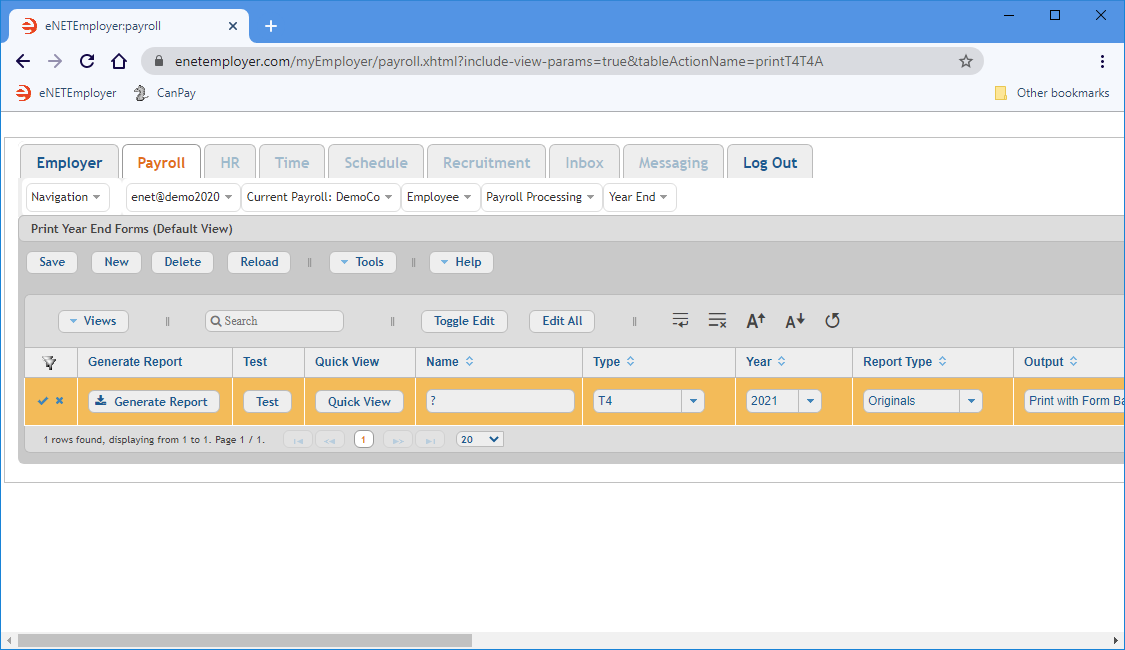
- Choose the New button from the top left side of the table. This inserts a blank report into the table and the row appears in Edit Mode so that you can work with the various settings.
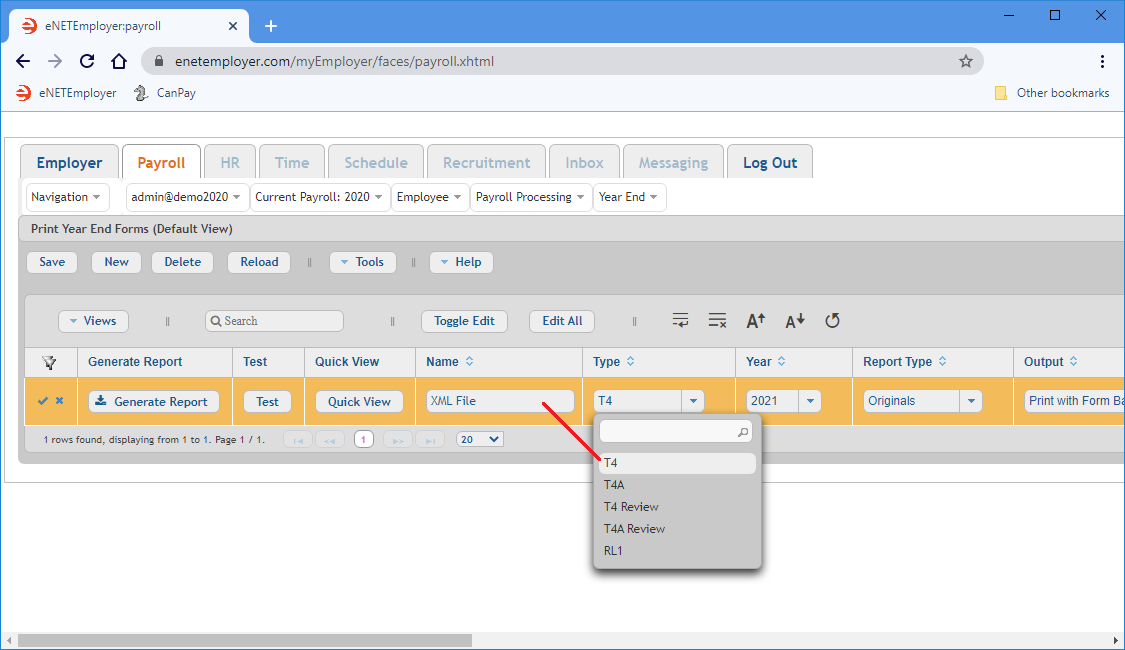
- Move to the Name cell and enter "XML File". This will help you to identify the report type if you decide to add other reports with different settings (because this report row can be used to generate a variety of year end reports simply by changing the type).
- Move to the Type cell and notice how the default report type is set to "T4". Since the XML data file is dependent on this report type, you will not need to change this option.
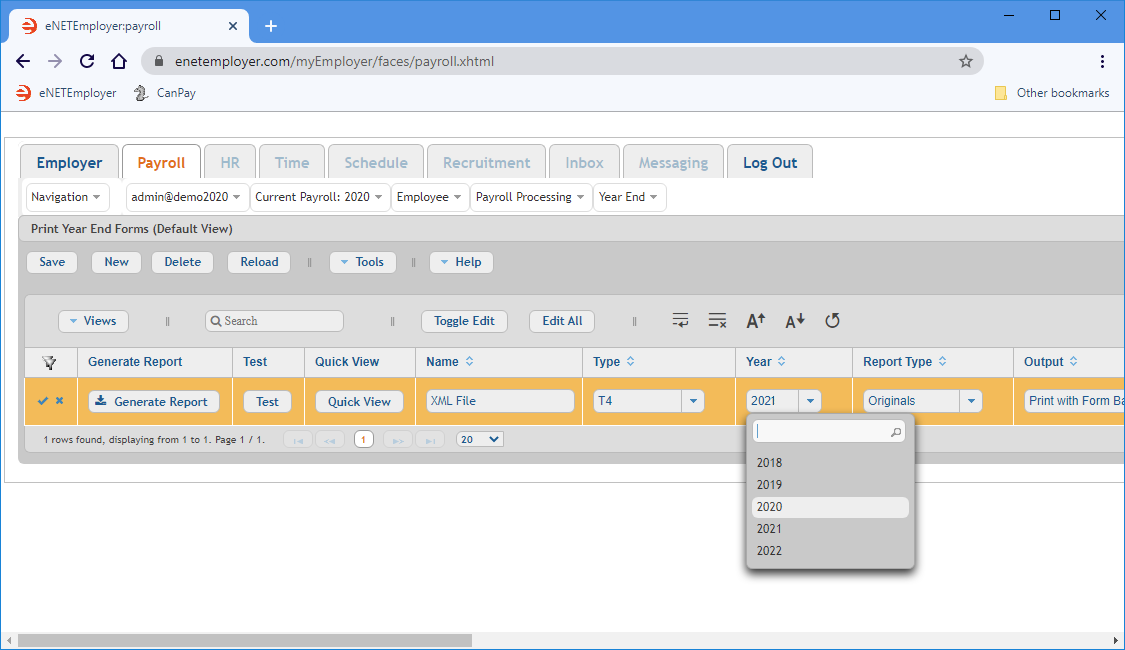
- Click on the drop-down list in the Year column and then select the year for which the XML file will be generated.
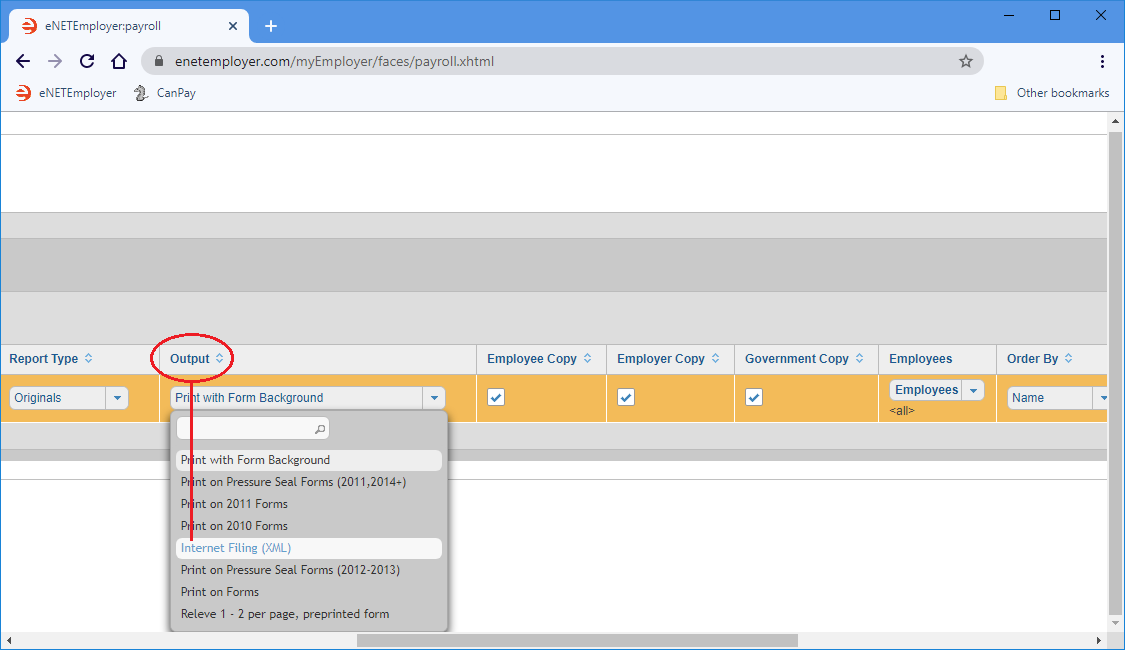
Example: In Fig. 04 below, we will choose the year 2020. - Click on the drop-down list in the Output column and select the Internet filing (XML) option. this will instruct the program to create the XML data file when you generate the report.
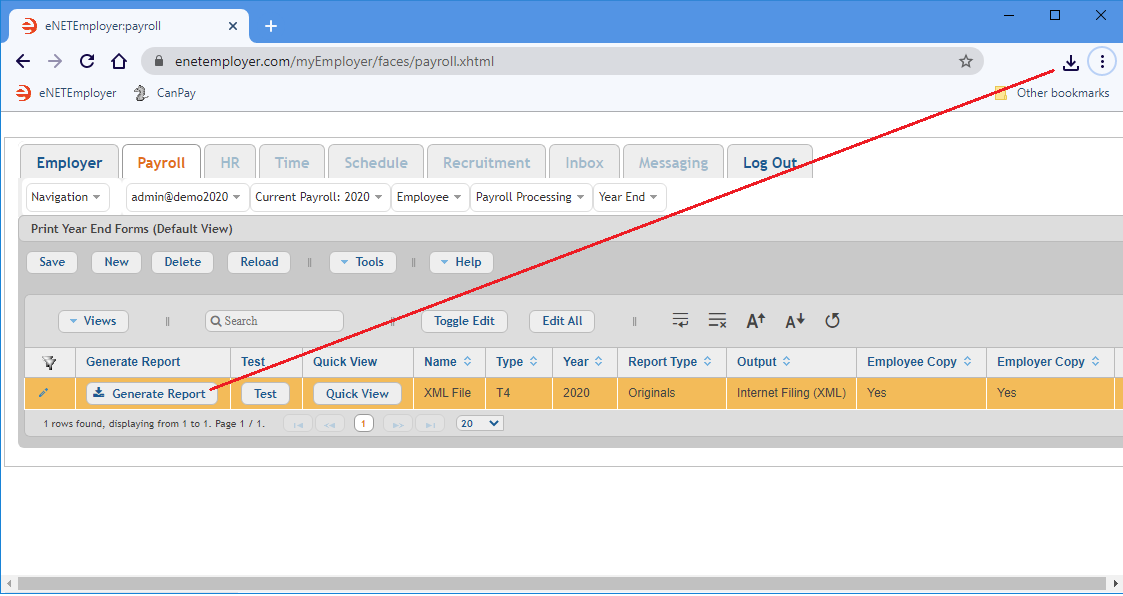
- Save the report row and then choose the Generate Report button to save the data as an .XML document. Depending on your browser settings, the resulting document will either be stored in your Downloads folder or you may be presented with a window that will prompt you where to save the file. In most browsers, the document can be viewed via a link that appears at the top-right of your browser.
Print Year End Forms Help Screen...
If you have never created a year end report, the screen will not contain any report rows (as shown in Fig. 02 below).
The file is now ready to be submitted to the CRA.
See Also
- Year-End Overview
- Employee T4s
- Edit T4s help page
- Generate your employee T4s
- Review your employee T4s
- Edit your employee T4s
- Add a T4 manually
- Employee T4As
- Edit T4As help page
- Generate your employee T4As
- Review your employee T4As
- Edit your employee T4As
- Add a T4A manually
- T4/T4A Reports
- Magnetic Media Filing
