Help Toolbar (select a button to browse other online help sections) Home Tutorials Resources Search Tabs & Menus Button Bar Table & Data Display |
Working with Applicant Profiles
When hiring for an available position, you sometime have to decide between several candidates who are almost equal in skill and experience. Rather than let a skilled person slip away, you may wish to "file" the candidate in another category for future consideration. Similarly, you will sometimes receive an application from an excellent candidate who is better suited for one job over the job for which they applied.
This tutorial has three sections:
- Reviewing an applicant's recruitment activity.
- Assigning an applicant to a company position.
- Assigning an applicant to a generic pool of applicants.
NOTE: Click on the images below to view them at full size
Part 1: To Review an Applicant's Recruitment Activity:
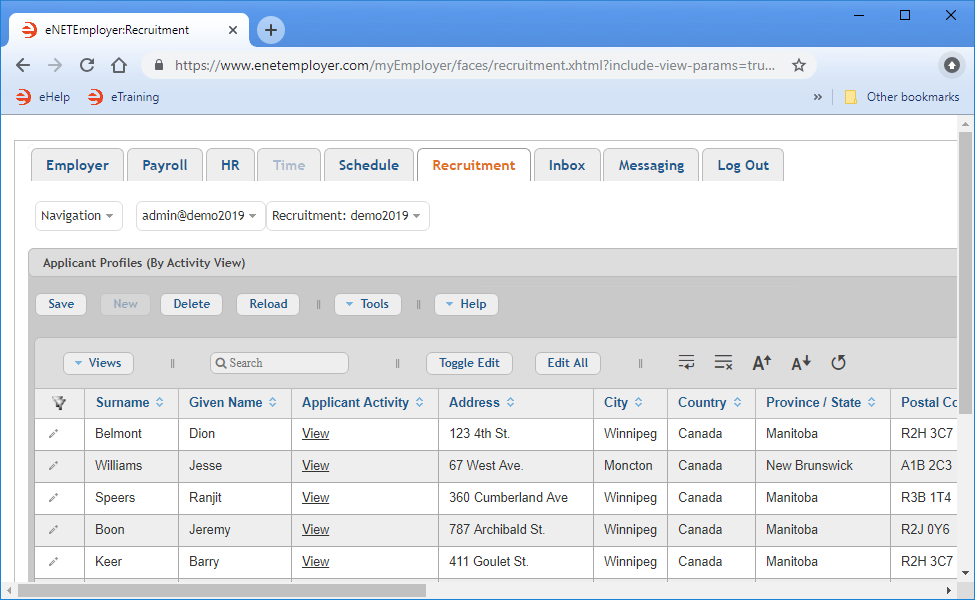
- From the Recruitment tab, open the Recruitment - Applicant Profiles screen where you can review job applications that have been submitted by prospective employees.
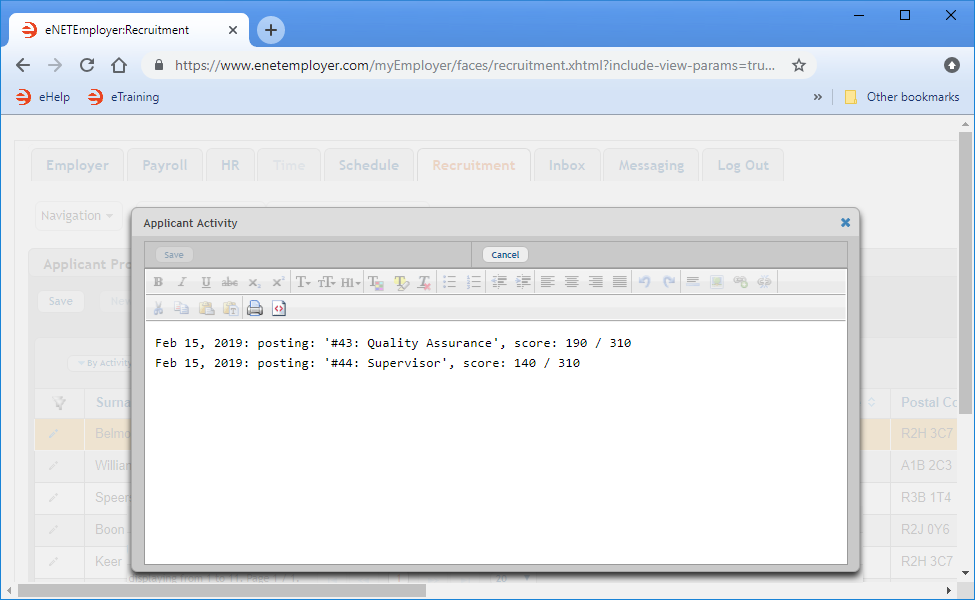
- Click on the View link in the Applicant Activity column for your desired applicant (in our example, we will choose Dion Belmont). A pop-up window appears displaying Dion's activity in the Recruitment system.
In the example above, we see that Dion has applied for two different job postings: Quality Assurance and Supervisor. The submission date for each application is shown, along with Dion's calculated score for each. Note: Most applicants will only have one entry, but this activity window is useful when you need to manage applicants who make repeated submissions, or for applicants who apply for multiple positions.
- When you are finished reviewing the applicant activity, choose the "x" icon in the top left corner (or the Cancel button) to close the window.
Although Mr. Belmont has applied for both the Quality Assurance and Supervisor positions, both of these roles are now unavailable. However, he possesses a number of excellent skills that the company could use in the Plant Foreman role. We will now assign Mr. Belmont to another position for future consideration.
Applicant Profile Help Screen...
In the example above, we see five rows - each row represents individual applicants who have submitted one or more job applications. The various cells include basic information as submitted by the applicant (name, contact information, etc.).
We used the Customize View feature to move the Applicant Activity column to the third column so that we can easliy view each applicant's interaction within the Recruitment module. Interactions can include applying for a job, updating a job application, or re-applying for a job.
Part 2: To Assign an Applicant to a Company Position:
As mentioned earlier, if a candidate has scored well and their cover letter is well-written, their resume may be the deciding factor on whether to proceed to the next step. Many employers believe that the goal of reviewing a resume is not to answer the question, "Should I hire this person?", but rather to answer, "Should I interview this person?"
- From the Applicant Profiles screen, double-click on the desired row to activate Edit Mode (you can also choose the Edit icon (the pencil) at the left side of the row). In our example, we will edit the row for Mr. Belmont.
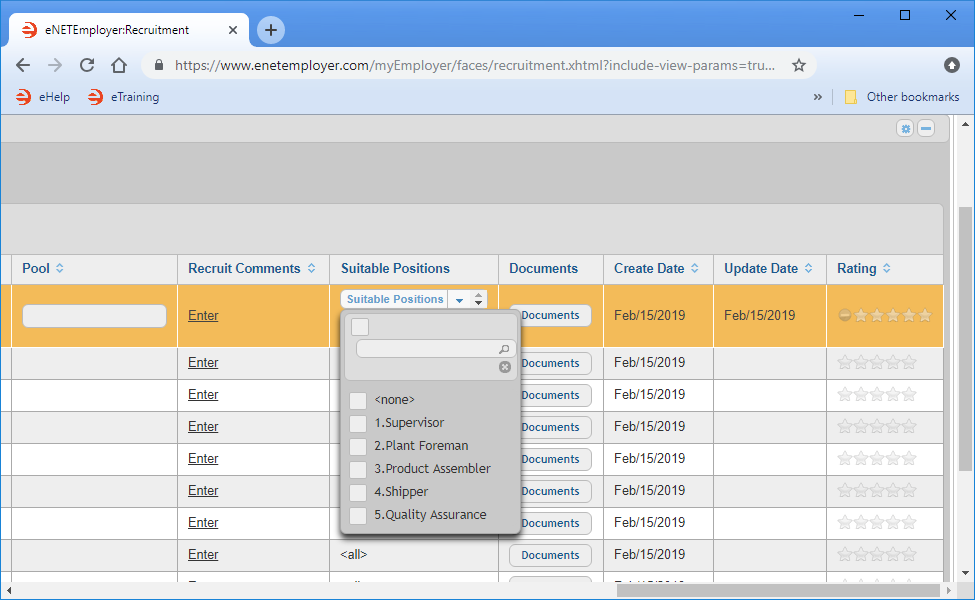
- Move to the Suitable Positions cell and select the downward facing arrow. This displays a menu with all of the available positions in the company.
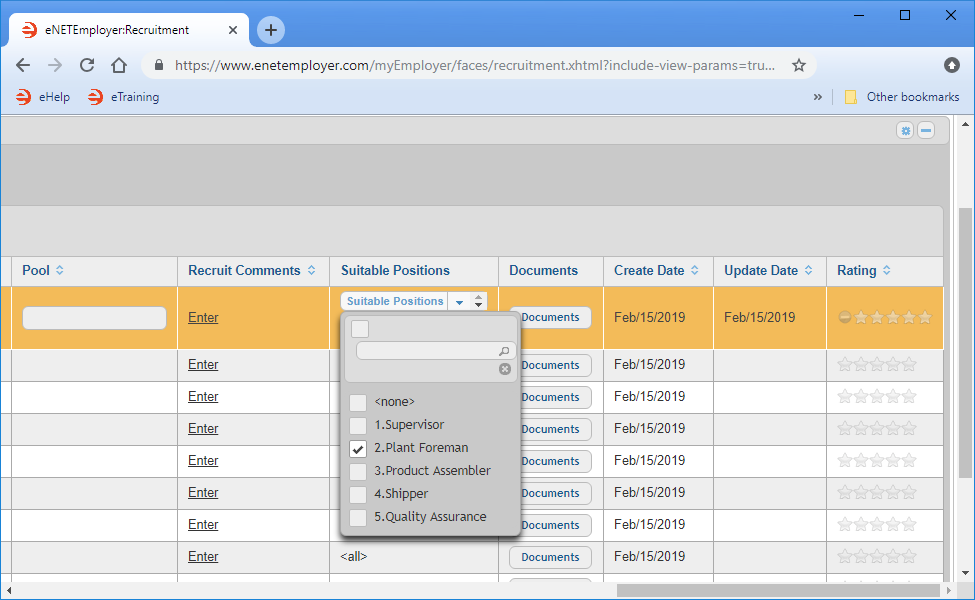
- To assign the applicant to another suitable position, place a check in the corresponding box. In our example, we will check the Plant Foreman box.
- Once you have completed the assignment, choose the Save icon (the Check Mark icon at the left side of the row) to accept your changes. This action saves the changes for the row and takes you out of Edit Mode.
In the example above, we see a total of 5 positions, as defined previously in the Positions screen.
With the alternate position now assigned, we can return to this screen at a later time and sort the applicants by suitable position to see candidates that we thought would be a good fit for the role.
This completes the necessary steps or assigning an applicant to a pre-defined company position. Now let's discuss how to assign an applicant to a "generic" Employee Database that does not involved any specific position.
Part 3: To Assign an Applicant to a Generic Pool:
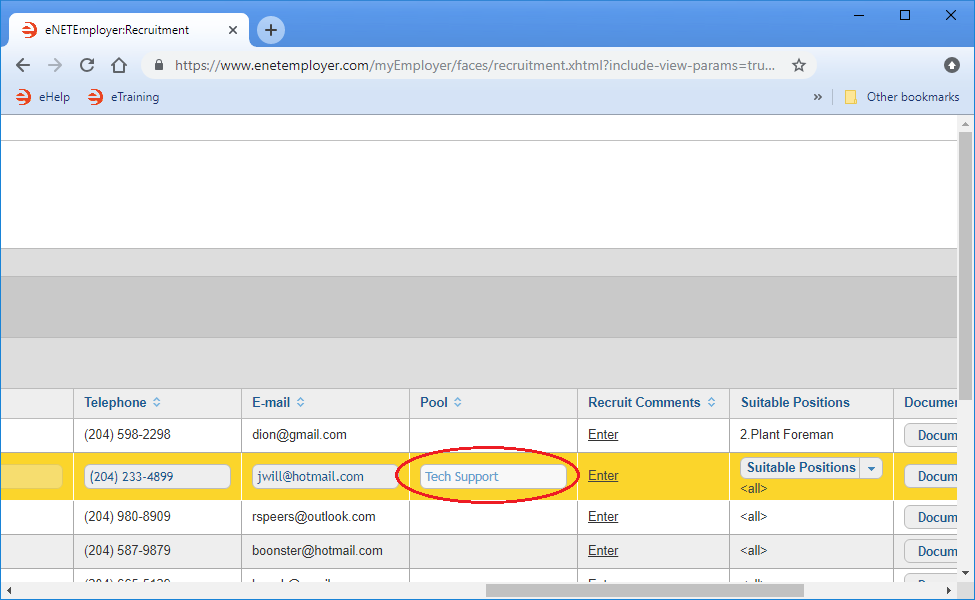
- From the Applicant Profiles screen, edit the row for your desired applicant. In our example, we will work with Jesse Williams.
- Move to the Pool cell and enter a generic job type or job classification to which you will temporarily assign the applicant for future consideration. For example, if an applicant has excellent qualities, but their chosen job is no longer available, you can enter another role name in this cell.
In our example, Mr. Williams has excellent technical skills and may make a good tech support operator. Since we do not yet have this position defined in our company, we will enter "Tech Support" in this cell. Afterwards, we can then use this column to sort applicants who have been assigned to the same temporary "pool" with Tech Support skills. - Once you have completed the temporary pool assignment, choose the Save icon (the Check Mark icon at the left side of the row) to accept your changes.
This completes the tutorial on assigning applicants to different roles for future consideration.
See Also:
Posting a Job:
- Step 01 - Add a job posting to the Recruitment module
- Step 02 - Create a custom job questionnaire
- Step 03 - Post a job to your eNETEmployer recruitment webpage
- Step 04 - Link a job posting to your company website or an online location
- Posting jobs to your intranet for non-public viewing
Manage Job Applicants:
- Sort Applicants Based on their Score
- Review Applicant Submissions
- Assigning Applicants to other Positions
Optional Steps:
