Help Toolbar (select a button to browse other online help sections) Home Tutorials Resources Search Tabs & Menus Button Bar Table & Data Display |
Deleting Employees
There are two levels of employee deletion in eNETEmployer:
- Deleting from a Payroll (Retrievable) - When you delete an employee from the Payroll tab's Employee - Setup Employee screen, the employee still resides in your Employee Database. eNETEmployer provides this safeguard so that payroll best-practices are maintained (the CRA recommends that employee data should retained for 7 years).
- Deleting from the Employee Database (Permanent) - When you delete an employee from your Employee Database, the employee is irretrievable. While permanently deleting employees is not suggested, there are several reasons why you may wish to do so:
- You wish to reduce the size of your database by removing employees who have been terminated and/or inactive for more than 7 years.
- You added/onboarded an employee in the HR or Employer tabs, and then later decided that they will not be added to a payroll after all.
- You added a duplicate employee to a payroll by mistake, added an employee for testing purposes only, or perhaps the employee ended up not working at all.
- You have a CPS Self-Service payroll account, and you wish to reduce your monthly cost by removing employees who are terminated (since CPS accounts are billed for each employee in your payroll regardless of their status).
Permanent Record Keeping Before you permanently delete an employee, you should create a final record in PDF or printed form in case you need it at a later date. Several documents are suggested and some are mandatory: Suggested:
Mandatory:
|
Other Important Considerations
Consider each of the following before permanently deleting an employee:
- Screen Locations - You can only delete an employee from the Setup Employee screen in either the Payroll, HR, or Employee tabs. By design, these are the only screens where the Delete button is available when working with employees.
- Cleared YTD Values - Employees cannot be deleted if they have year-to-date (YTD) values in the current payroll year. Though the optimal time to delete an employee is after the start of a new year (after the employee's YTD values have been cleared), you can delete them any time as long as they have no YTDs.
- Historical Reports - After an employee is deleted, you can still create a Pay Register report that includes their data. You can also use the Payroll Processing - Transactions screen to create a custom report for all of the deleted employee's transactions. Note: After deleting an employee, you can no longer create their ROE, T4, T4A, or RL1.
This tutorial has three parts:
- Deleting an employee from the current payroll.
- Deleting an employee from the Employee Database.
- Deleting an employee who is not part of any payroll.
NOTE: Click on an image below to view it at full size.
To delete an employee from the current payroll
This section discusses how to remove an employee who has left the company in the previous year, but who still resides in the payroll as a terminated employee.
- From the Payroll tab, open the Employee - Setup Employee screen. Note: This is the only screen from which you may delete an employee. Our sample employee "Pat Redondo", left the company in the previous year, thus has no YTDs.
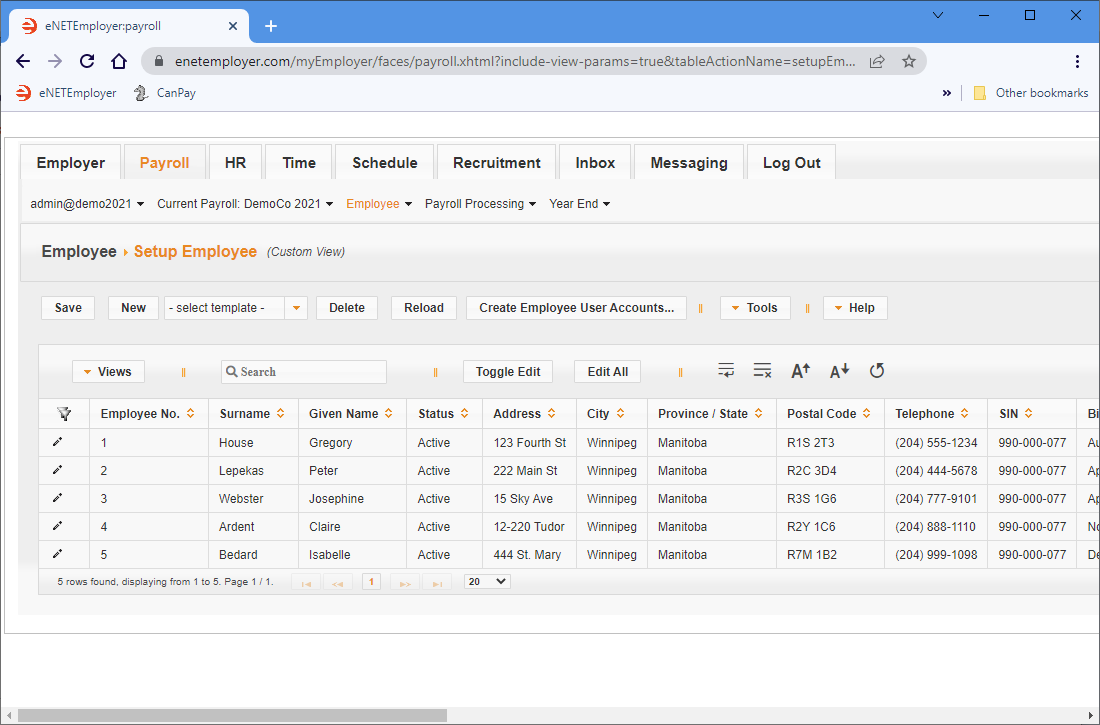
Notice however, in Fig. 01 below, that Pat does not appear anywhere on the screen. This is because employees with the "Terminated" status (or any other non-active status) are only visible on the Employee - Status Parameters screen). We will first need to make her visible on this screen so that she can be deleted.
Example: In Fig. 01 below, we want to remove Pat, but her Terminated status prevents her from appearing on the screen.
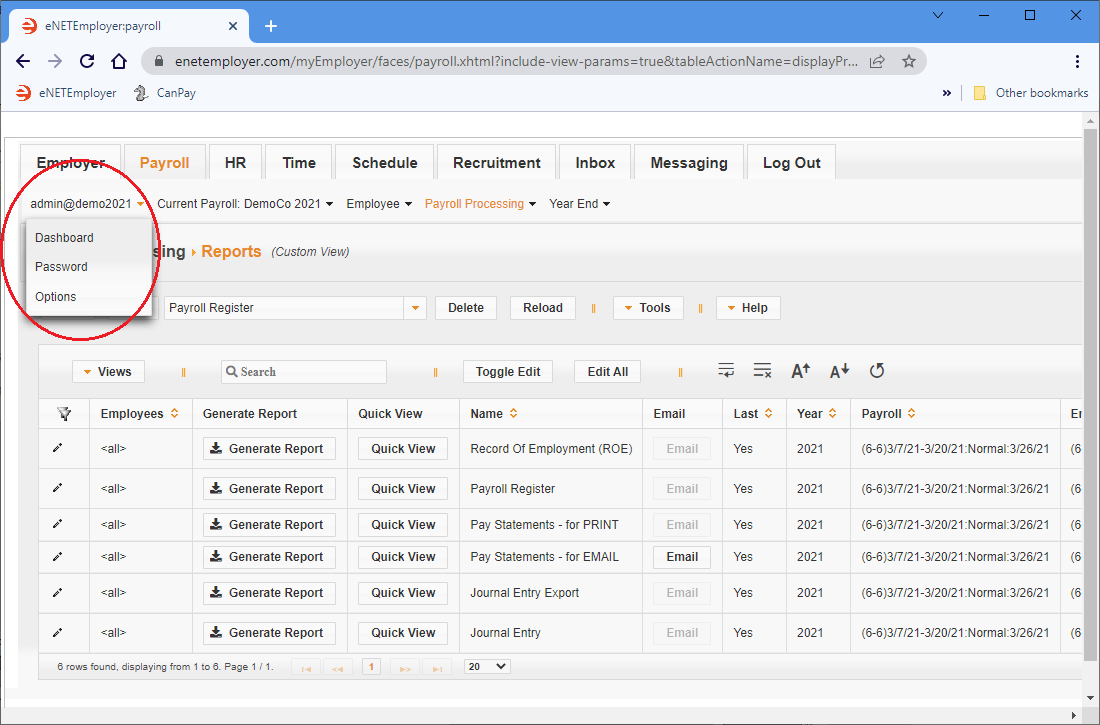
- Click on the User menu to view the available menu commands.
- From the User menu, choose the Options command. This opens the User - Options screen where you can define settings that affect how you interact with the program.
- Double click on the row to enter Edit Mode (or click the Pencil icon at the left side of the row).
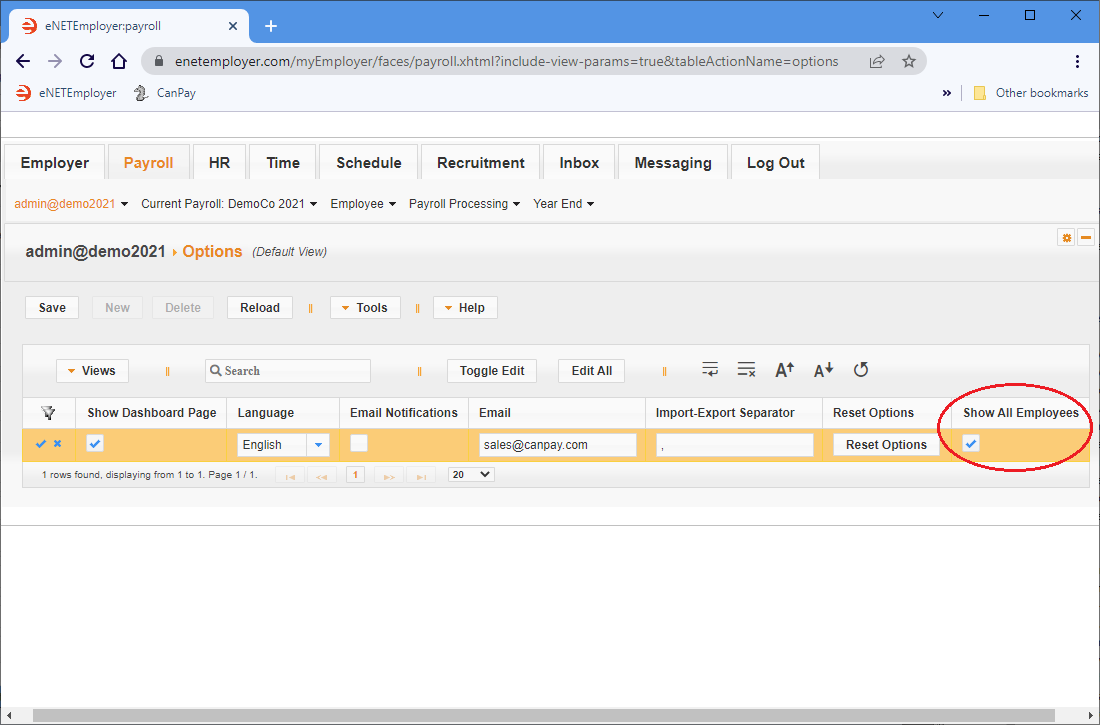
- When the row becomes editable, move to the Show All Employees column and place a check in the checkbox. This will instruct eNETEmployer to display employees of all statuses on applicable program screens.
Example: In Fig. 03 below, we have activated the Show All Employees option.
- Save the row changes by clicking the Checkmark icon at the left side of the row (or by clicking the Save button above the table).
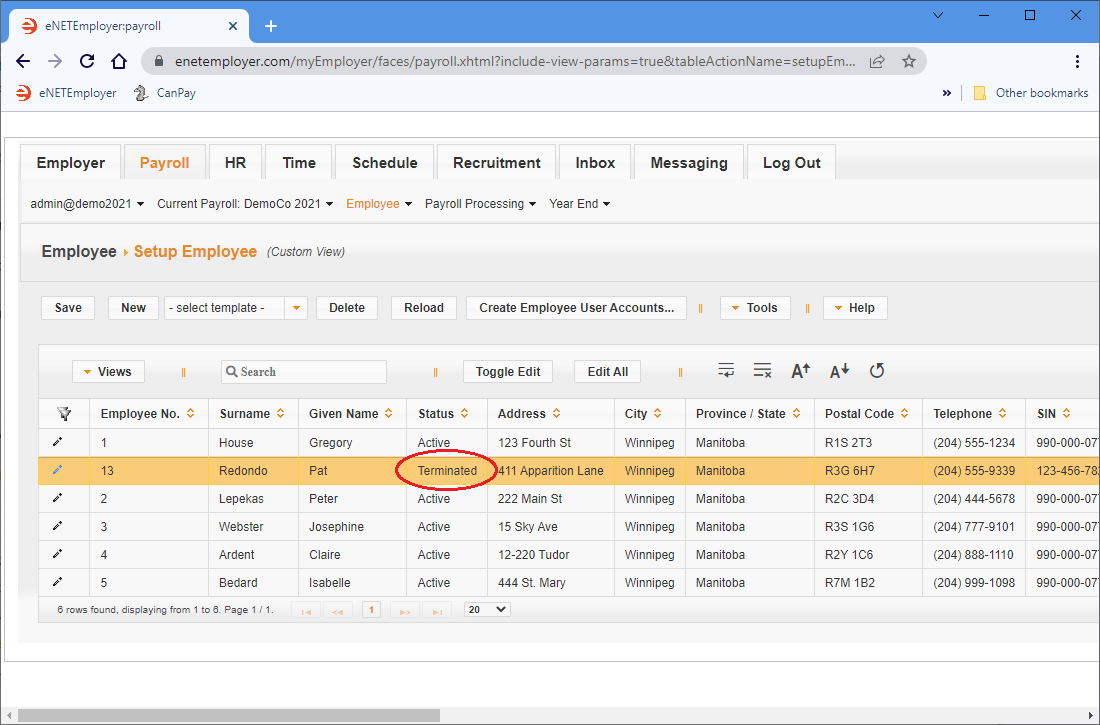
- Return to the previous screen by choosing the Employee - Setup Employee menu command. You will now see employees of all status types, whether active or not.
Example: In Fig. 04 below, we now see our terminated employees. Note: We used the Customize Views feature to add the "Status" column to our screen.
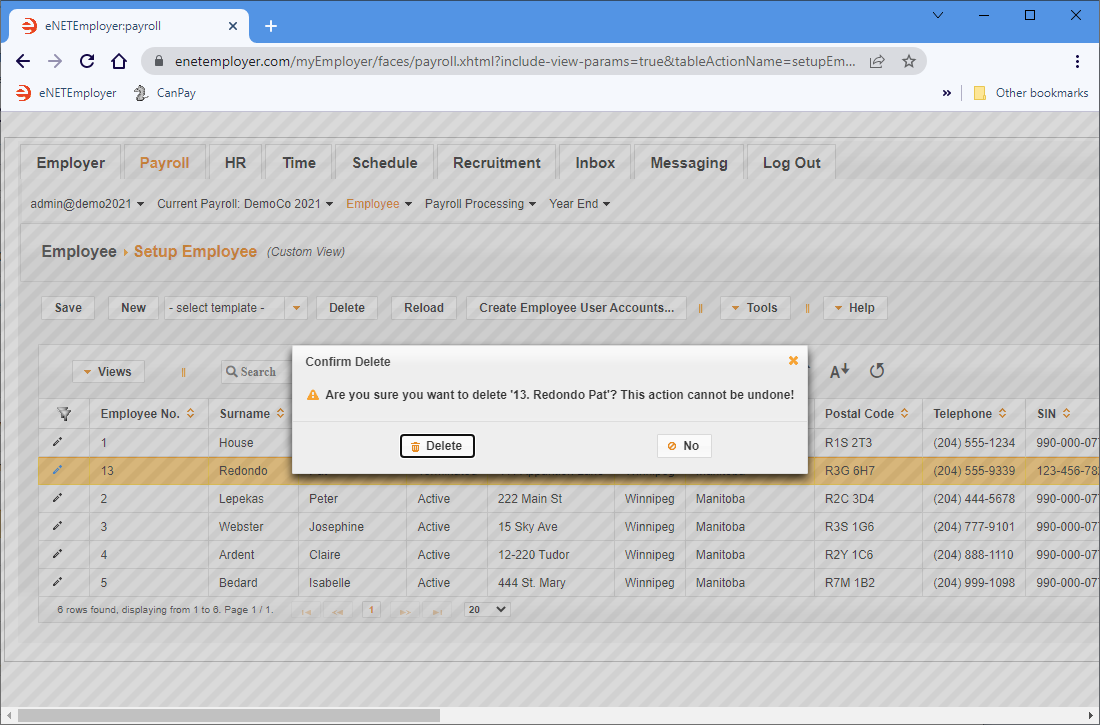
- Click on the employee row that is to be removed, and then click the Delete button above the table (you can also press the Delete key on your keyboard). This displays a pop-up message prompting you to confirm the removal.
- Click the Delete button from the pop-up message to confirm the removal of the employee. This action removes the employee's row from the screen, and they will no longer appear in any calculations.
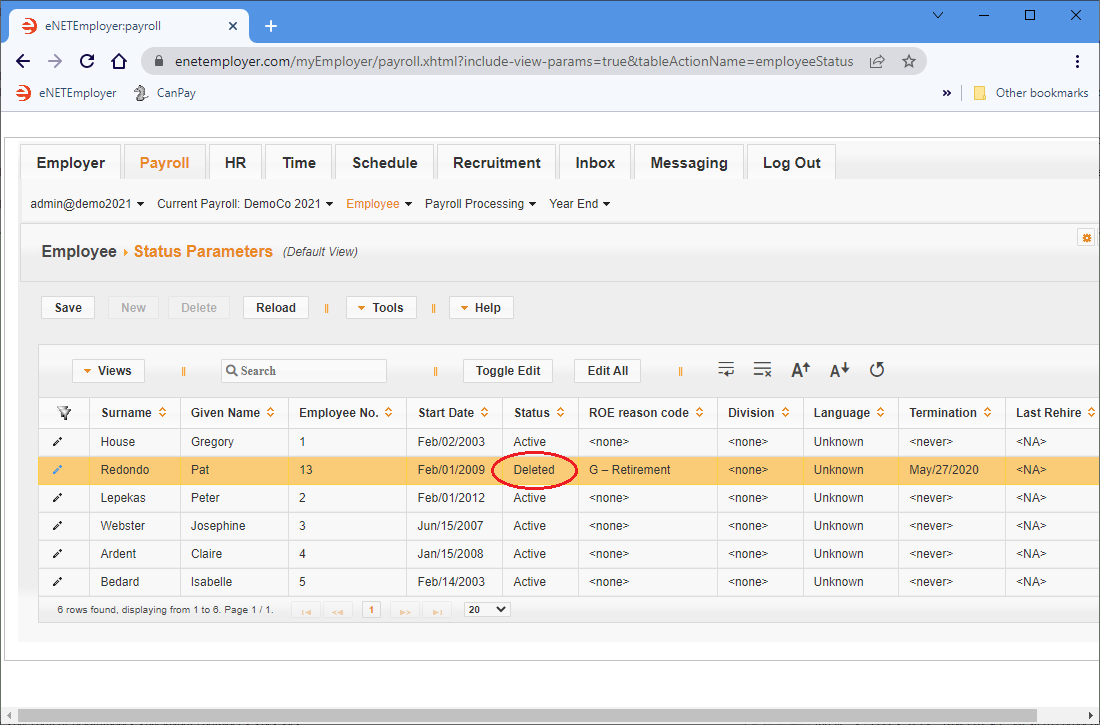
Now we can review the deleted employee's revised status. - Open the Employee - Status Parameters screen. You will see that the employee is now assigned the "Deleted" status.
To make her visible, we will use a special option located under the User menu.
Reminder: Even though you have deleted the employee from the current payroll, their data still resides in your Employee Database. If you wish to remove the employee from the Employee Database entirely, proceed to the next part of this tutorial.
To delete an employee from the Employee Database
This section discusses how to remove an employee permanently from your Employee Database.
Before you begin: This tutorial assumes that you have already deleted one or more employee templates using the instruction in the tutorial section above. |
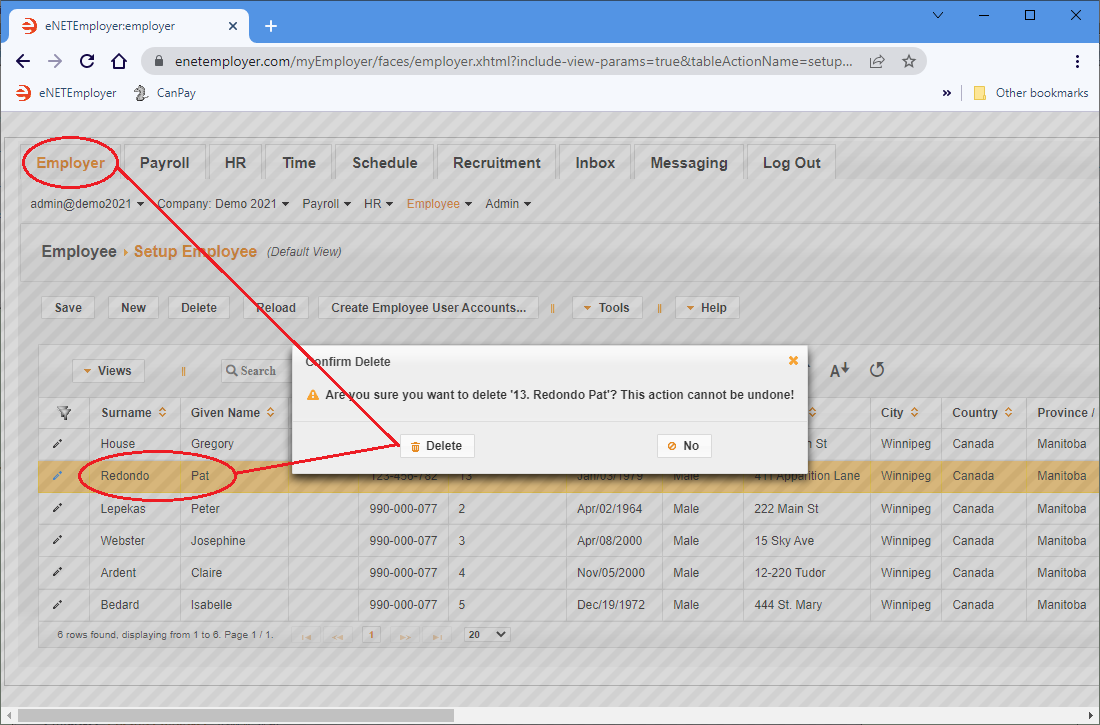
- Click the Employer tab at the top of the screen, and then open the Employee - Setup Employee screen. This screen displays all personnel in the Employee Database.
- Click on the employee row that is to be removed, and then click the Delete button above the table (you can also press the Delete key on your keyboard). This displays a pop-up message prompting you to confirm the removal.
- Click the Delete button from the pop-up message to confirm the removal of the employee. This action removes the employee permanently from the Employee Database. Note: If you receive a message stating "<employee name> cannot be deleted because this employee is still associated with a payroll", it means that the employee is still residing in one or more payrolls, and the employee must be deleted from that location(s) before you can proceed.
To delete an employee who is not part of any payroll
This section discusses how to remove an employee who is not part of any payroll. This can happen when you add/onboard an employee in the HR or Employer tabs, and then later decide that they will not be added to a payroll. This can also happen when you add an employee as a duplicate, or by mistake.
- Click the Employer tab at the top of the screen, and then open the Employee - Setup Employee screen. This screen displays all personnel in the Employee Database.
- Click on the employee row that is to be removed, and then click the Delete button above the table (you can also press the Delete key on your keyboard). This displays a pop-up message prompting you to confirm the removal.
- Click the Delete button from the pop-up message to confirm the removal of the employee. This action removes the employee permanently from the Employee Database.
Deleting Employees with No Names - When you add an employee, their default Surname and Given Name cells are assigned as LastName? and FirstName? If you leave these default names in place and then delete the employee (even after entering data in various cells), the employee will be removed from the system entirely without being added to the Employee Database. The only exception is if you enter an SIN for them (after which they will also need to be removed from the Employee Database when deleted from the payroll).
See Also:
- Setup Employee help page (Payroll tab)
- Adding Employees Using an Employee Template
- Adding Employees Manually
- Deleting an Employee
- Creating an ROE
Other Employee Settings:
- Employee address settings
- Employee's status settings (terminations, leaves, etc.)
- Employee payment settings
- Employee tax settings
- Employee bank accounts
- Employee earnings
- Employee deduction and benefit Items
- Employee accumulator items
- Working with an employee's YTD earnings
- Working with an employee's YTD deductions and benefits
- Working with an employee's YTD accumulators
- Importing employees from another payroll
